Circular Jabara Pg. 47 Pattern Magic 2
Draft & Muslin Circular Accordion (Jabara):
The Challenge: Create the assigned pattern in half scale. Sew a 1st sample.
This pattern was created in ½ scale.
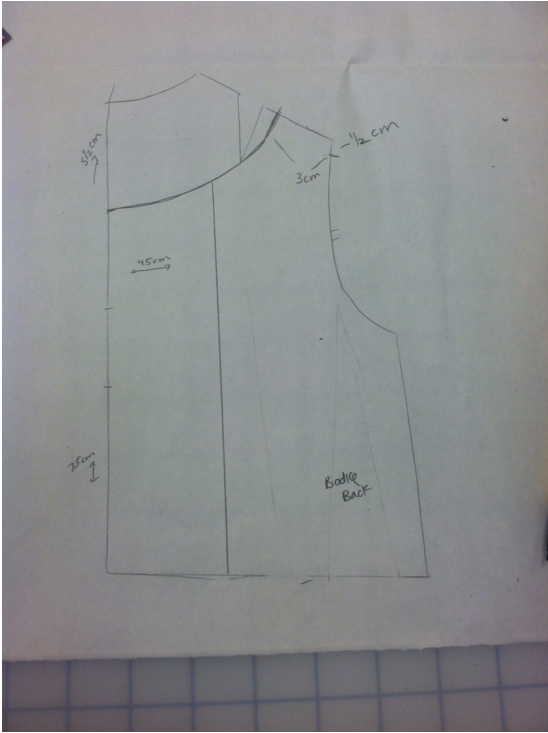
To create the circular jabara pattern, the first step is to trace the bodice back on fold on pattern paper, without transferring any of the darts. We will be transferring the entire dart intake to the center back where the jabara will fit.
To start make a mark:
1. 5.5 cm down from center front
2. 3cm over from arm hole
3. Connect the two; this is your new neckline, removing the shoulder dart completely.
4. ½ cm down from shoulder at arm hole, connect to new neckline point. This is your new shoulder seam
5. Make a mark 7.5 cm up from center back bodice waist
6. Draw a line parallel and 4.5cm away from center back, this will be your slash line
The Challenge: Create the assigned pattern in half scale. Sew a 1st sample.
This pattern was created in ½ scale.
To create the circular jabara pattern, the first step is to trace the bodice back on fold on pattern paper, without transferring any of the darts. We will be transferring the entire dart intake to the center back where the jabara will fit.
To start make a mark:
1. 5.5 cm down from center front
2. 3cm over from arm hole
3. Connect the two; this is your new neckline, removing the shoulder dart completely.
4. ½ cm down from shoulder at arm hole, connect to new neckline point. This is your new shoulder seam
5. Make a mark 7.5 cm up from center back bodice waist
6. Draw a line parallel and 4.5cm away from center back, this will be your slash line
To slash and spread:
1. Slash the parallel line 4.5cm away from center back, open roughly 2 inches.
1. Slash the parallel line 4.5cm away from center back, open roughly 2 inches.
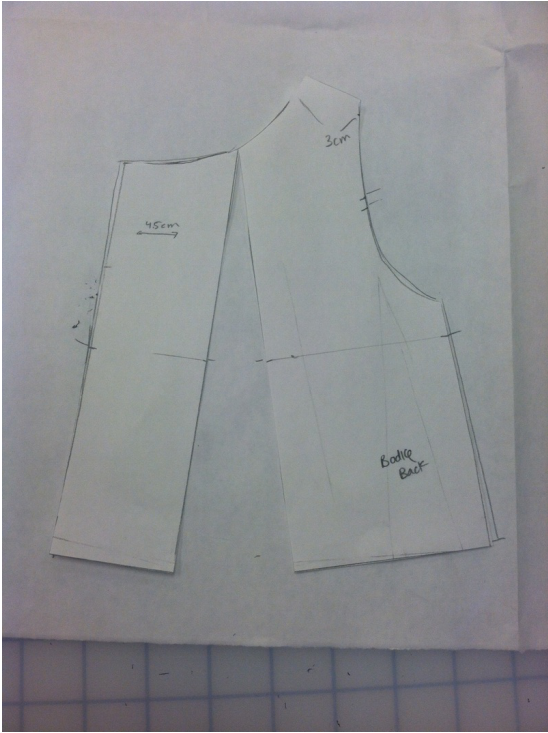
1. Next, make a mark 9 cm up from center back waist and side seam, draw a line.
2. The left leg of the line you just slashed now becomes the center of your dart.
3. Draw a 9cm long dart that touches the 9cm line and is 4cm wide, 2cm on each side of the slashed line.
2. The left leg of the line you just slashed now becomes the center of your dart.
3. Draw a 9cm long dart that touches the 9cm line and is 4cm wide, 2cm on each side of the slashed line.
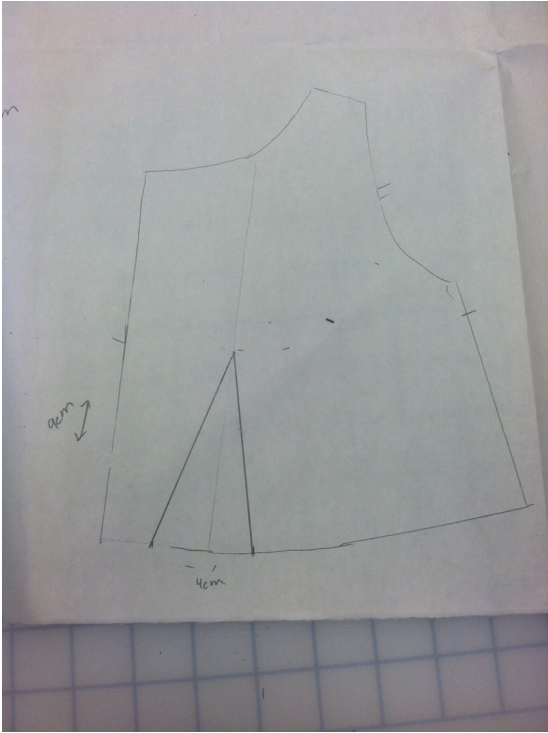
Transferring the new dart:
Now we need to transfer the new dart that we just created to the side seam.
1. Slash open the 9cm line from the side seam all the way to the dart tip
2. Close the waist dart and move excess to the side seam
3. Extend the waist hem 1cm at the side seam
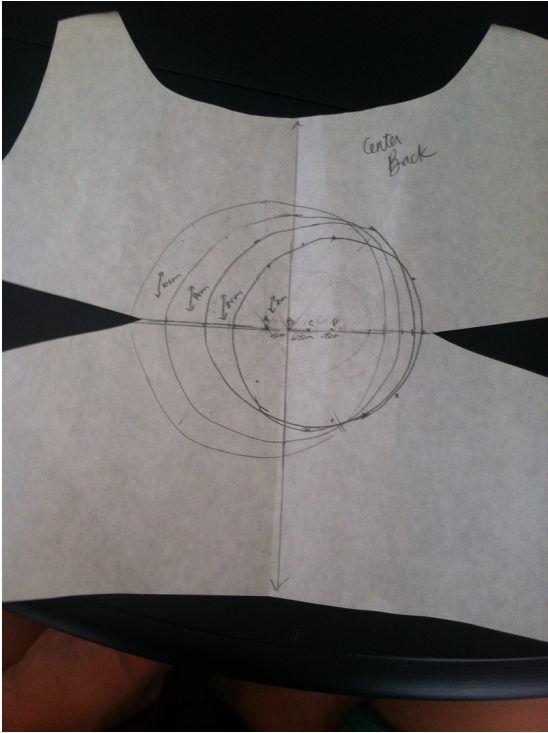
Creating the circle templates:
Now we need to create the space where the circle jabara will fit into. Make sure there is a center back line drawn. Connect the dart tips from both side seams.
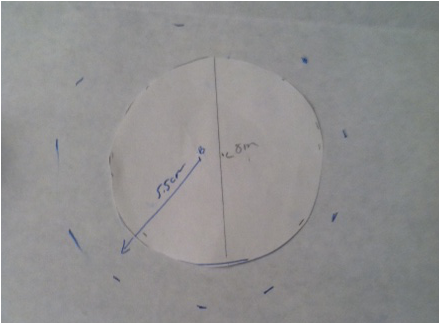
1. Make a mark ½ cm to the left of center back on the line connecting the dart tips, label this A
2. With A as the center, draw a 10cm diameter circle
3. Make a mark B directly on Center back where the line connecting the dart tips runs through the center back line.
4. With B as the center, draw a 9cm circle
5. Make a mark 5/8cm to the right of B, label this C.
6. With C as the center, draw a 8cm diameter circle
7. Make a mark ¾ cm away from C, label D
8. With D as the center, draw a 7cm diameter circle.
These now will serve as the circle templates for creating the accordion effect
Now we need to transfer the new dart that we just created to the side seam.
1. Slash open the 9cm line from the side seam all the way to the dart tip
2. Close the waist dart and move excess to the side seam
3. Extend the waist hem 1cm at the side seam
Creating the circle templates:
Now we need to create the space where the circle jabara will fit into. Make sure there is a center back line drawn. Connect the dart tips from both side seams.
1. Make a mark ½ cm to the left of center back on the line connecting the dart tips, label this A
2. With A as the center, draw a 10cm diameter circle
3. Make a mark B directly on Center back where the line connecting the dart tips runs through the center back line.
4. With B as the center, draw a 9cm circle
5. Make a mark 5/8cm to the right of B, label this C.
6. With C as the center, draw a 8cm diameter circle
7. Make a mark ¾ cm away from C, label D
8. With D as the center, draw a 7cm diameter circle.
These now will serve as the circle templates for creating the accordion effect
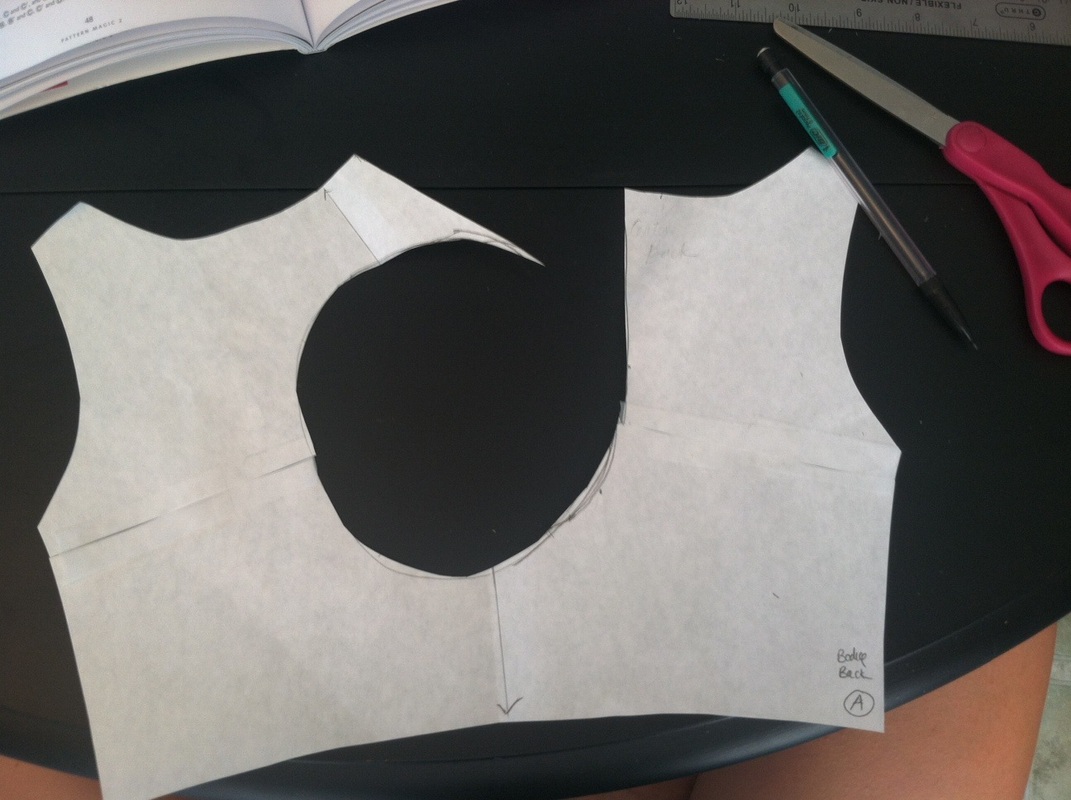
To remove the circle, make a mark 1.5cm away from the center back line at the neckline. Connect this mark to the edge of the circles at the right dart tip. Slash the line and cut around all of the circles. Label the bodice back piece as A. Your pattern should now look like this:
Creating the Jabara Pieces
A:
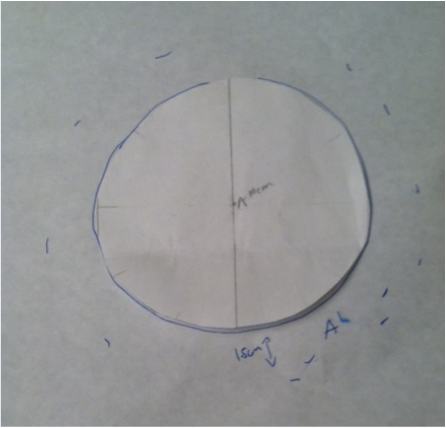
Starting with circle A, trace the circle to pattern paper, extend 1.5cm from all edges of the circle. Cut away the inner circle, leaving just the 1.5cm border, label this A1. This will be the underside to A (which in this case is the bodice back)
A:
Starting with circle A, trace the circle to pattern paper, extend 1.5cm from all edges of the circle. Cut away the inner circle, leaving just the 1.5cm border, label this A1. This will be the underside to A (which in this case is the bodice back)
B:
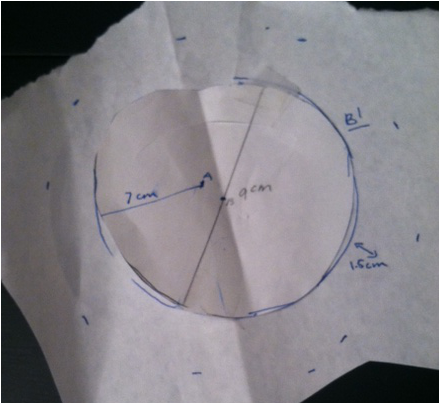
To create jabara B first trace circle B with the 9cm radius. From here you need to mark A in its original spot, which is 1/5 cm to the left of B. Using A as the center, draw a 7cm radius circle around B. The left side will be wider than the right. Cut away the inner circle B leaving only the outer edge, Label this B, this now replaces your B circle.
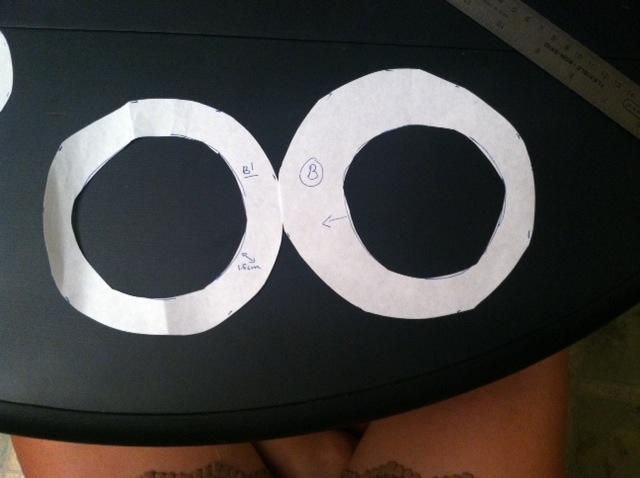
To create B1, trace the original circle B and add 1.5 cm border along the edge. Cut away the inner circle leaving only the 1.5 cm border, label this B1.
To create jabara B first trace circle B with the 9cm radius. From here you need to mark A in its original spot, which is 1/5 cm to the left of B. Using A as the center, draw a 7cm radius circle around B. The left side will be wider than the right. Cut away the inner circle B leaving only the outer edge, Label this B, this now replaces your B circle.
To create B1, trace the original circle B and add 1.5 cm border along the edge. Cut away the inner circle leaving only the 1.5 cm border, label this B1.
| 
|
C&D:
C and D are both created just like B. With C as the center, make the mark B, 5/8 cm to the left of C. Use this mark at the center mark when creating the new C outer edge with the left side being wider than the right. Draw a 5.5 cm radius circle around C. This border becomes your new C. For D, make a mark ¾ cm to the left of D and label C, this is the new mark used to create the outer border. Draw a 5 cm radius circle around circle D from mark C. This outer edge becomes your new D. To create C1 and D1, trace the original circles and extend 1.5cm, these new 1.5 cm wide borders become new C1 and D1.
C and D are both created just like B. With C as the center, make the mark B, 5/8 cm to the left of C. Use this mark at the center mark when creating the new C outer edge with the left side being wider than the right. Draw a 5.5 cm radius circle around C. This border becomes your new C. For D, make a mark ¾ cm to the left of D and label C, this is the new mark used to create the outer border. Draw a 5 cm radius circle around circle D from mark C. This outer edge becomes your new D. To create C1 and D1, trace the original circles and extend 1.5cm, these new 1.5 cm wide borders become new C1 and D1.
| 
|
E:
Draw a circle with the diameter equal to the outer edge of D, label this E.
*Note: It is very important to have things properly labeled, or else sewing the pieces together will cause mass confusion.
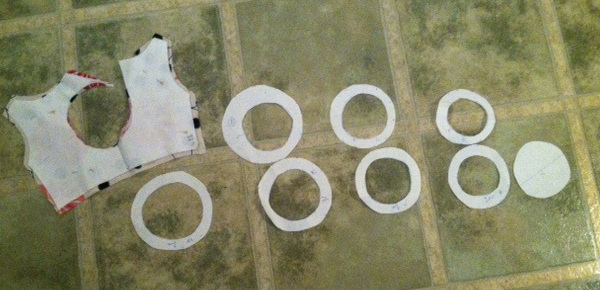
All of the pattern pieces:
Cut 1 of everything.
Draw a circle with the diameter equal to the outer edge of D, label this E.
*Note: It is very important to have things properly labeled, or else sewing the pieces together will cause mass confusion.
All of the pattern pieces:
Cut 1 of everything.
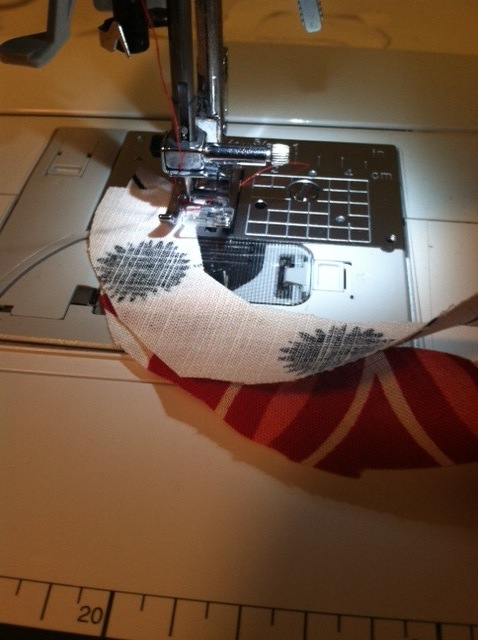
To sew:
Sewing the garment sounds trickier than it actually is. First, sew the circle A1 to A (the bodice back). Then follow these guidelines:
Sew the inner circles of:
1. B to B1
2. C to C1
3. D to D1
Next sew the outer edges of the circles together start with sewing:
1. A1 to B
2. B1 to C
3. C1 to D
4. D1 to E
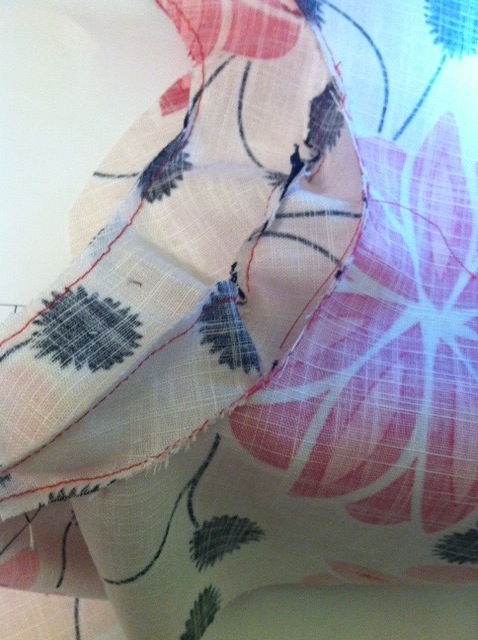
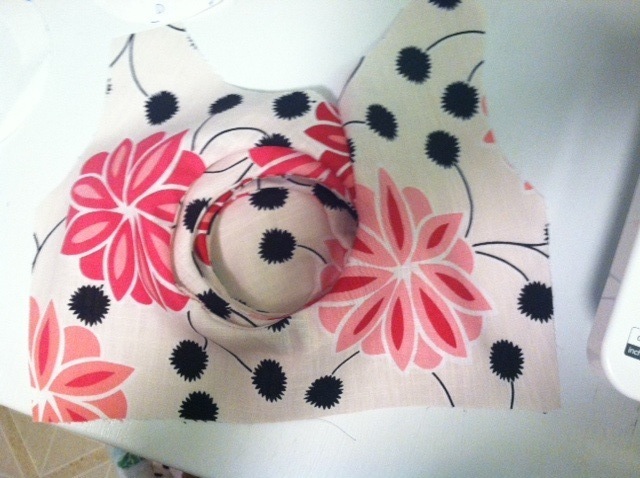
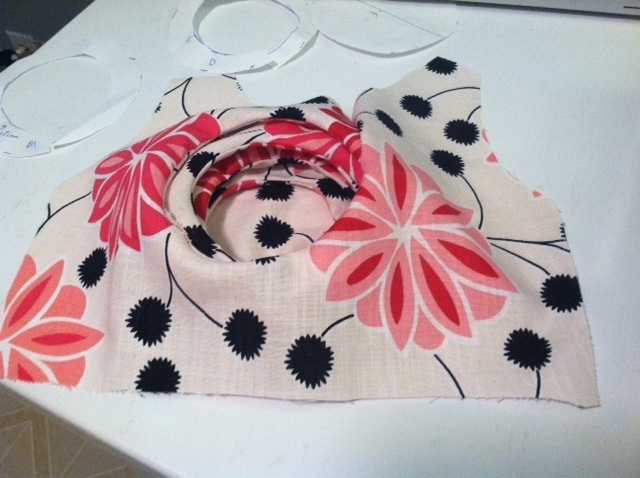
This should connect all the jabaras and look something like this Insert pic
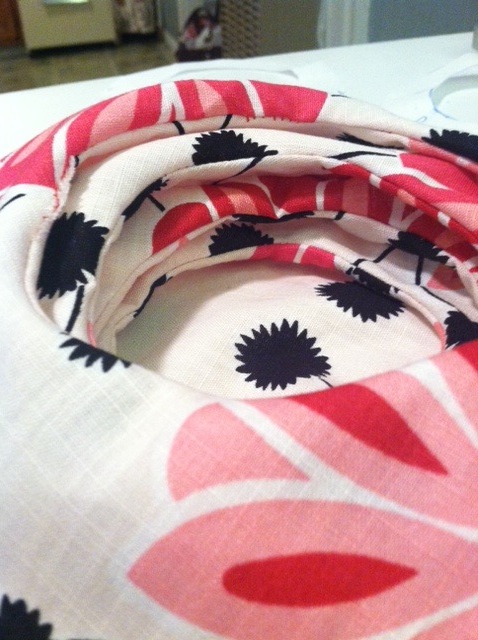
Sew the seam of the circles together and continue all the way up to the neckline, You now have a circle accordion (jabara) The jabara takes some playing with to get it to lie how you would like it to.
Sewing the garment sounds trickier than it actually is. First, sew the circle A1 to A (the bodice back). Then follow these guidelines:
Sew the inner circles of:
1. B to B1
2. C to C1
3. D to D1
Next sew the outer edges of the circles together start with sewing:
1. A1 to B
2. B1 to C
3. C1 to D
4. D1 to E
This should connect all the jabaras and look something like this Insert pic
Sew the seam of the circles together and continue all the way up to the neckline, You now have a circle accordion (jabara) The jabara takes some playing with to get it to lie how you would like it to.
Analysis:
Q1: What type of flat patternmaking is this: Dart manipulation? Added Fullness? Contouring? Something else? A combination?
A: Circular jabara is a combination of dart manipulation and added fullness
1. Added fullness is added by slashing and spreading
2. Dart manipulation is used by moving darts from the waist to the sideseam.
Q2: What are the basic principles of this pattern?
A:
1. All pattern pieces are cut 1 since it is asymmetrical
2. The circles must cross the bust point in order to effectively transfer fullness.
Q3: What are the basic rules of this pattern?
A:
1. The diameter of Circle A must equal the diameter of the opening on the bodice, sleeve, or wherever the circle is going to be placed
2. If darts are present all dart excess must be moved to the jabara opening
3. For every Circle i.e. A, B C, there needs to be an under-circle, i.e. A1, B1, C1
Q4: Are these rules and principles always true?
A: Yes, the 3 rules stated above must be followed in order to make the jabara successful
Q5: What rules of traditional patternmaking are broken in this pattern?
A: None, to my knowledge.
Application: The Challenge: Create your own half scale pattern by applying the rules and principles of this pattern in a different location of the garment. Sew a 1st sample.
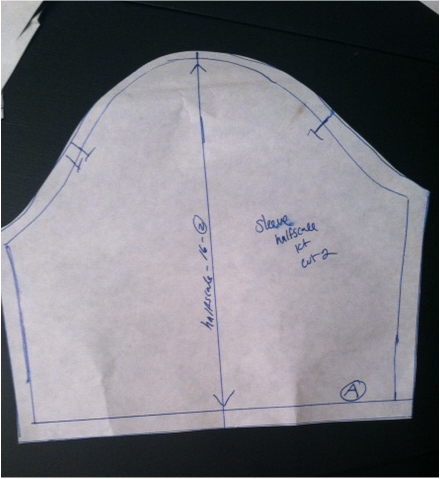
-I continued the Circular Jabara pattern onto the sleeve.
-I wanted to create the same effect on the outer edge of the sleeve creating the accordion affect in a different manner. I also chose the sleeve to use an already made circle without dart transfer, to see how that would work. The instructions are below describing the process more briefly than the original.
-My sleeve diameter was 7cm.
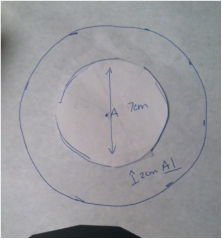
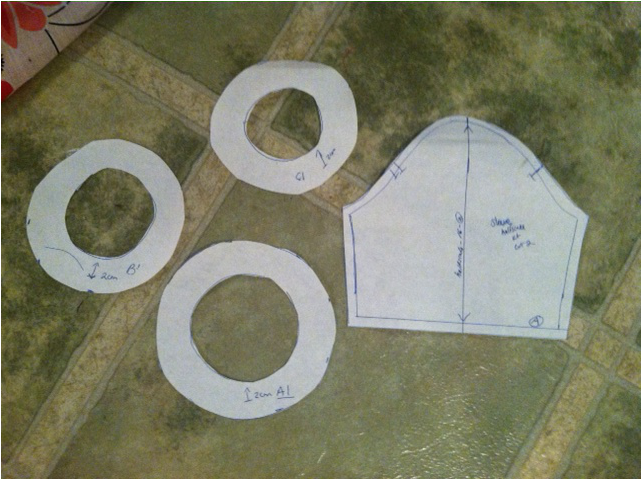
-I first created circle A with a 7cm diameter. I added a 2cm outer edge that will serve as the jabara, I labeled it as A1 cut 2. I wanted to see the effect of having the same shapes sewn together verses the previous pattern where the one piece was a different shape. I then created circle B with a 6cm diameter, again, extending the 2cm outer border edge and then circle C with a 5cm diameter and 2cm edge.
| 
|
These are now my pattern pieces
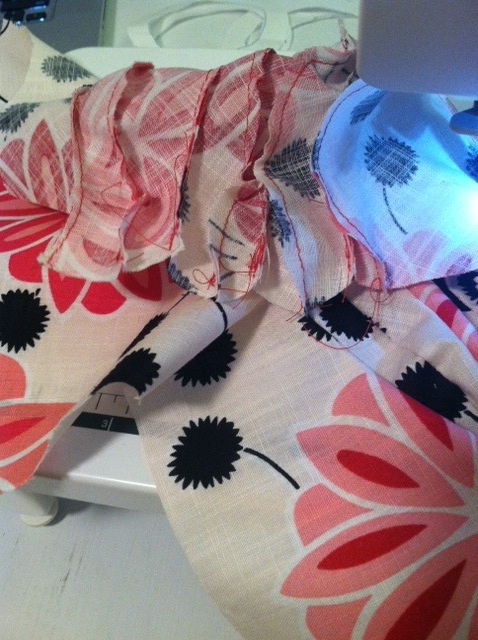
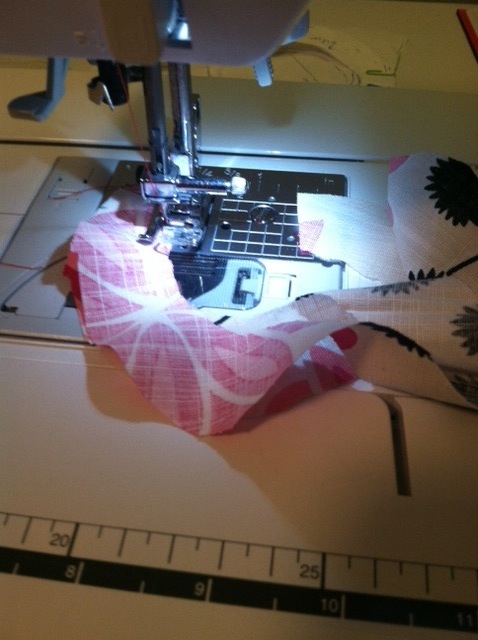
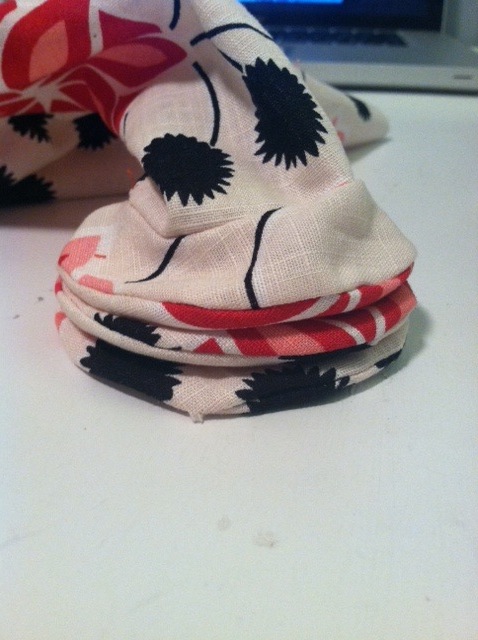
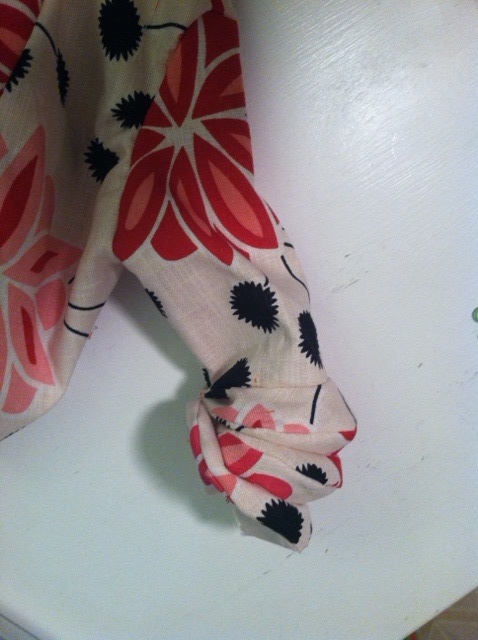
Just like previous, the sleeve was labeled A. I sewed A1 to A and both B circles together and both C circles together, sewing the inner circles first. Then sewing the outer circles I sewed B to A1 and C to B1. This created an accordion effect at the opening of the sleeve, which I found quite interesting and fun.

Evaluation:
Q1: Did you stay true to the basic principles of the original pattern?
A: Yes, all the same rules and principles applied. Except this time I used an already made circle (sleeve opening) instead of manipulating darts and making my own.
Q2: Where did you move the pattern manipulation and how well did that work?
A: I moved the pattern to the sleeve opening where I tried to create the circular accordion on the exterior instead of on the interior. This used the same pattern application in a different manner. I think it created an aesthetically appealing sleeve detail. This time I played with the sizes of the circles and made them all 2 cm wide and also made A and A1 a cut 2 pattern instead of 2 different pieces. I wanted to see what kind of effect that would make and how it would different from the center back jabara.
Q3: Do all the same rules still apply? Did the need for new rules appear when you made this change?
Yes, all the same rules still applied
I found no current or past designer incorporating this design! But the search still continues :) ....
 RSS Feed
