Draft & Muslin:
The Challenge: Create the assigned pattern in half scale. Sew a 1st sample.
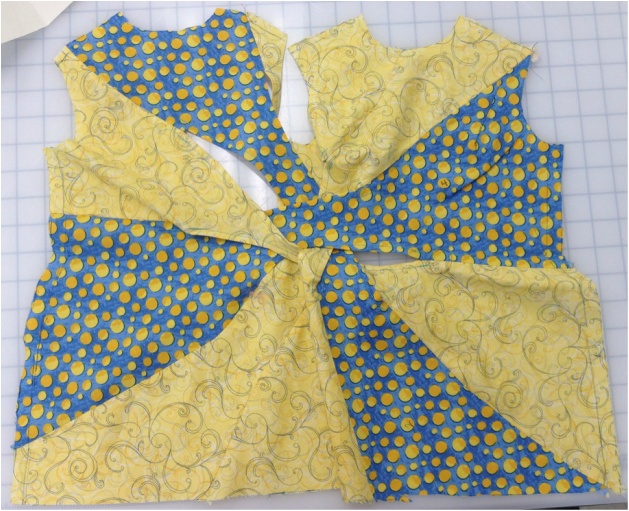
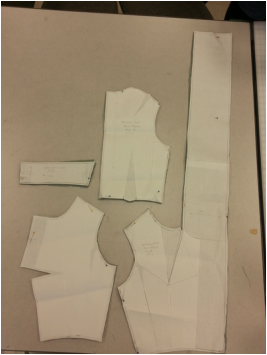
This pattern was completed in 1/2 scale.
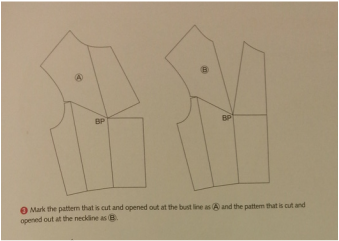
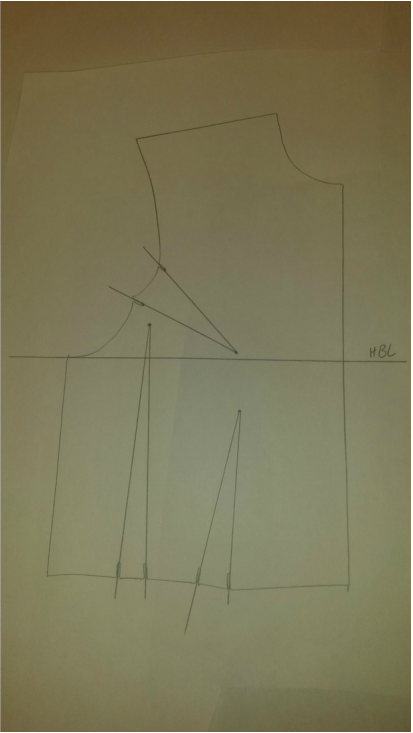
In order to create the design, a mandarin collar sloper needed to be drafted first to accommodate the expansion of the bodice.
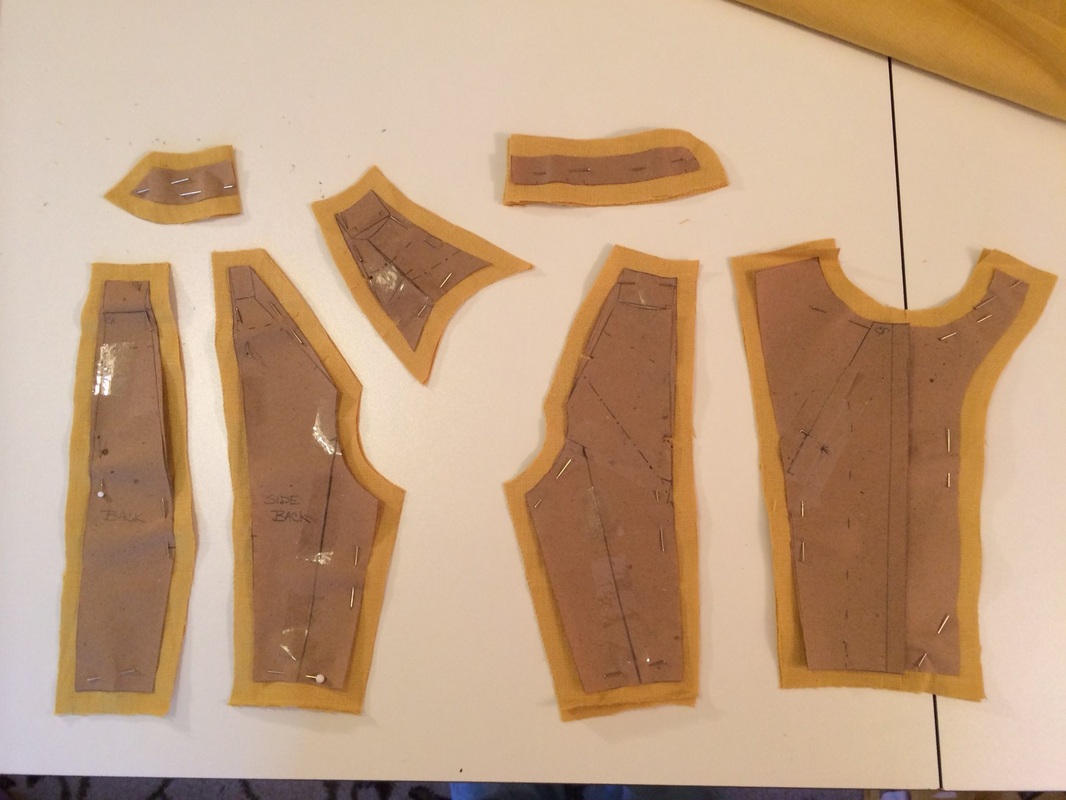
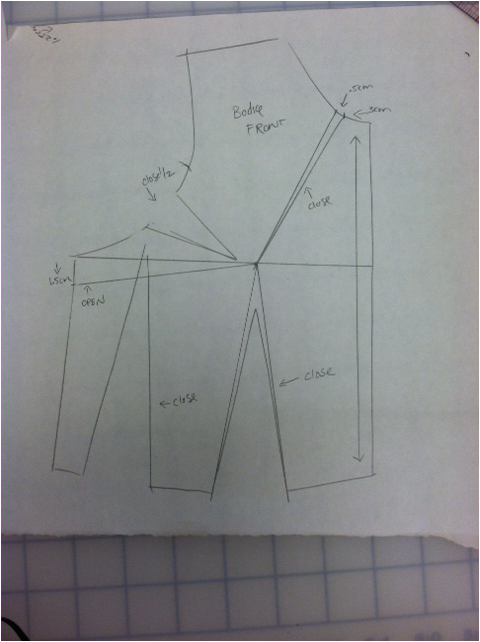
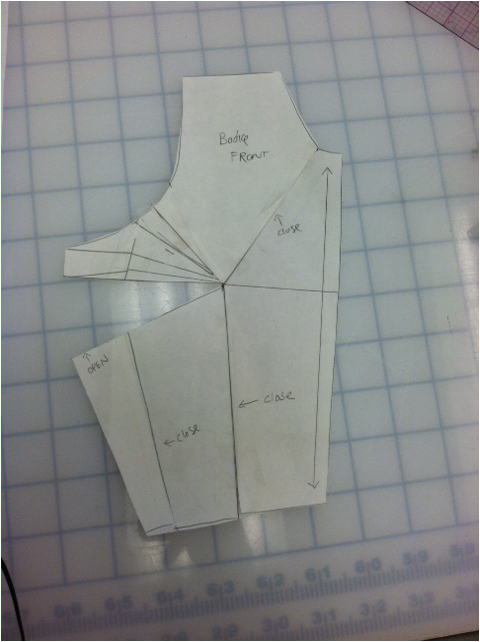
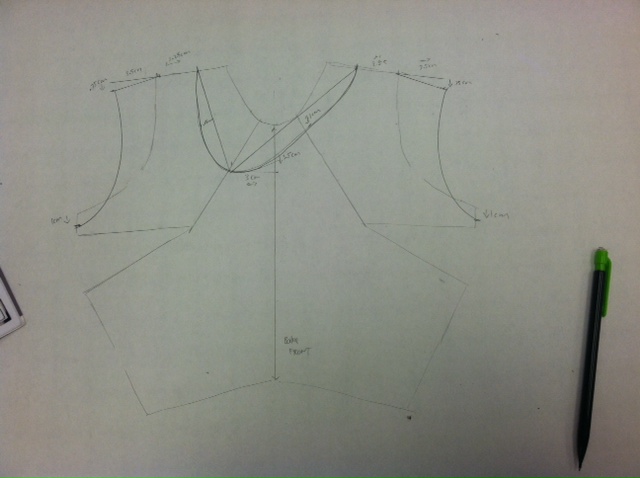
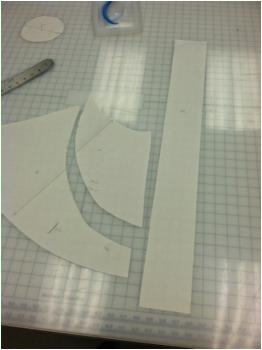
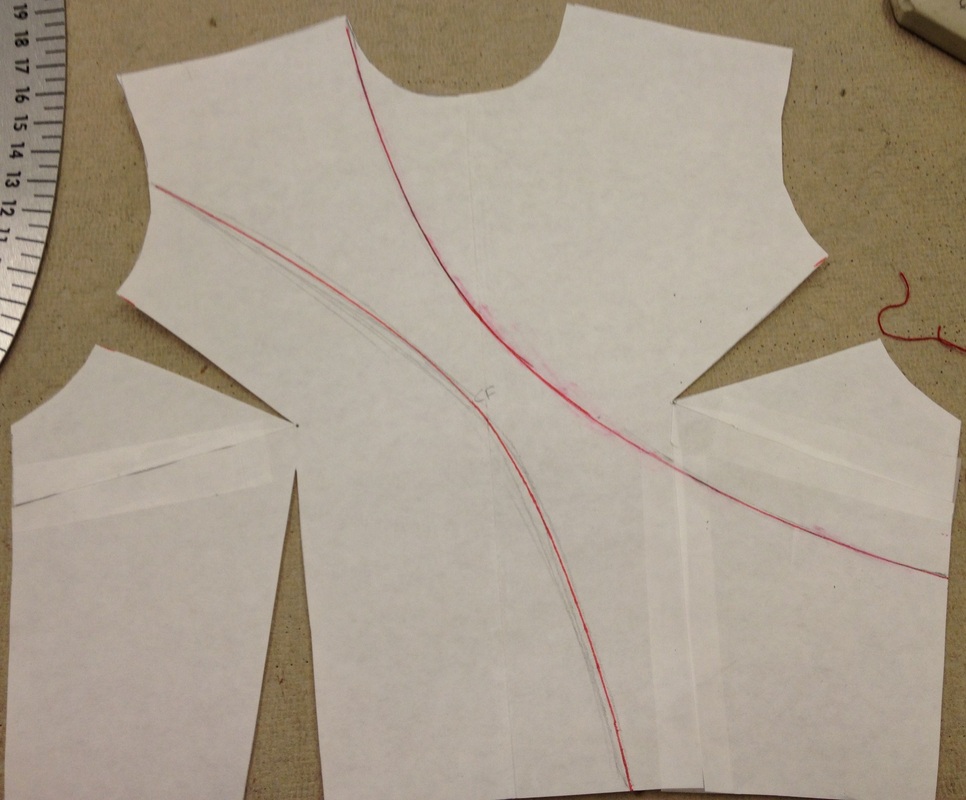
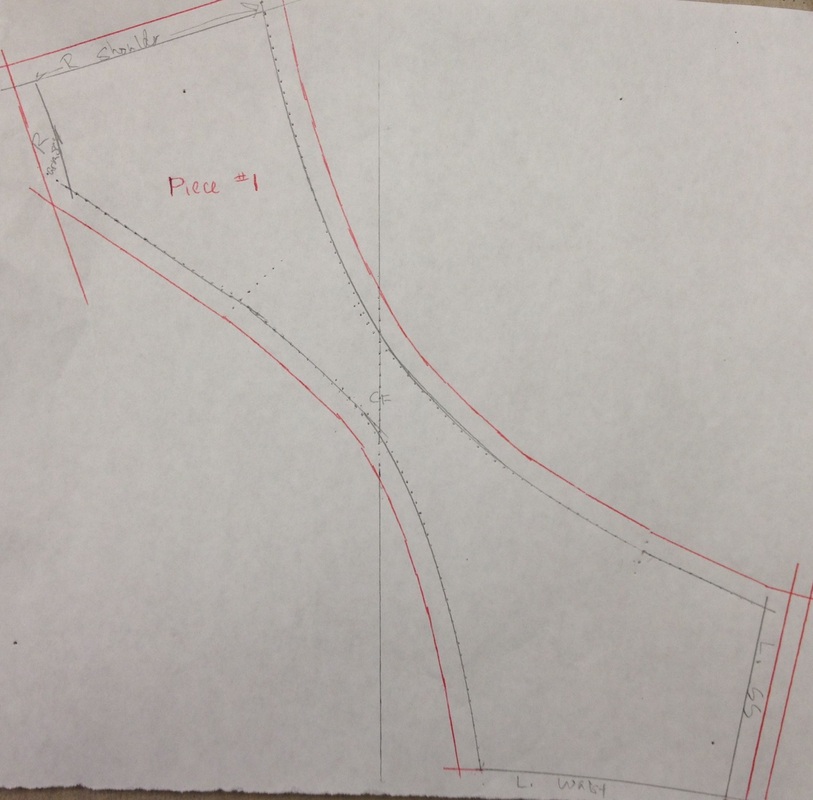
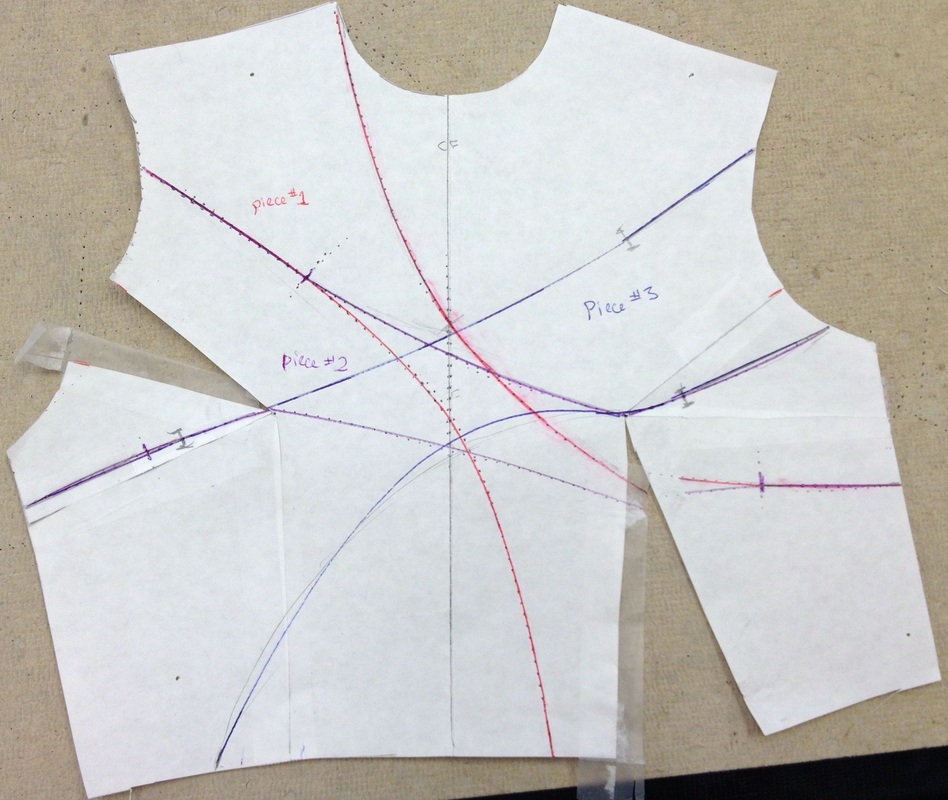
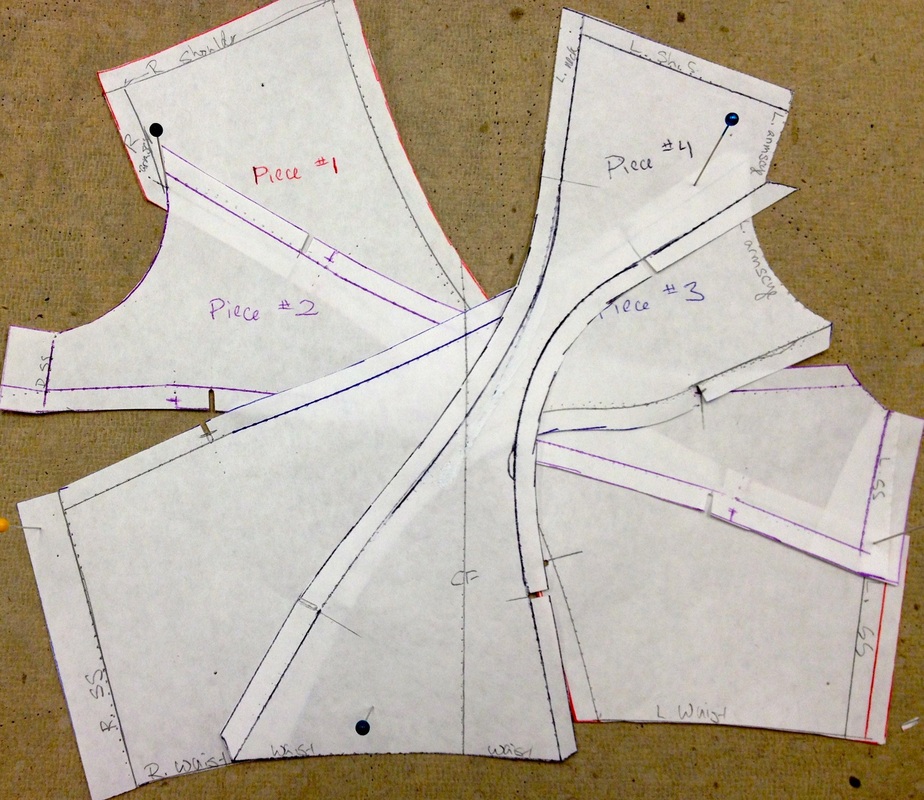
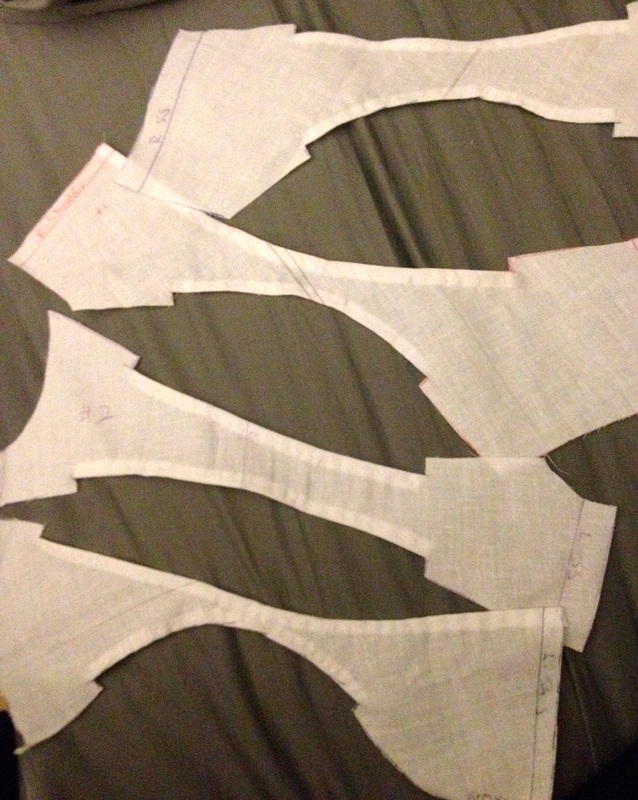
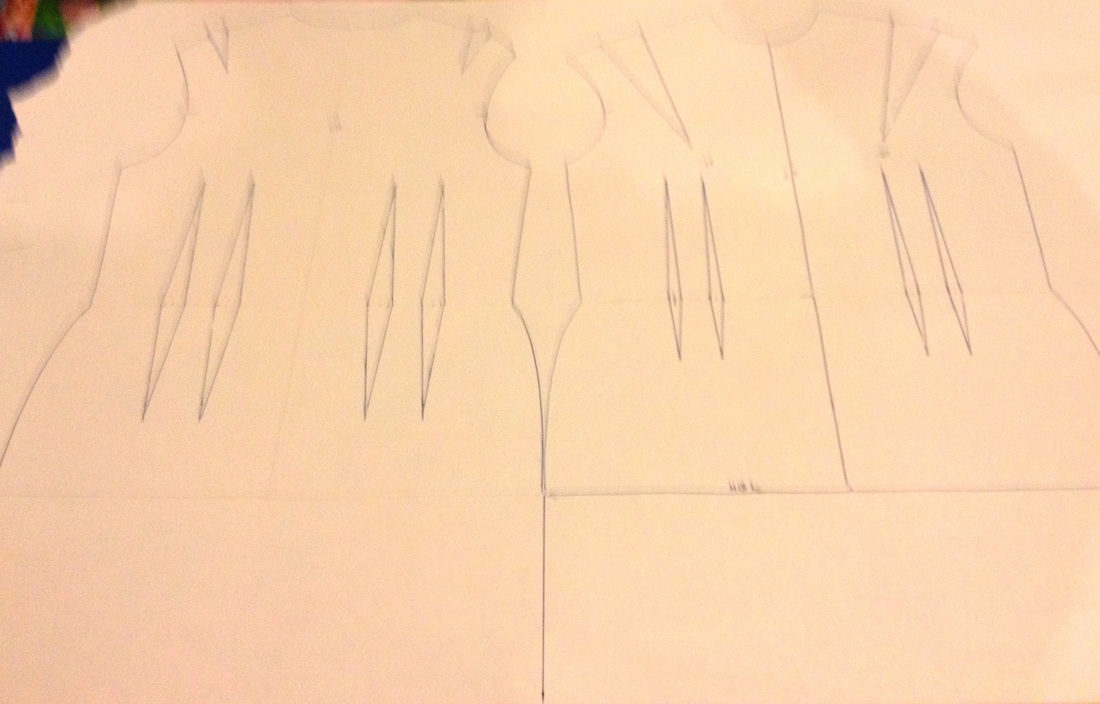
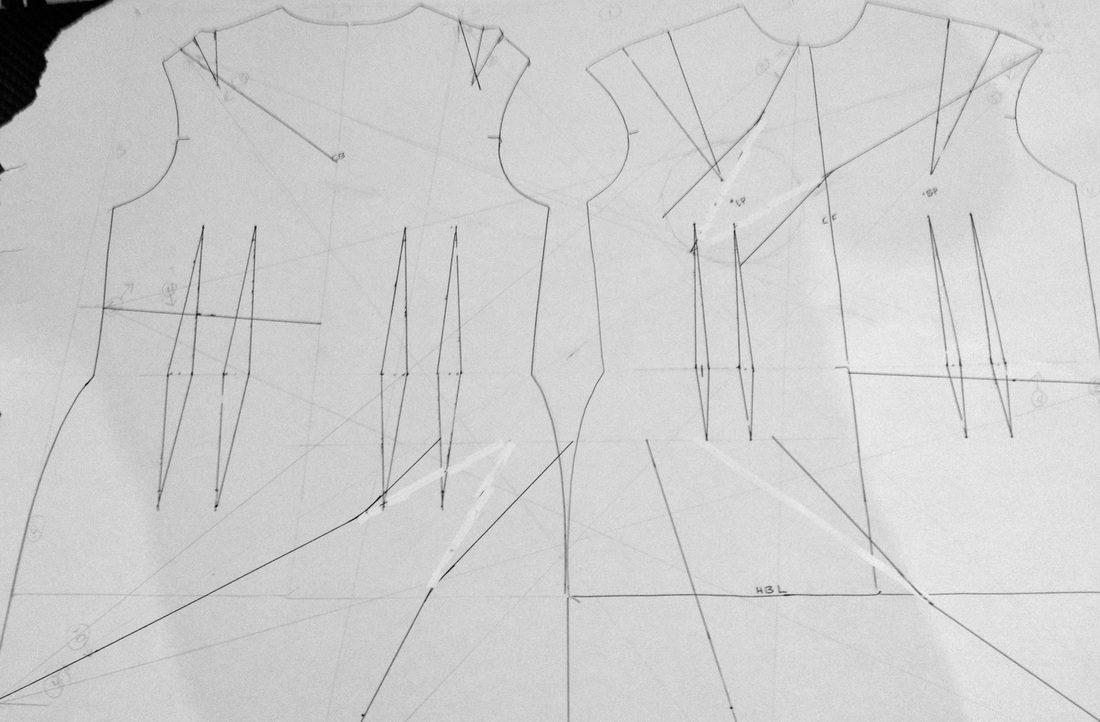
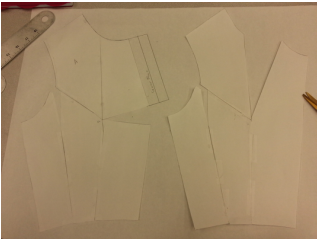
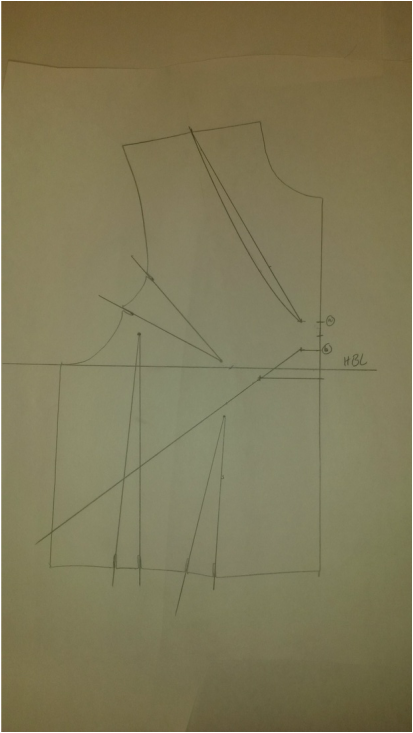
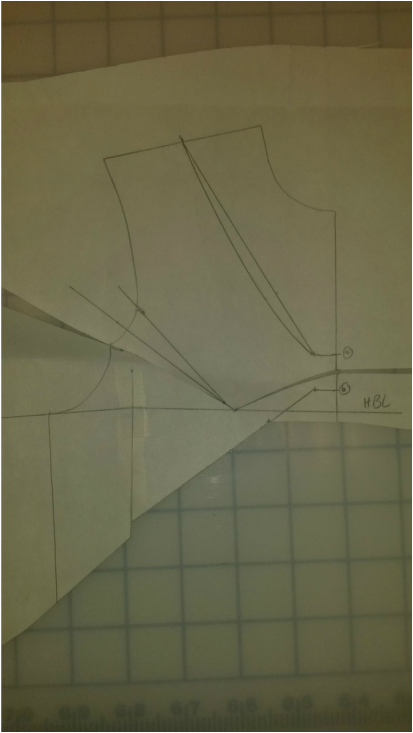
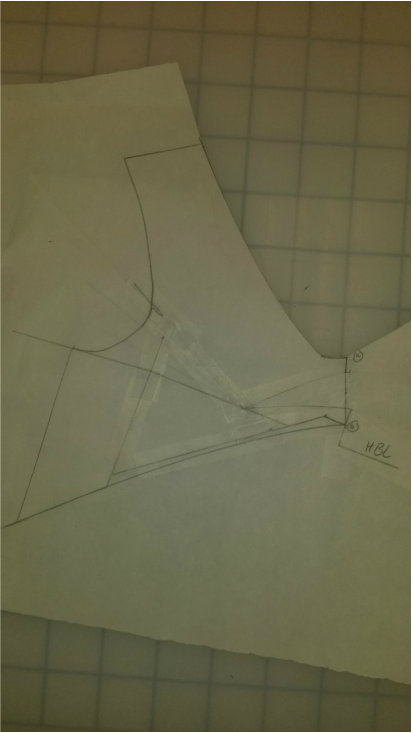
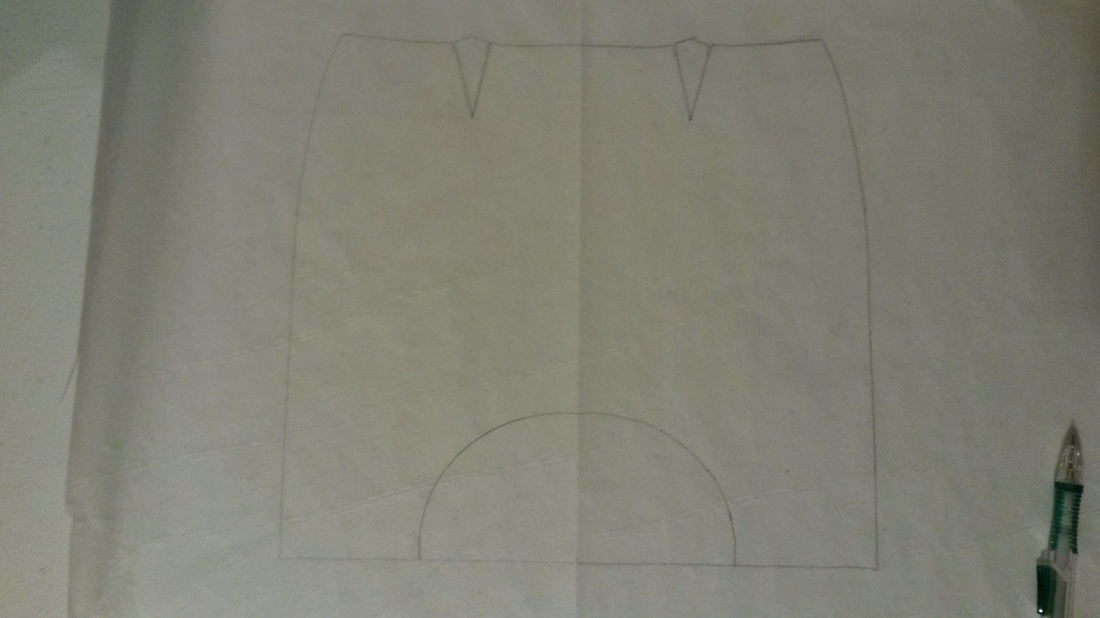
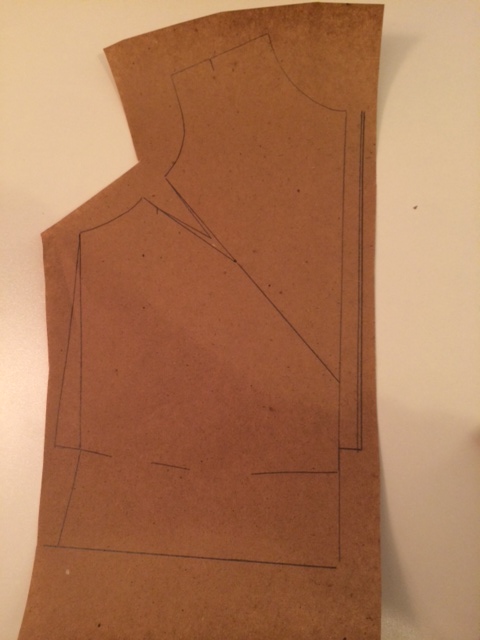
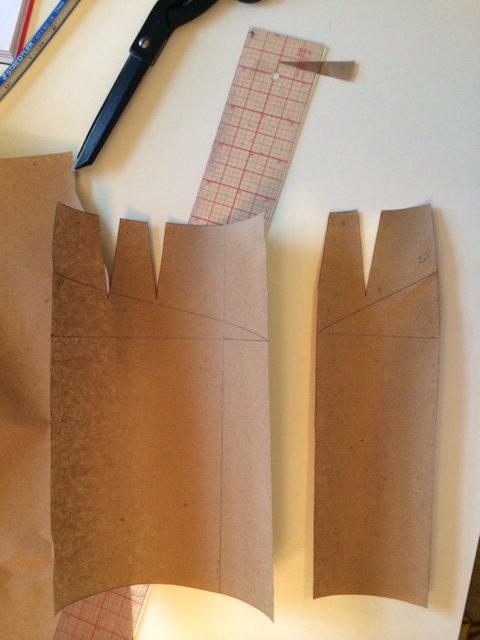
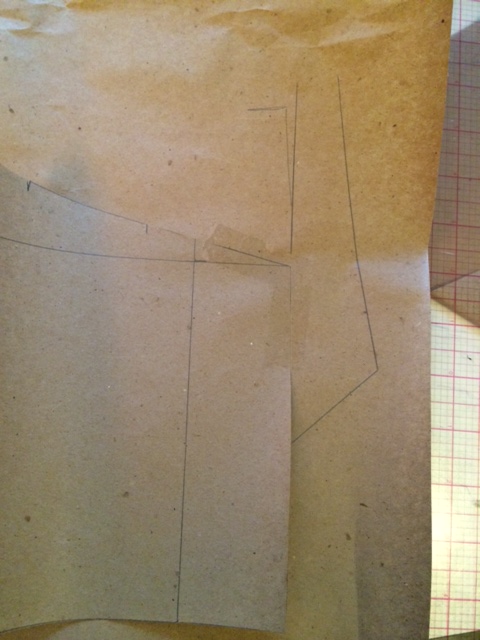
1) The first step in the book was to draw “well-balanced design lines on the sloper block” so I traced off a bodice front, bodice back, and collar. I drew in the front extension, collar height landmark to allow for proper design line on front princess seam, design lines, and facing guide lines. There were many lines on the pattern pieces that I will use to trace off, section, and assure overlap with the pieces need.
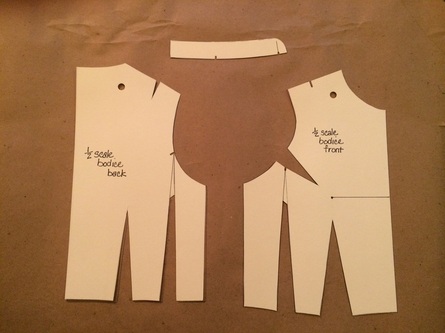
2) I traced off the facing pieces first leaving the bodice front and bodice back intact. (I did not cut apart the original traced pattern piece with all the deign lines on it).
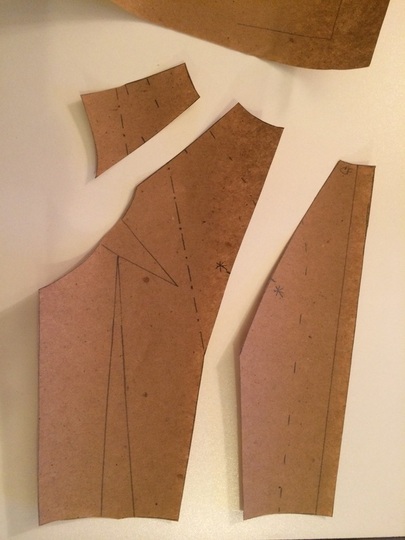
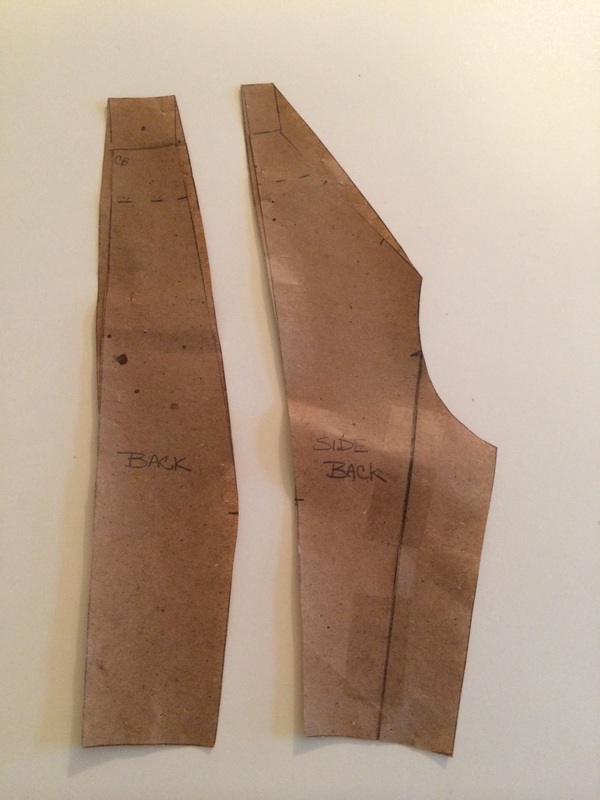
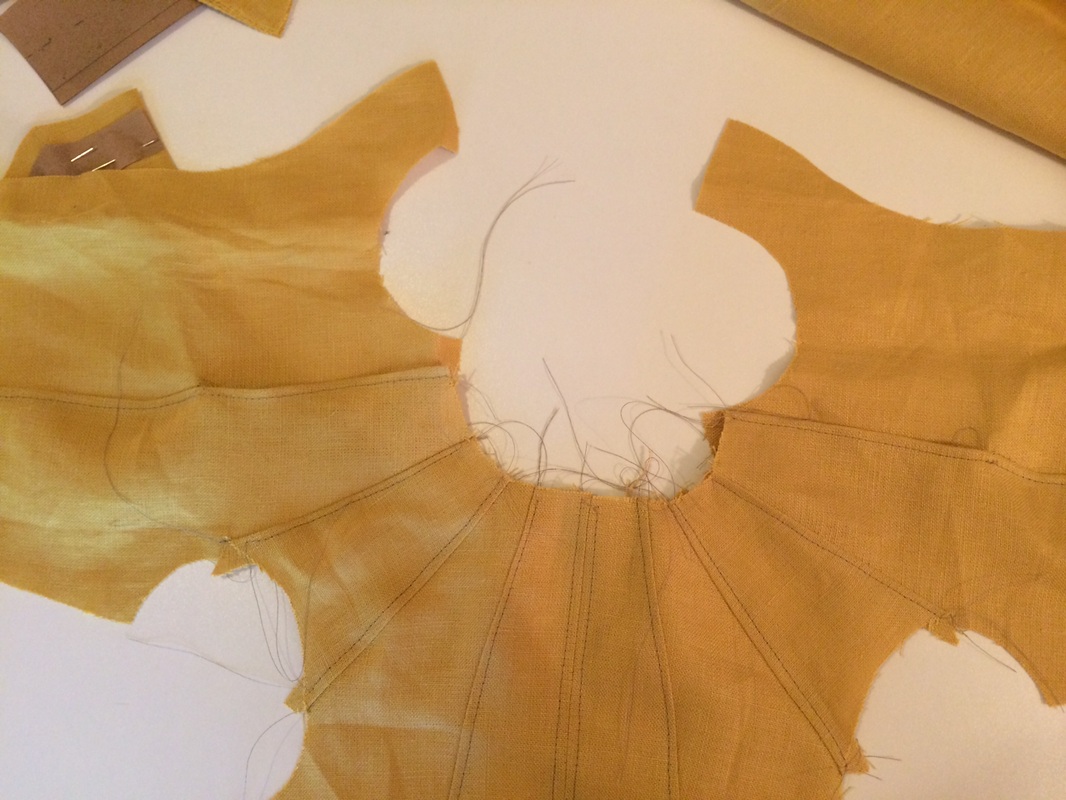
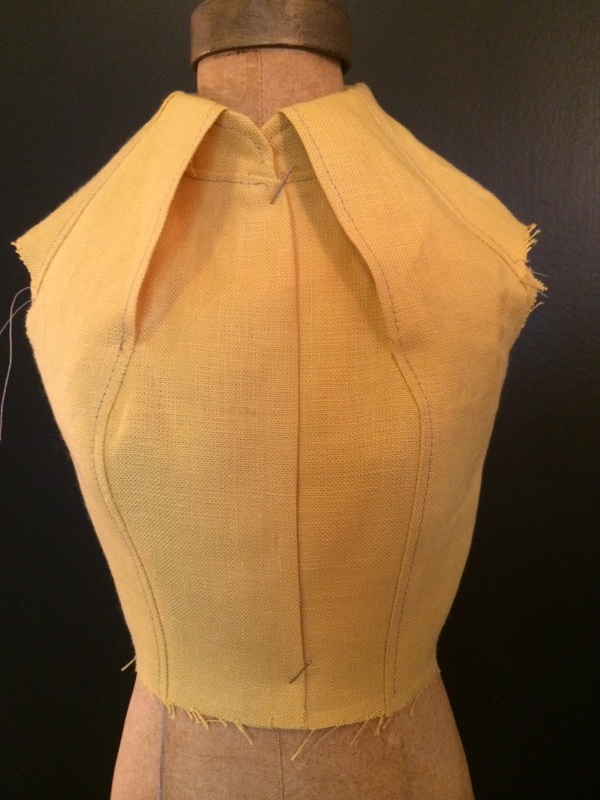
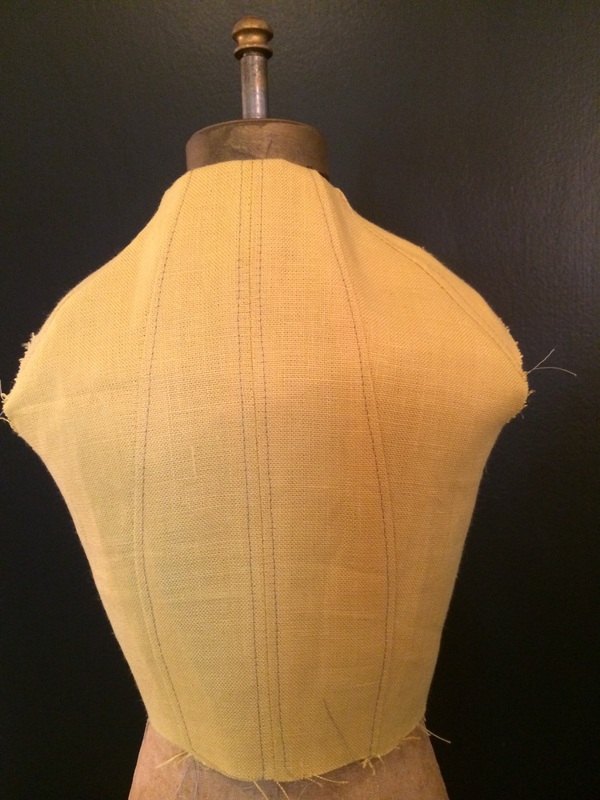
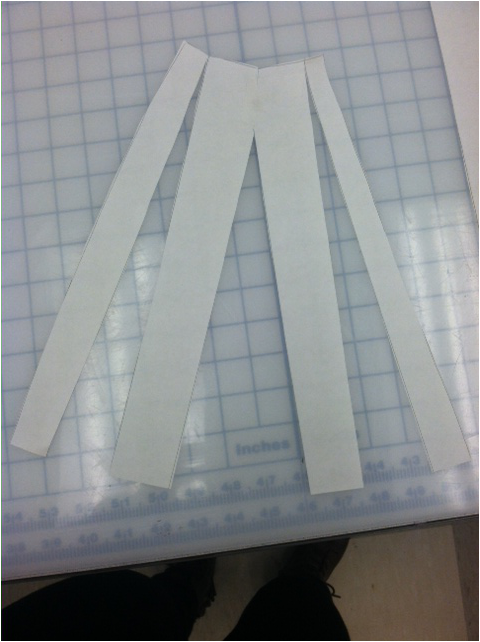
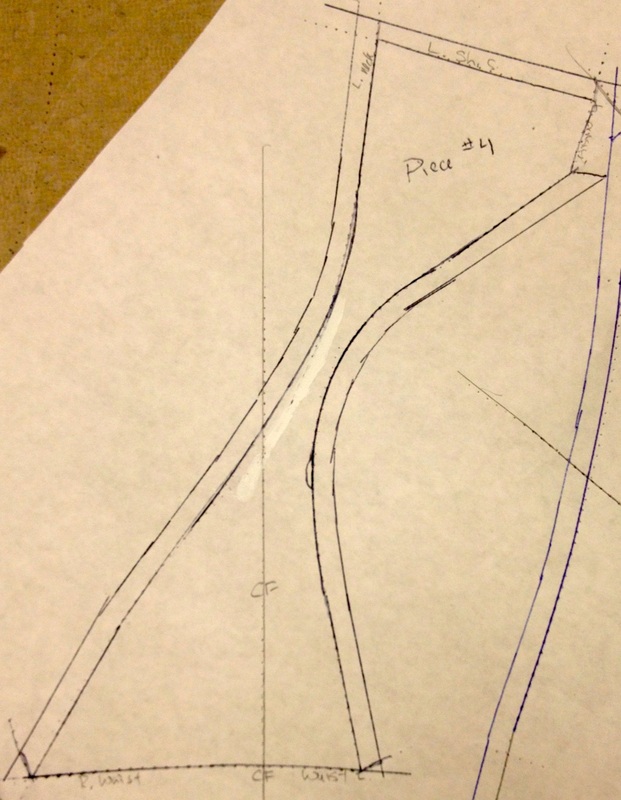
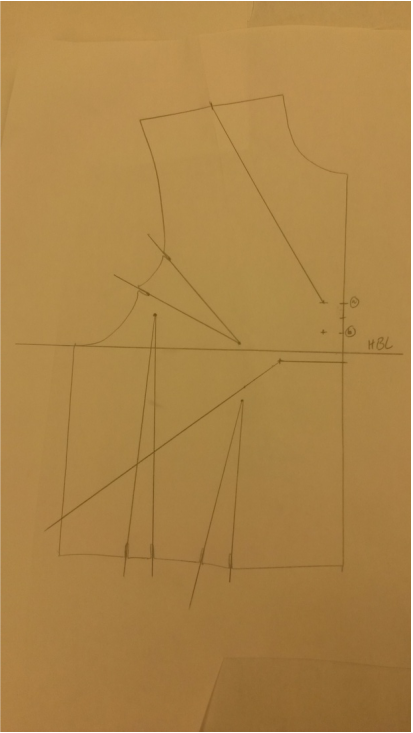
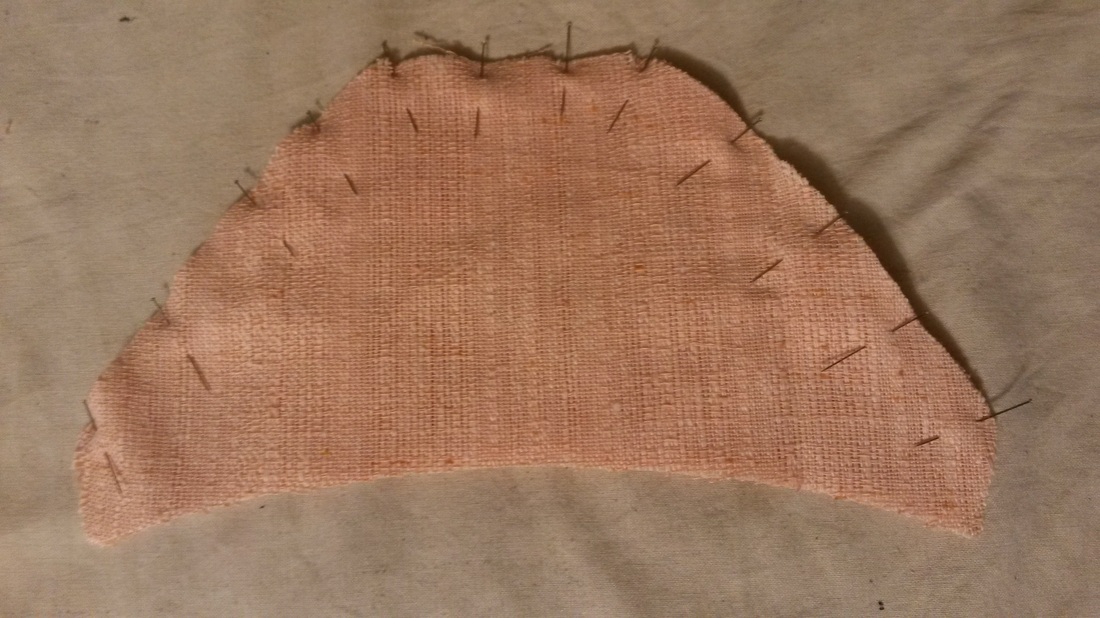
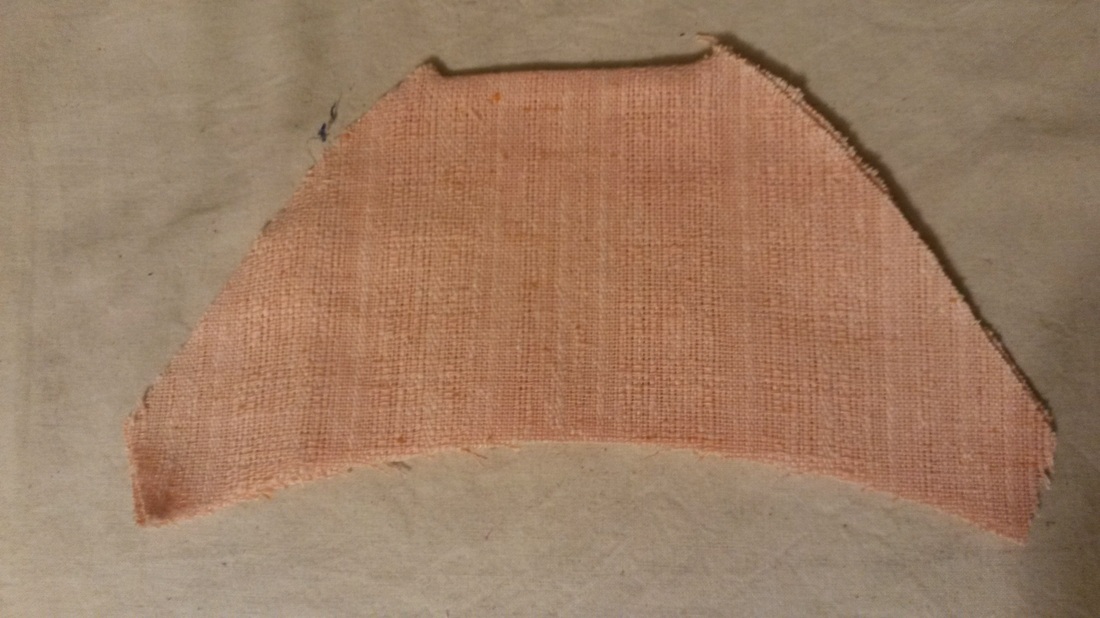
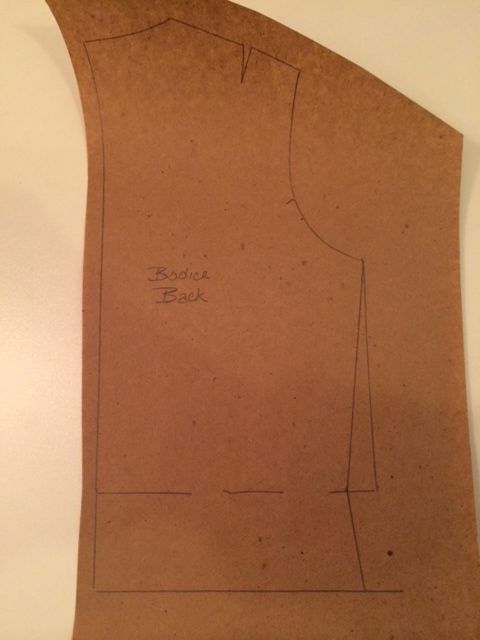
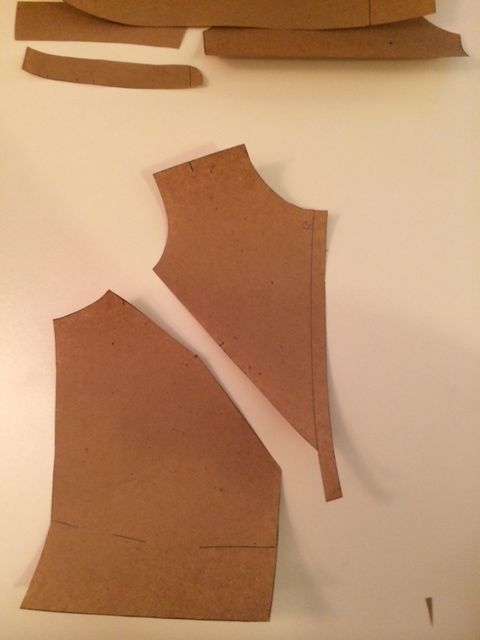
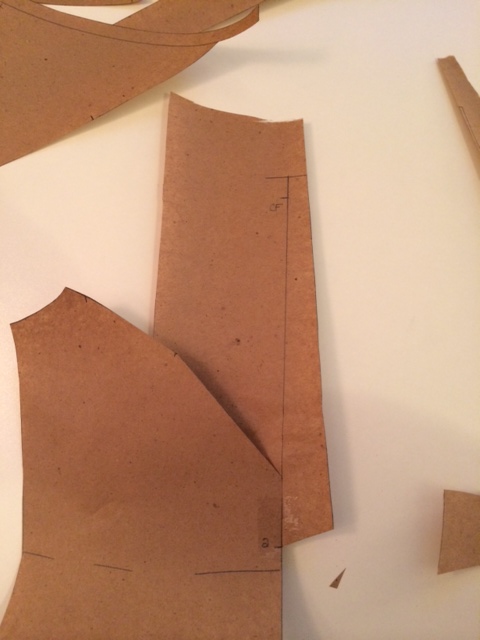
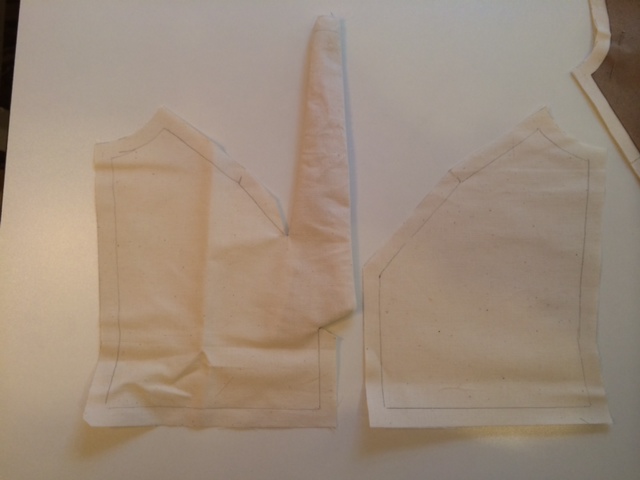
3) Because the back bodice did not have overlapping pieces I decided this was an easier place to begin the separation of pieces. I notched and labeled as necessary before I cut the back into 3 pieces. I then eliminated the waist dart (easy to do because I planned the design line to incorporate the dart legs), then slahed and closed out the side waist dart and shoulder dart.
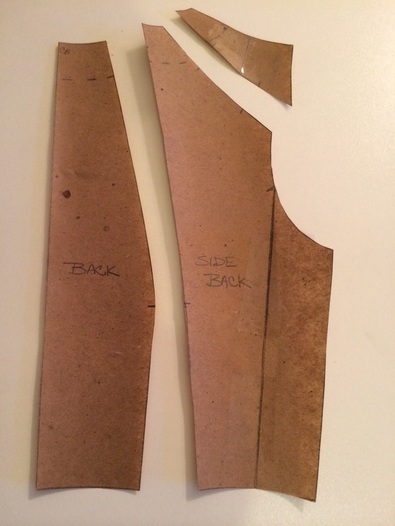
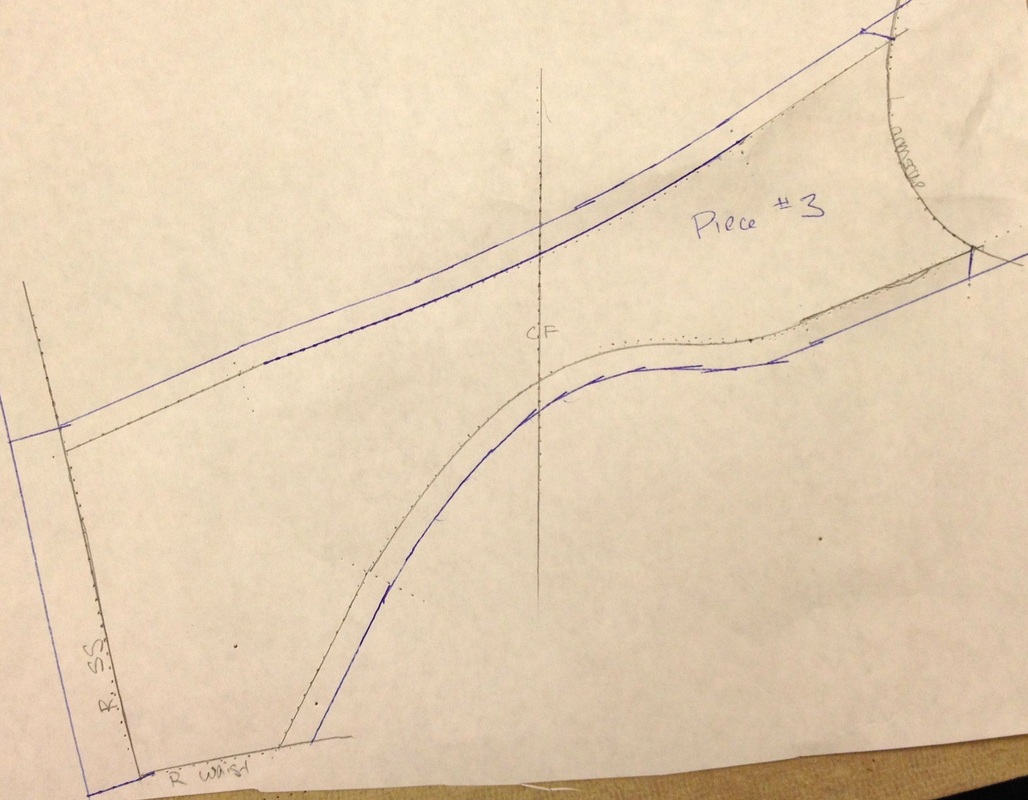
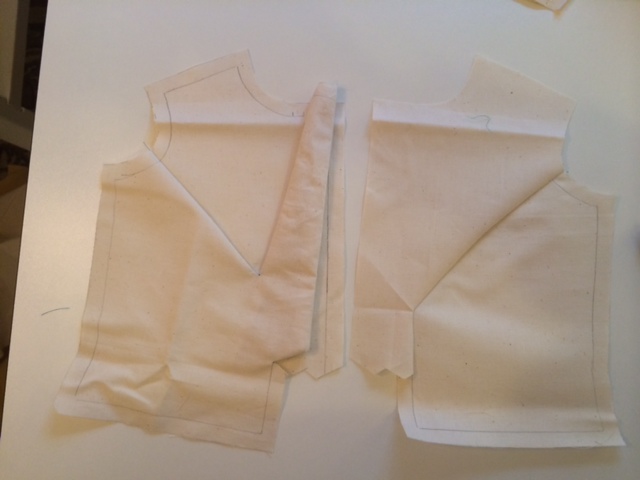
| 4) The bodice front was more complicated because of the overlapping pieces. (I could not simply cut apart the pieces) To ensure accuracy in fit of the overlap I created a step of tracing of part of the bodice from that I would attach after I cut the pieces apart. I again notched, labeled, and closed out darts. | 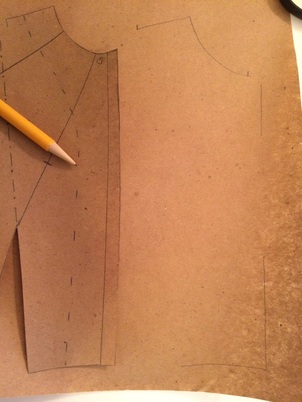 |
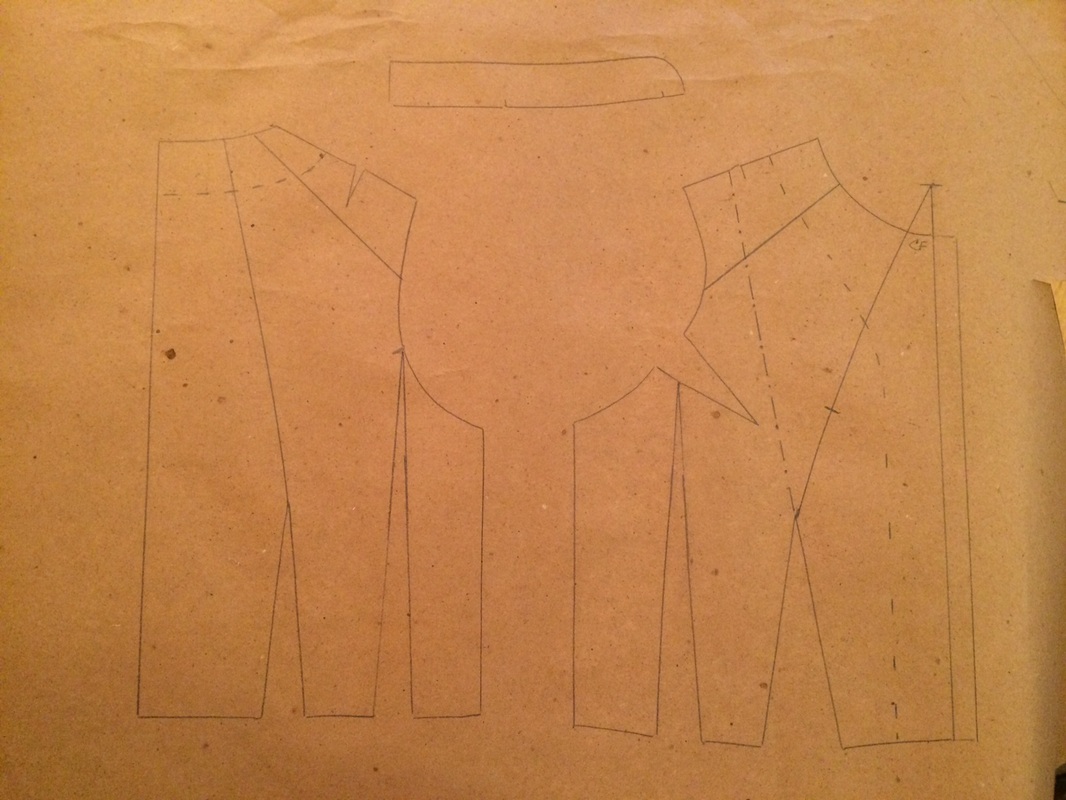
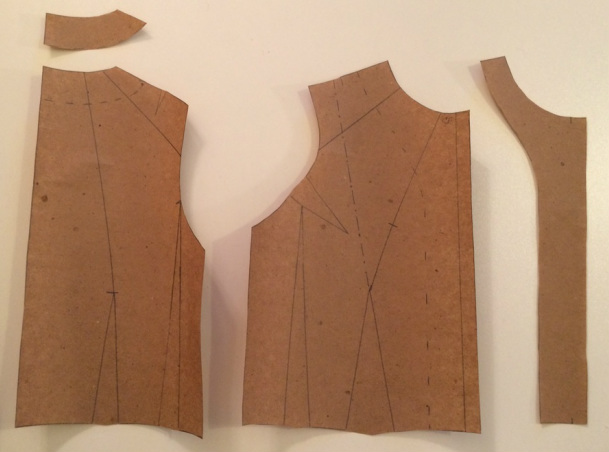
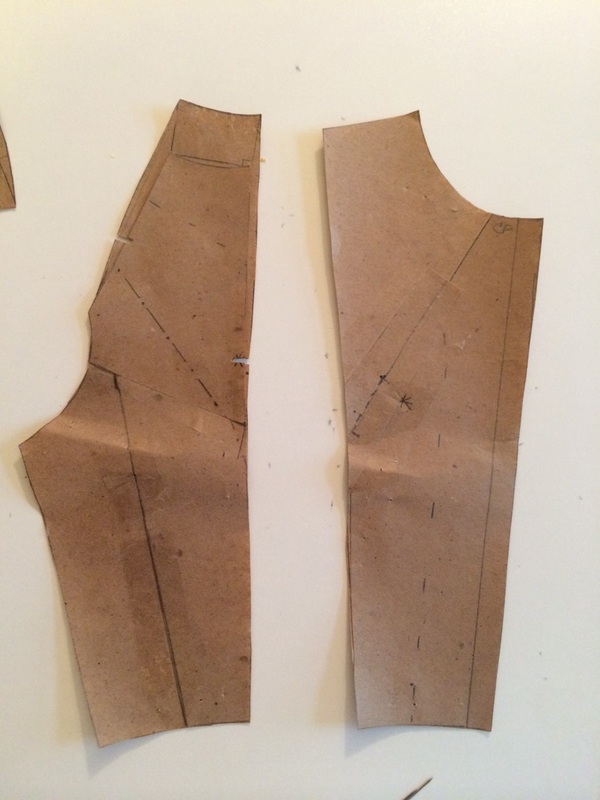
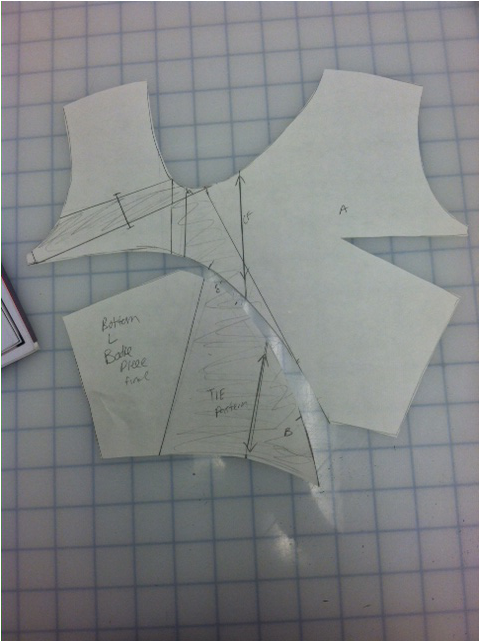
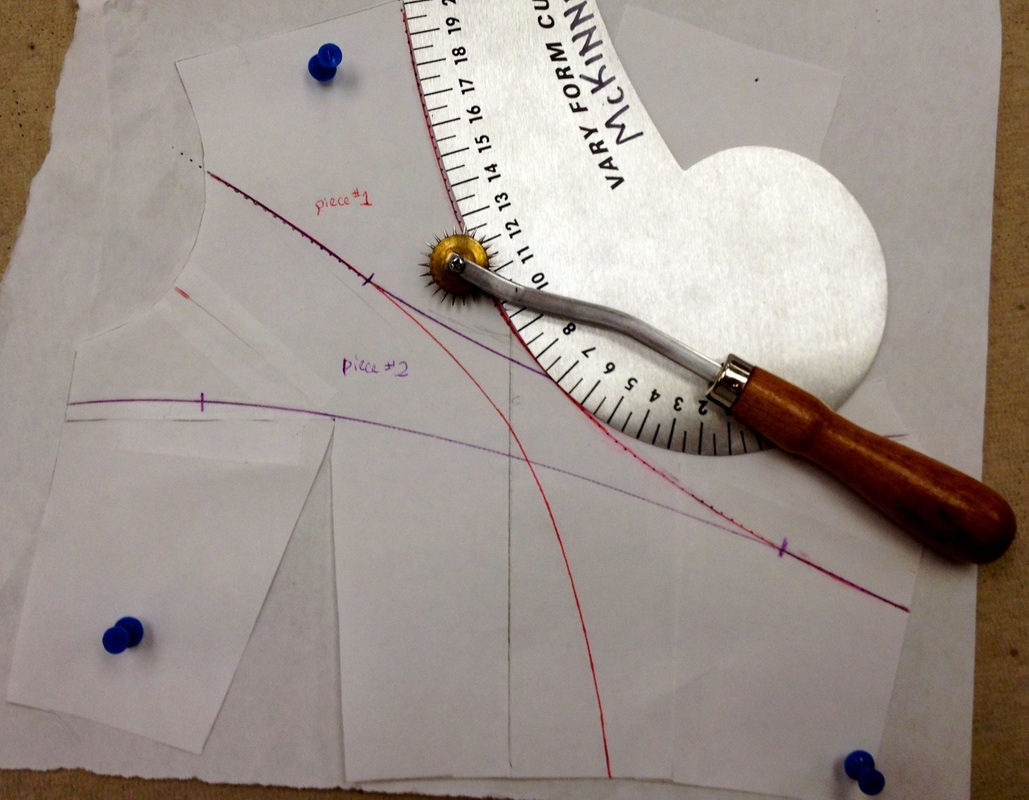
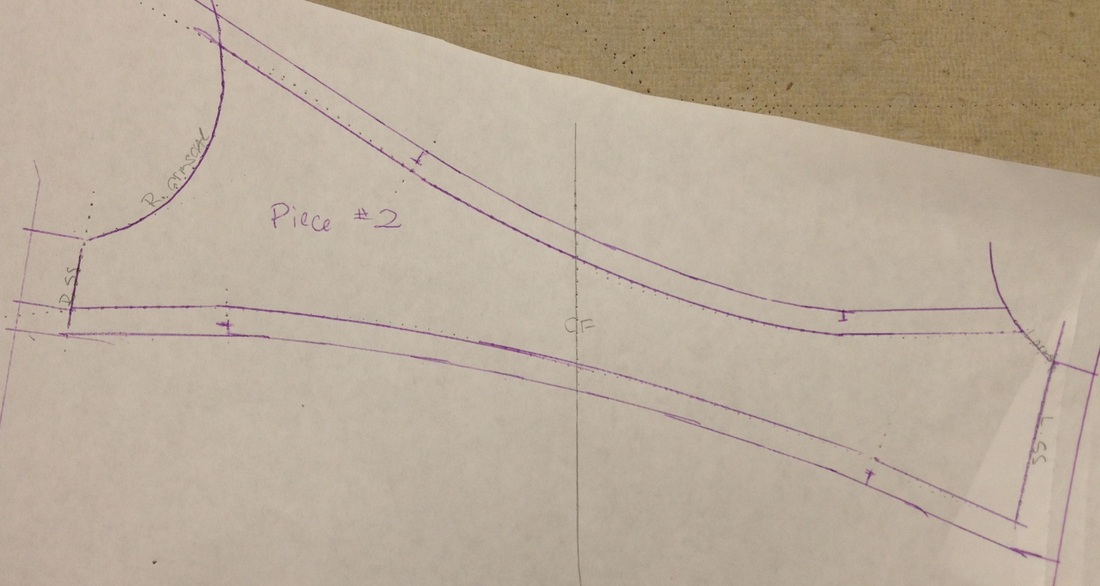
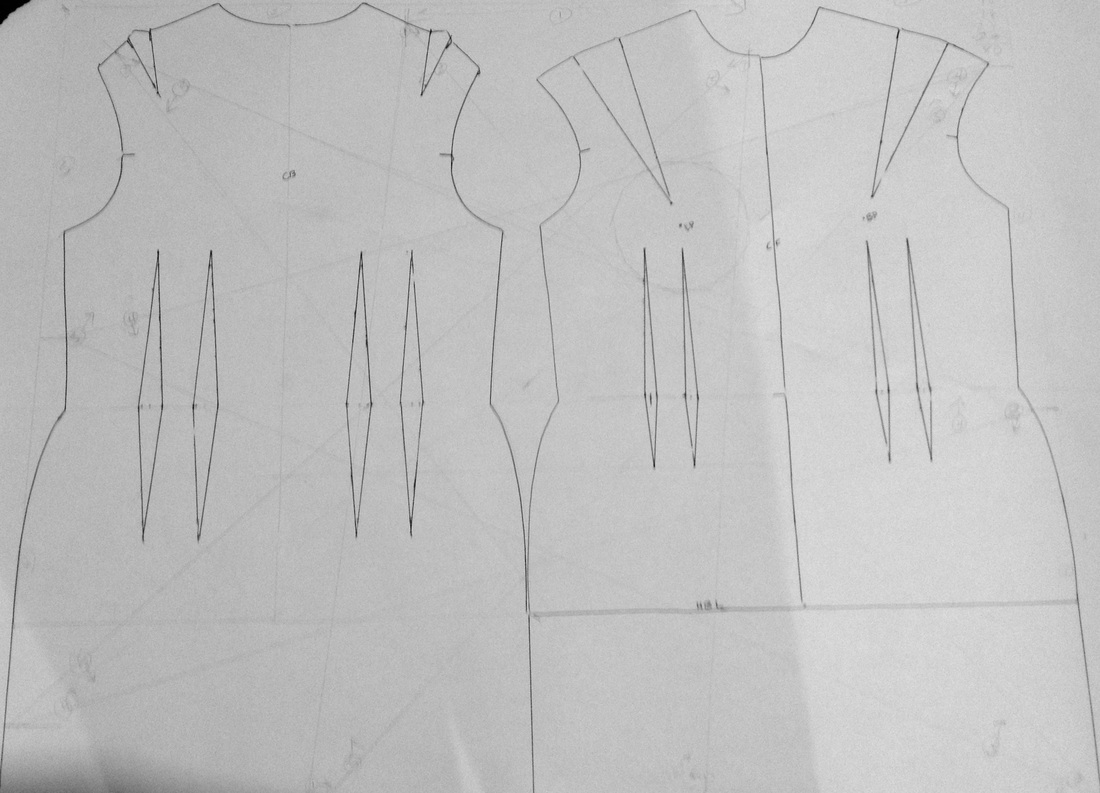
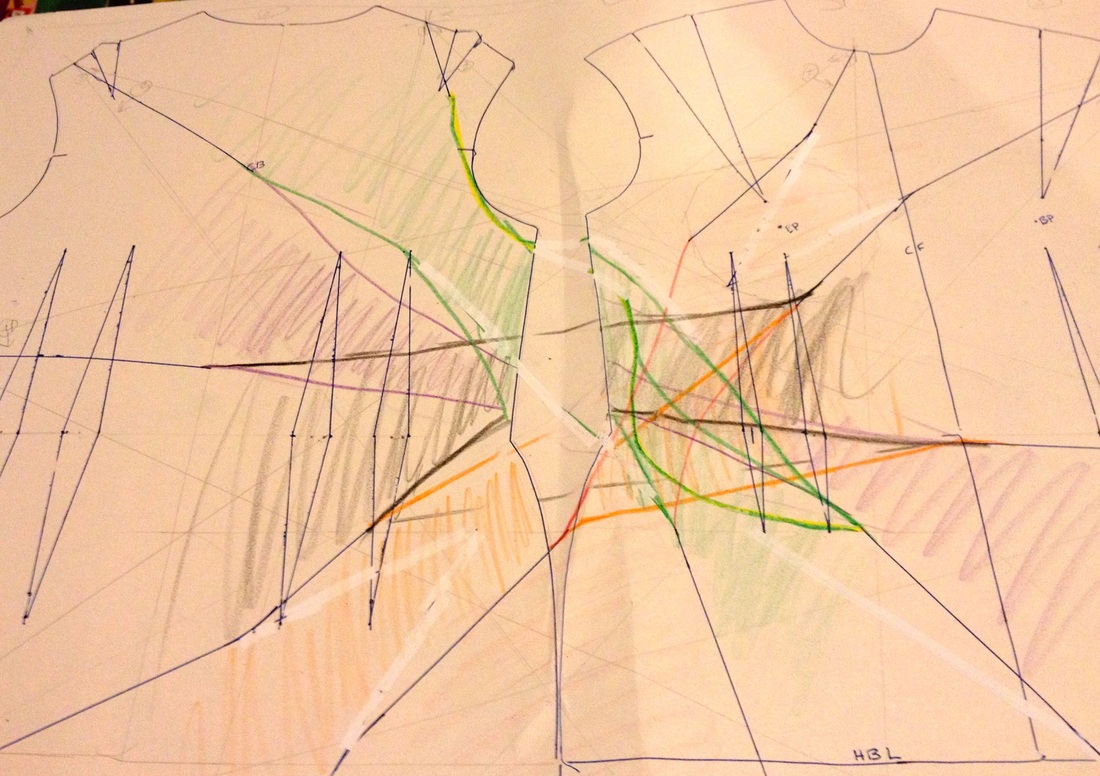
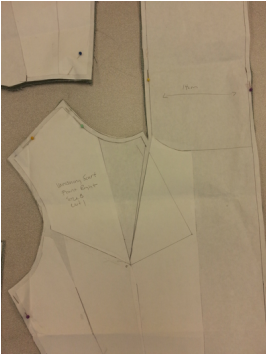
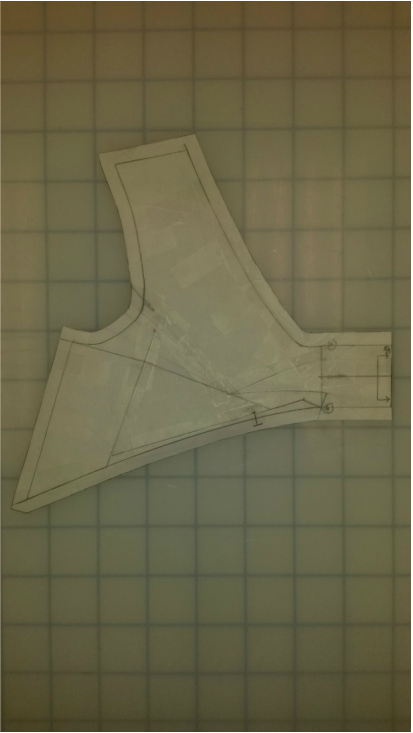
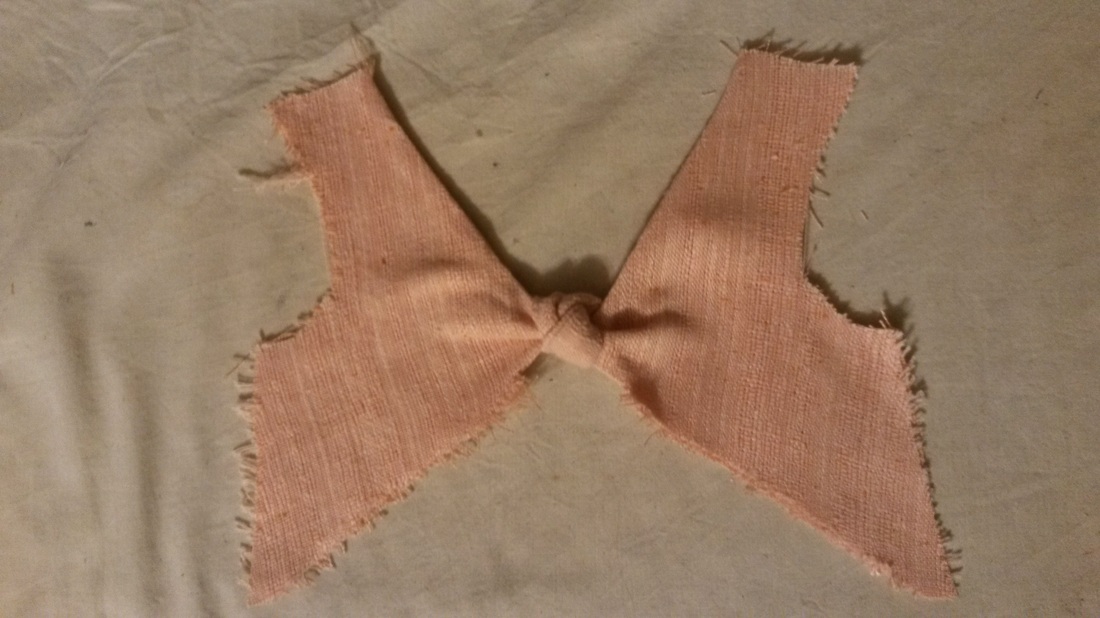
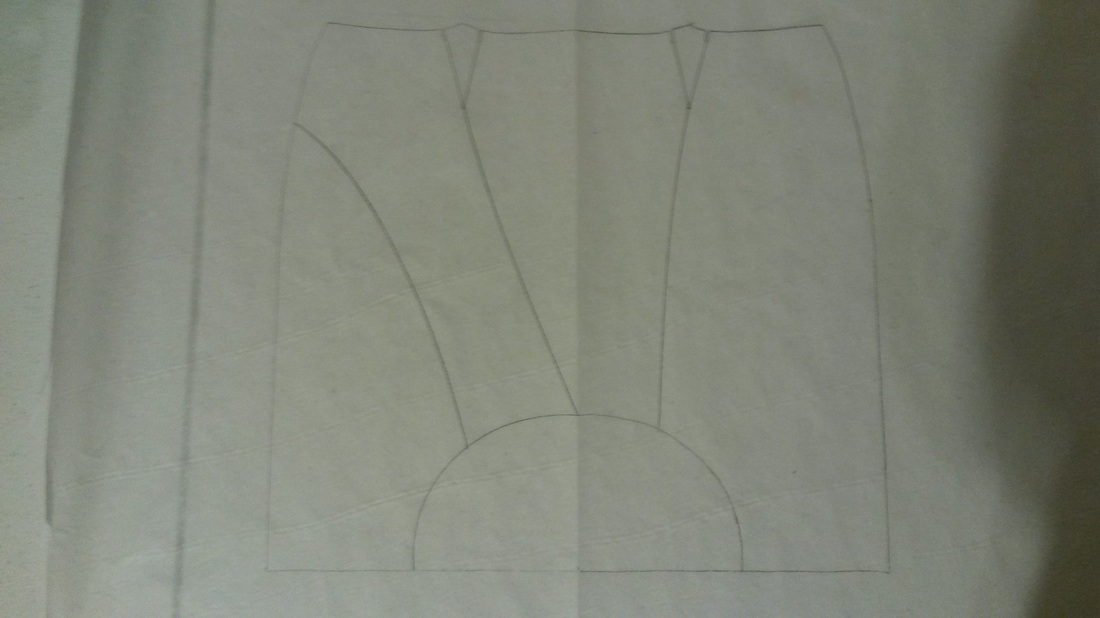
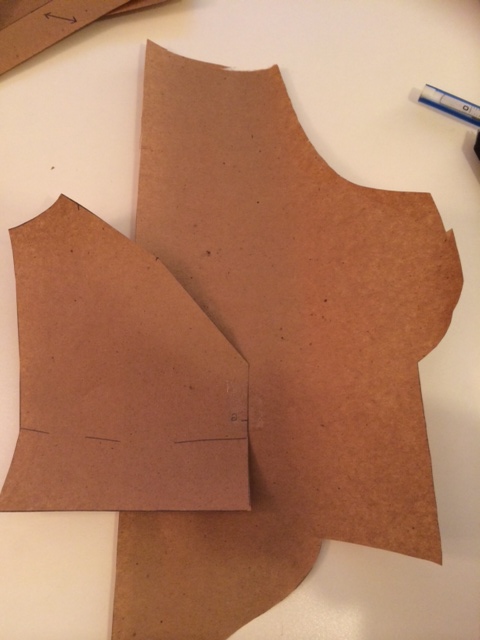
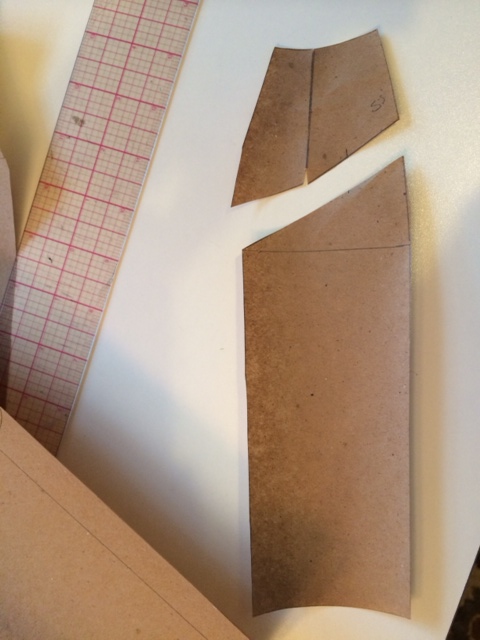
5) To eliminate the shoulder seam the front shoulder yoke and back shoulder yoke are taped together at the shoulder seam.
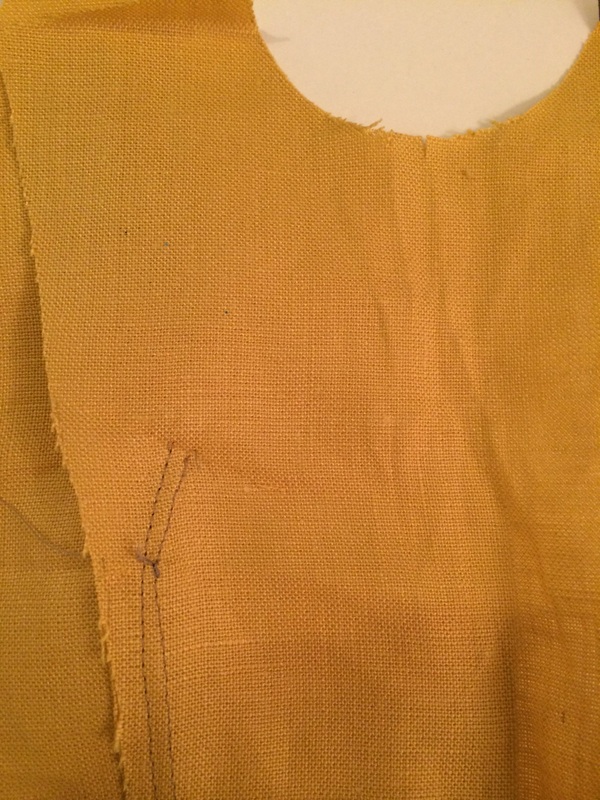
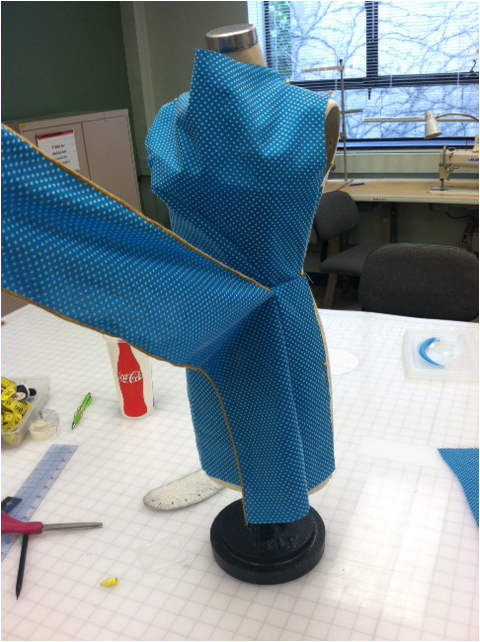
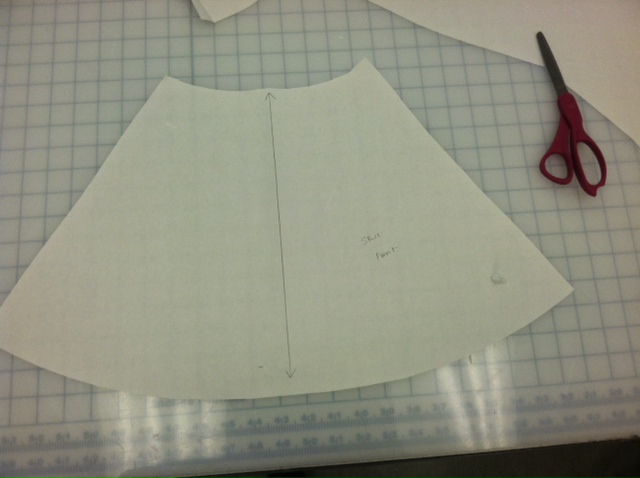
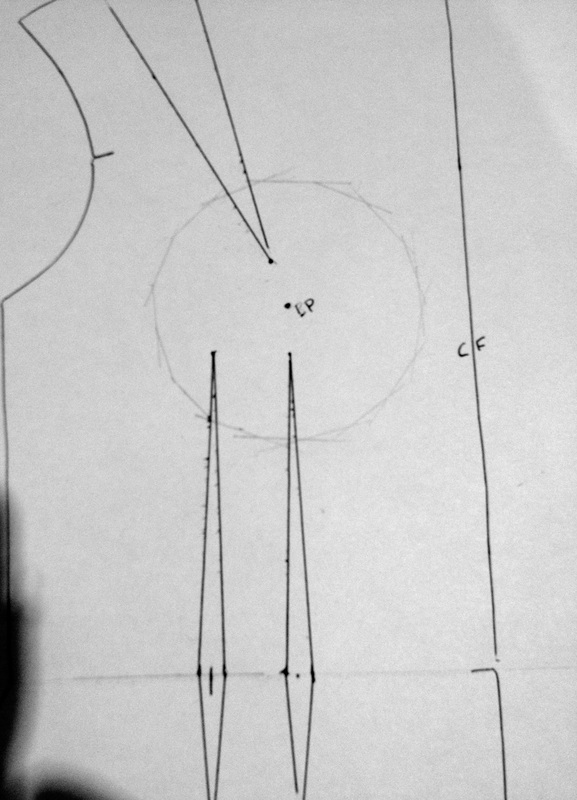
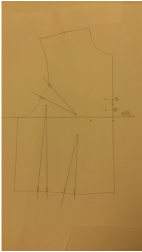
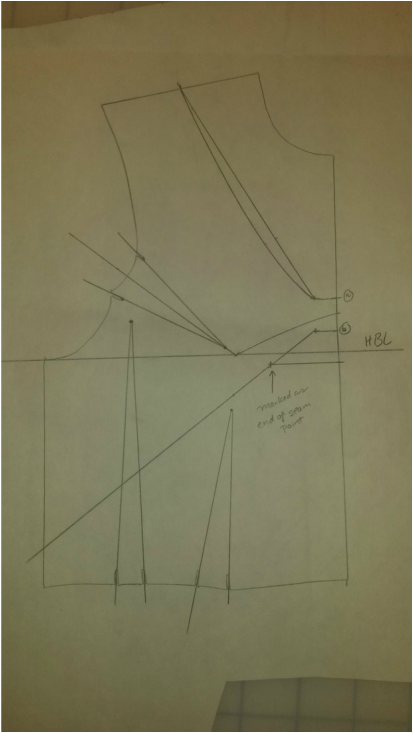
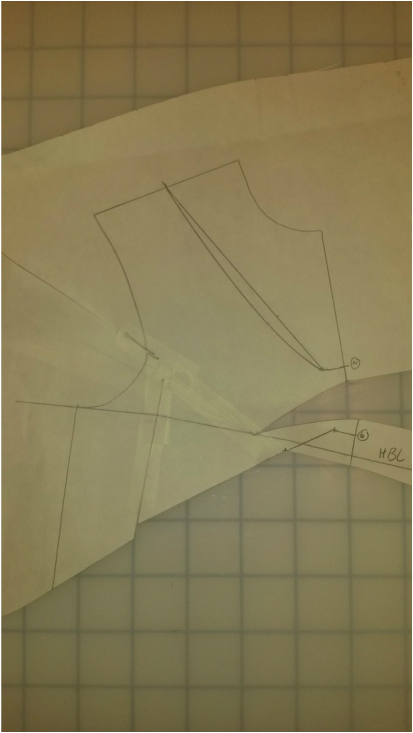
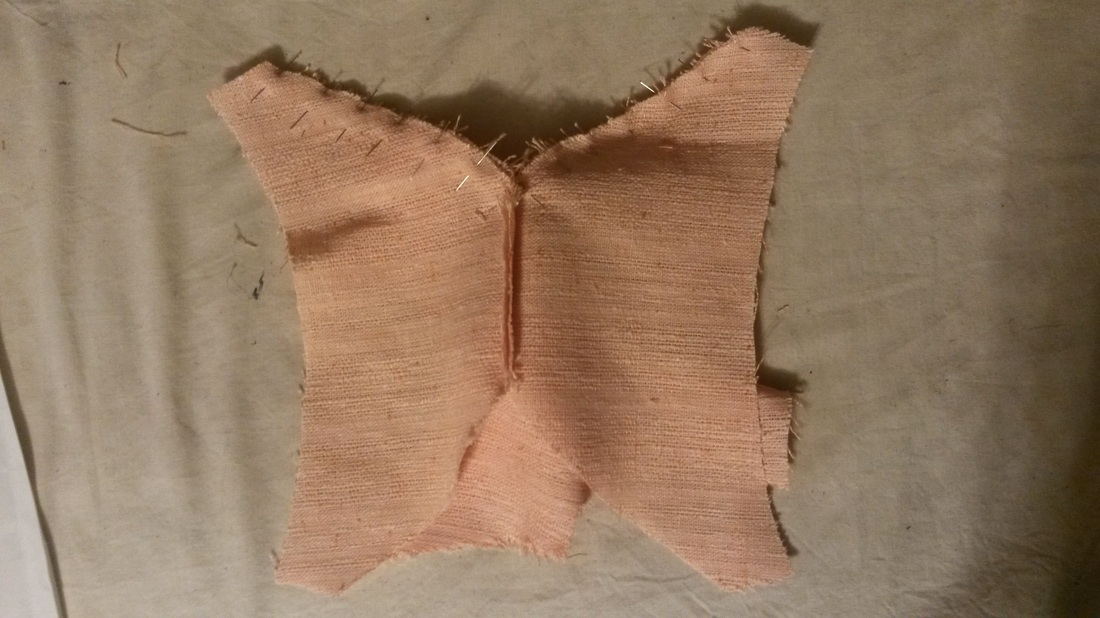
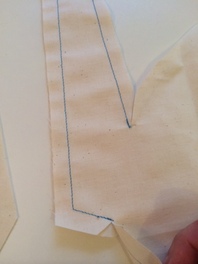
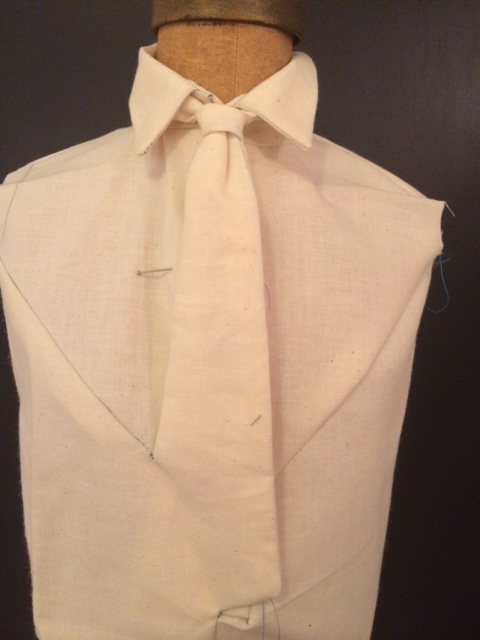
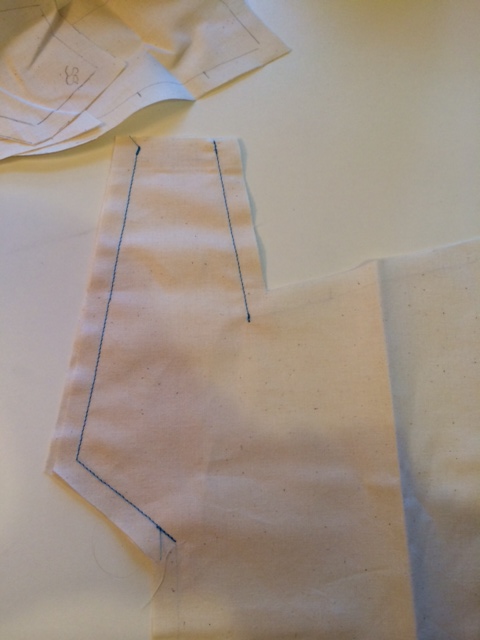
6) Now all bodice pieces need the have the balloon alteration done at the neckline edge
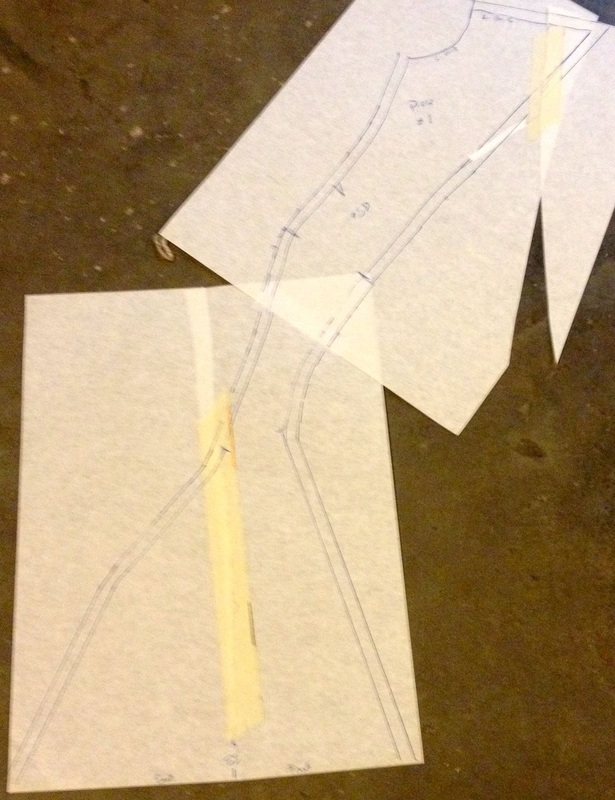
At each neckline edge a straight line was added so that lines could be made perpendicular to raise the neckline the same height as the collar. The curve of the original neckline edge was then transferred to the new edge. There is also width added to the part where the extension happens, but the curve must blend back into the neckline edge. This was done to all pieces except for the bodice center front because this piece ends up unlapping the other pieces and is the one that the mandarin collar attaches to
6) Now all bodice pieces need the have the balloon alteration done at the neckline edge
At each neckline edge a straight line was added so that lines could be made perpendicular to raise the neckline the same height as the collar. The curve of the original neckline edge was then transferred to the new edge. There is also width added to the part where the extension happens, but the curve must blend back into the neckline edge. This was done to all pieces except for the bodice center front because this piece ends up unlapping the other pieces and is the one that the mandarin collar attaches to

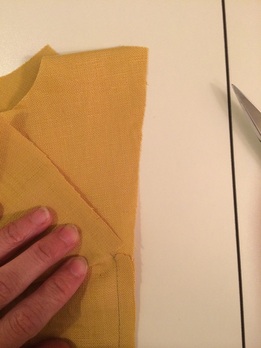
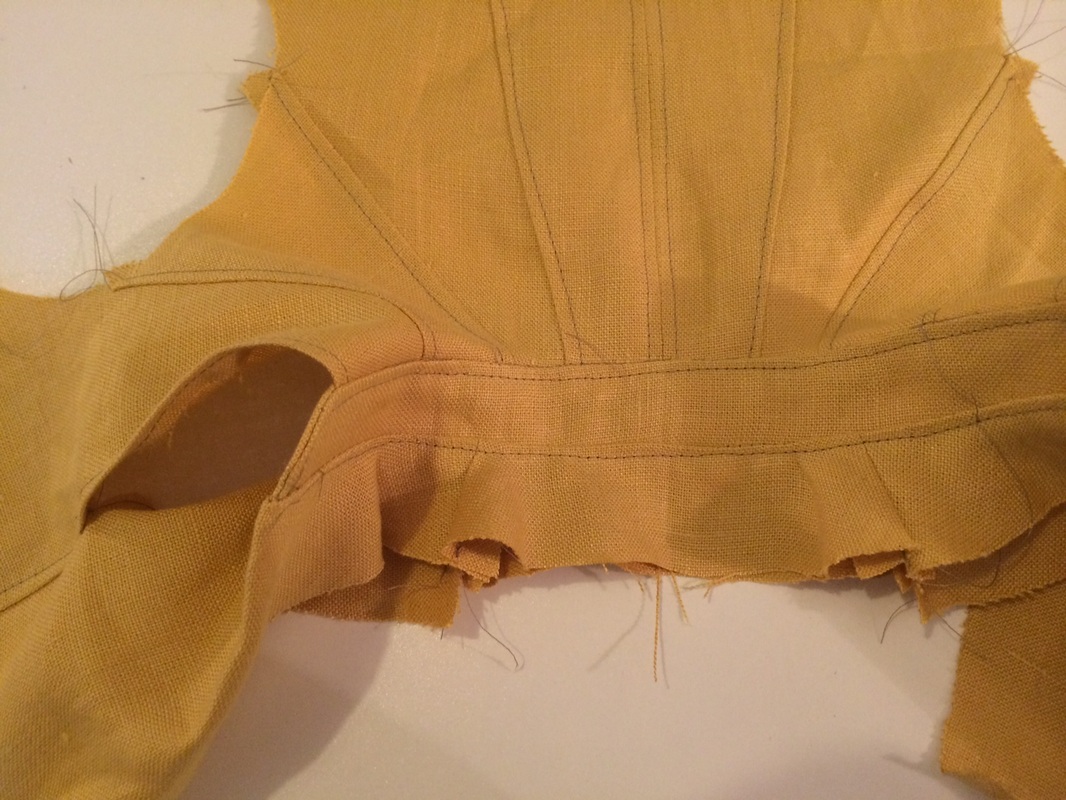
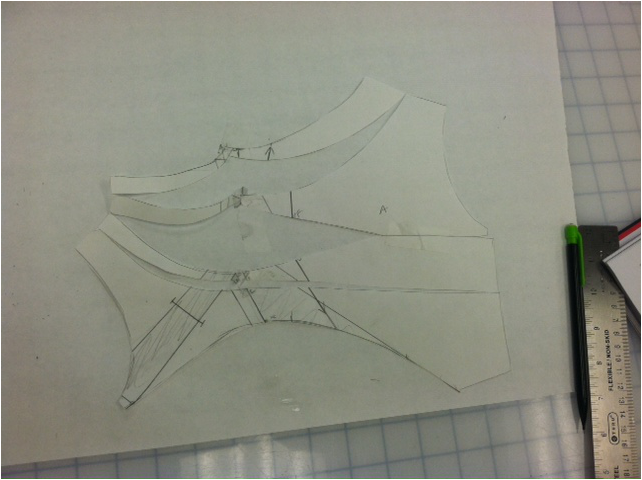
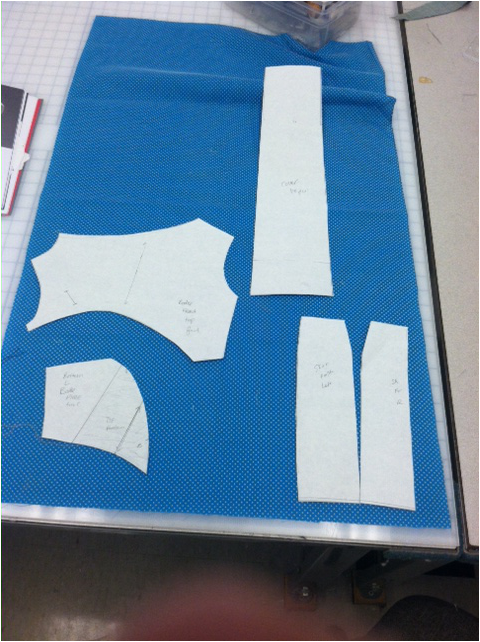
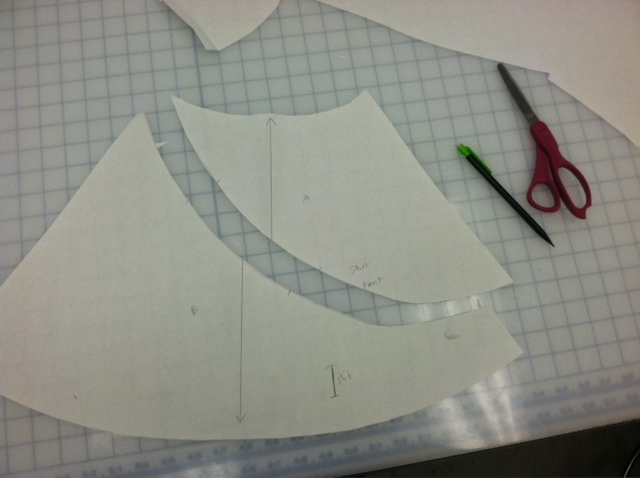
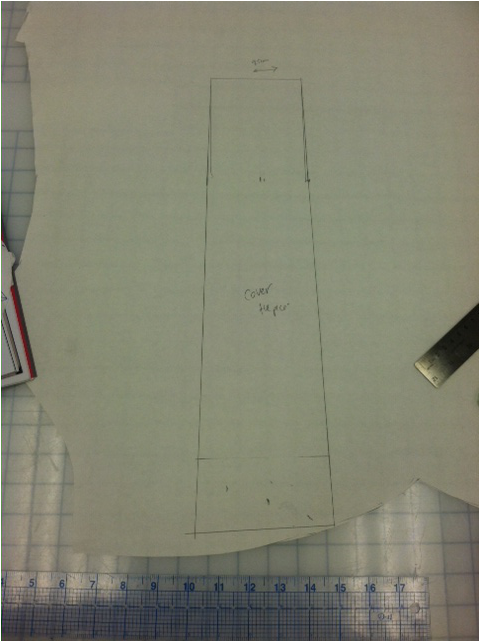
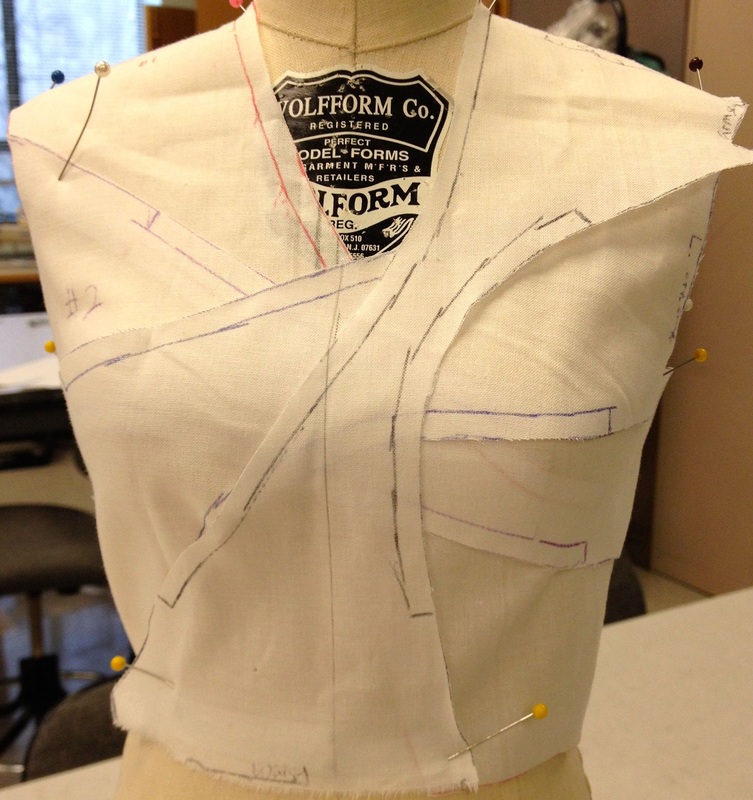
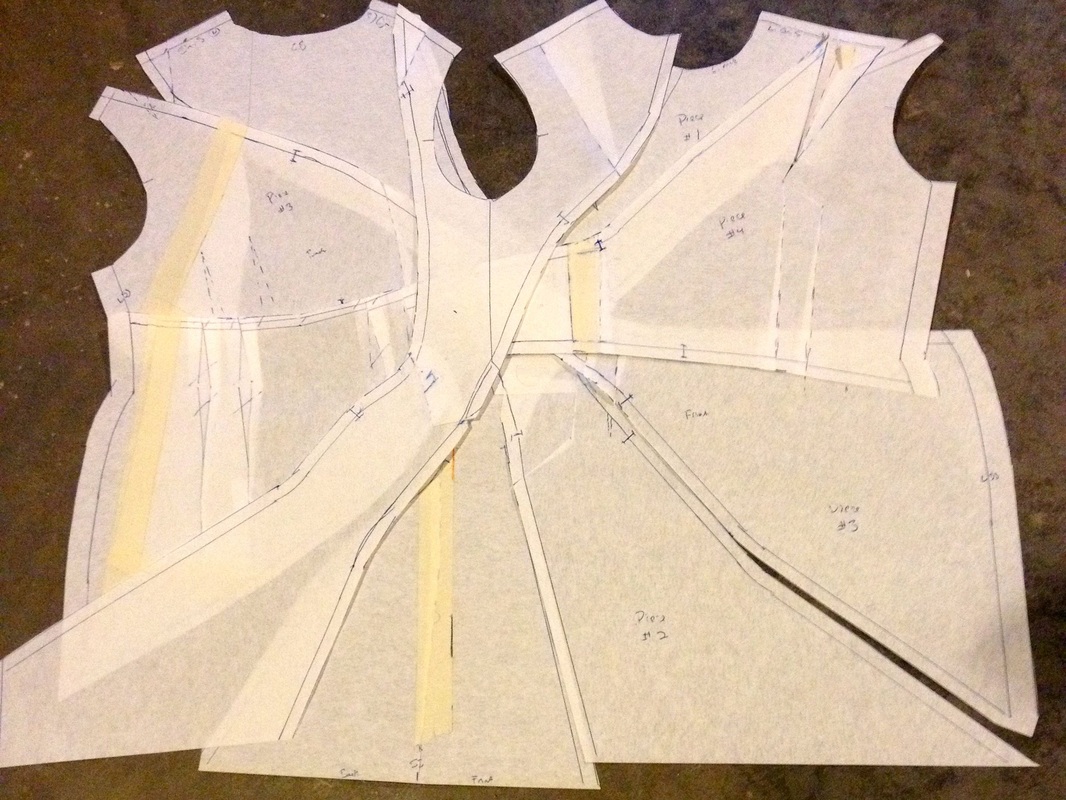
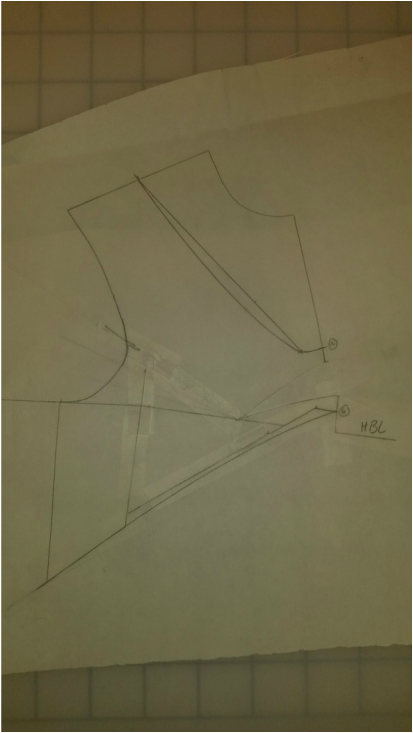
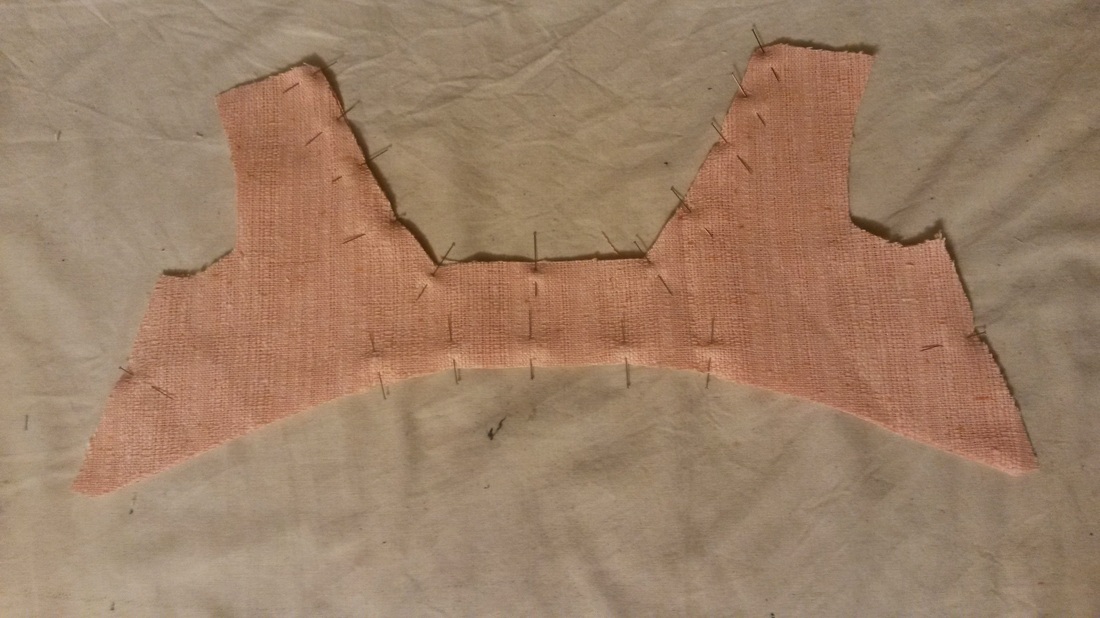
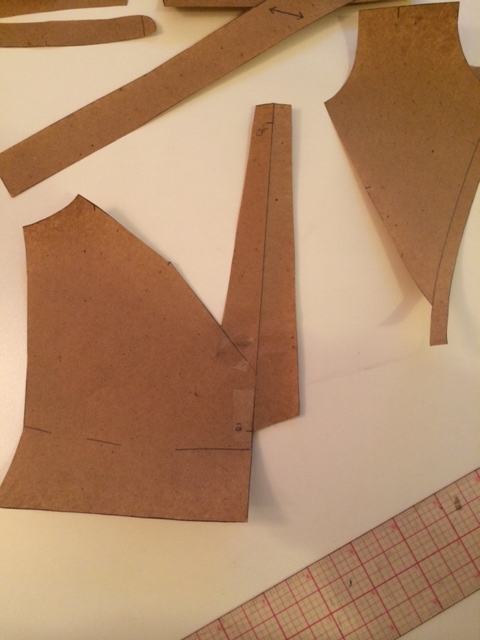
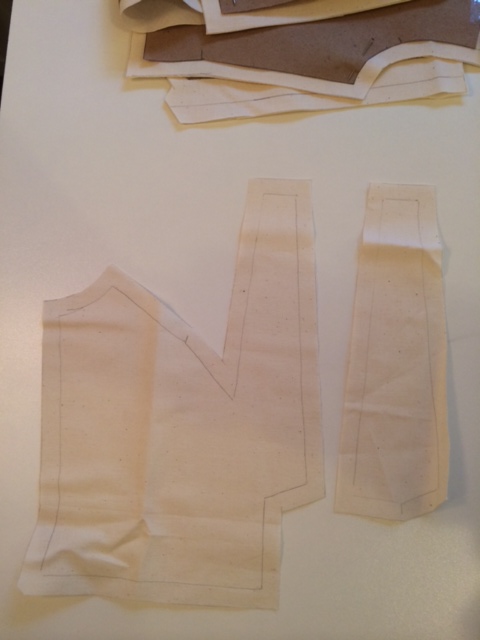
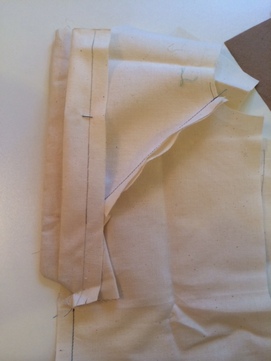
7) In cutting out the fabric, I decided to combine the front facing to the front bodice and cut 2 facings as well as 2 of everything else
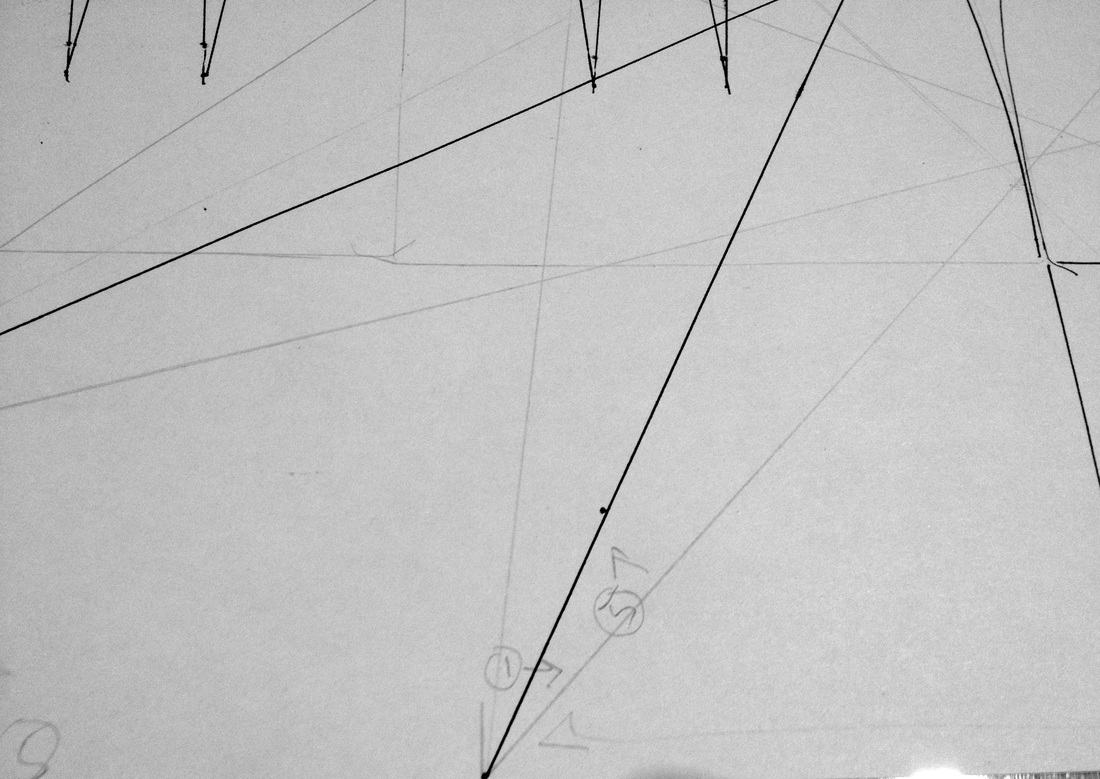
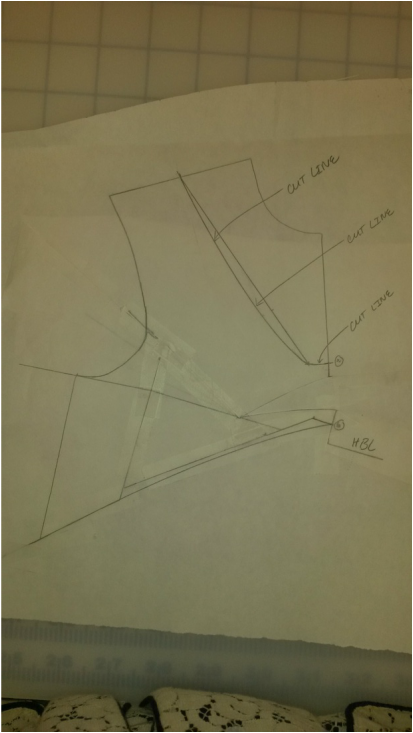
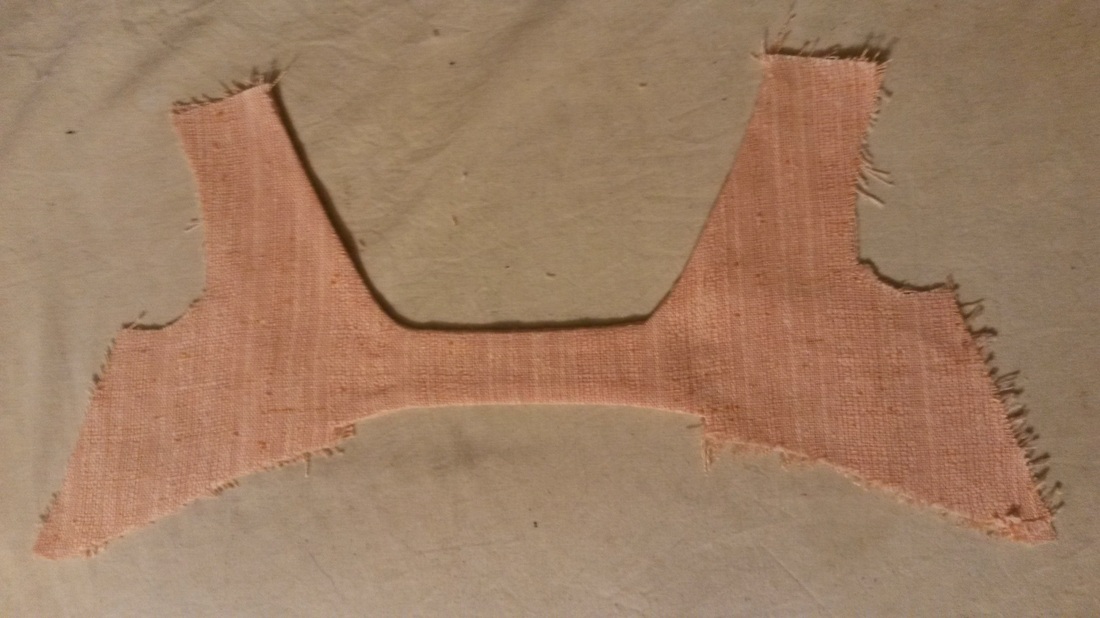
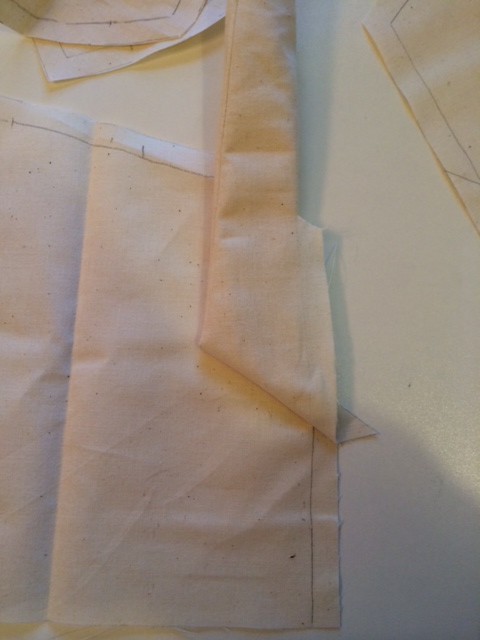
| 8) Now on to construction, as with many examples in the pattern magic series, the construction steps are very limited. In thinking about the sequencing the initial concern was the overlap part at the front…so I started at the back! I stitched center back seam, side back seam | 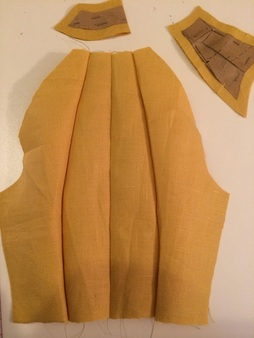 |
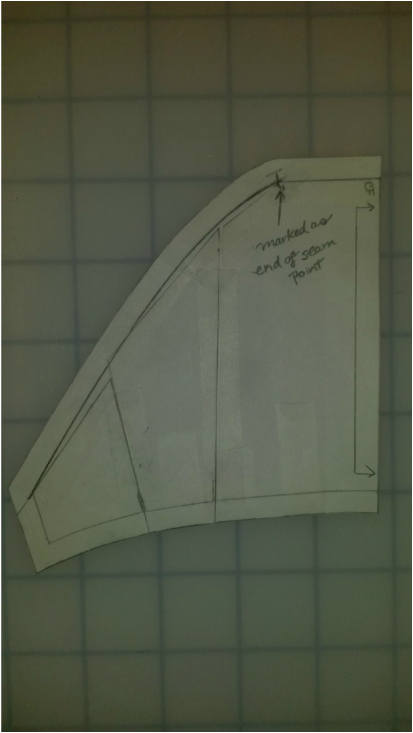
  |  | 9)Then stating on the bodice front, paying extra attention to the BP tranisition point and the end stitching point that I marked on the pattern piece, I stitched, clipped, pivoted, and stitched intended seam. Then top stitched making sure to stop at point and seam finish the overlap part. (after looking at the finished sample I would have preferred the finish to have been more complete- either with a facing or a binding) |
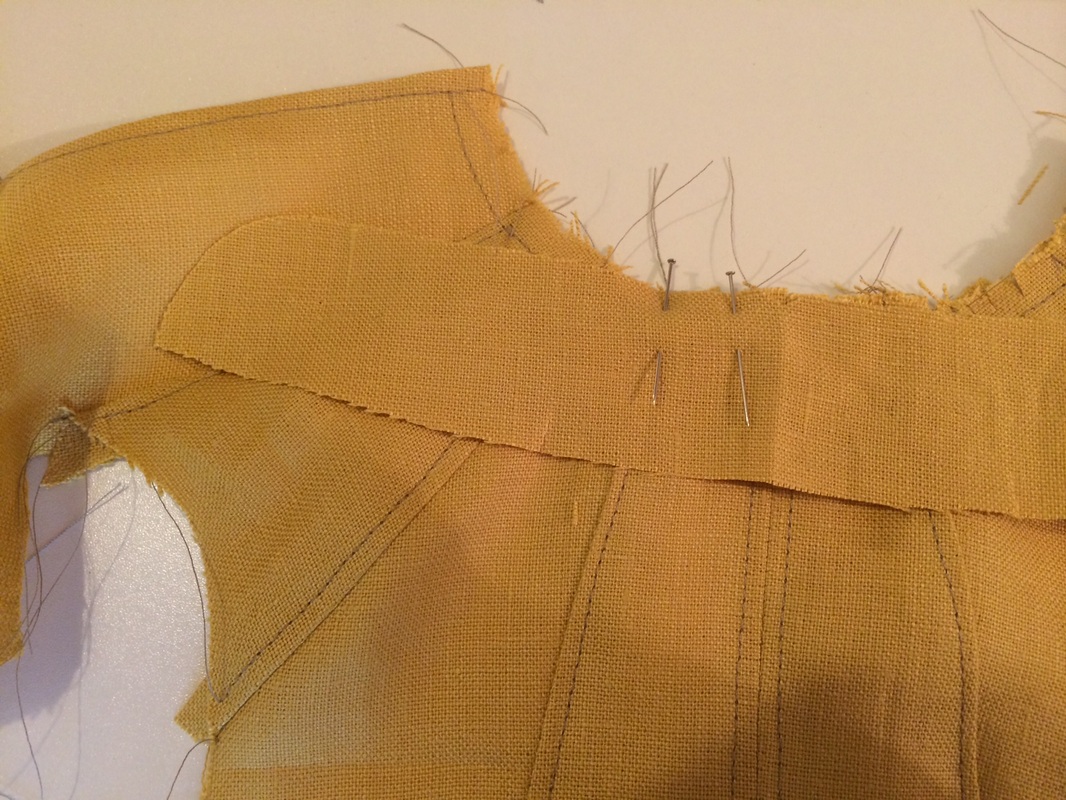
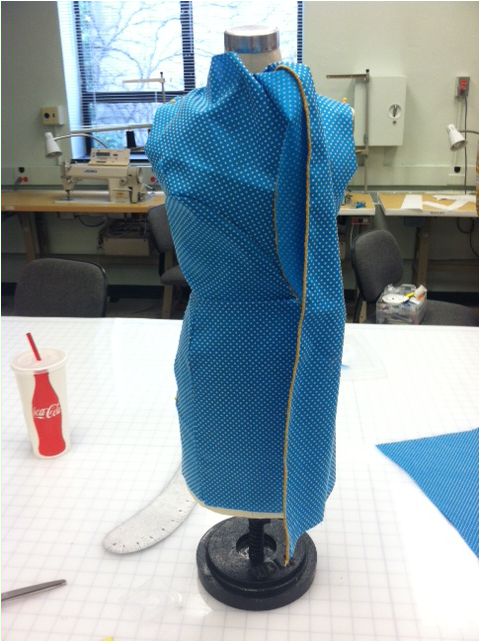
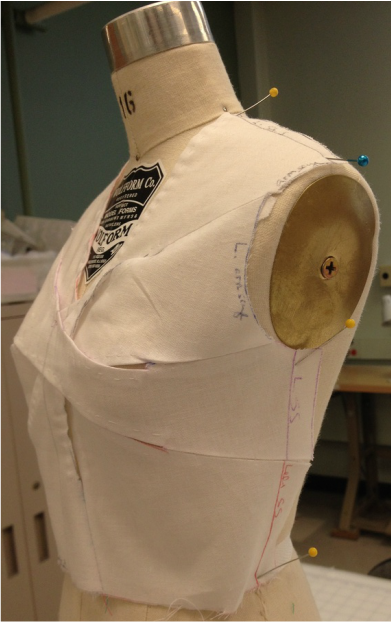
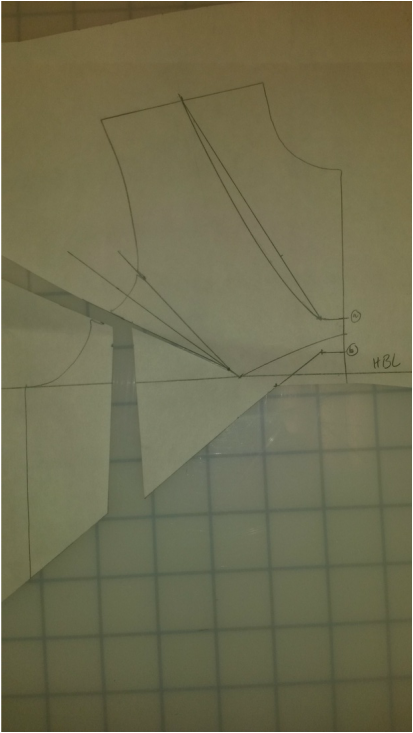
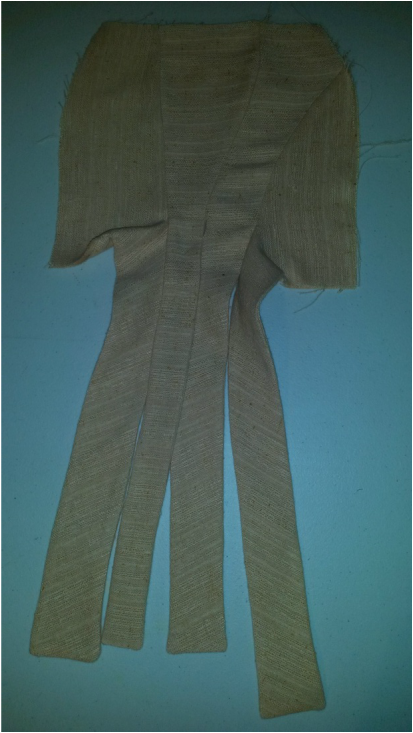
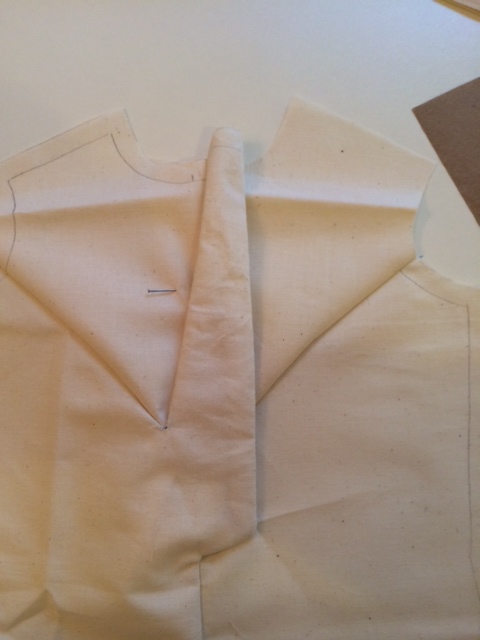
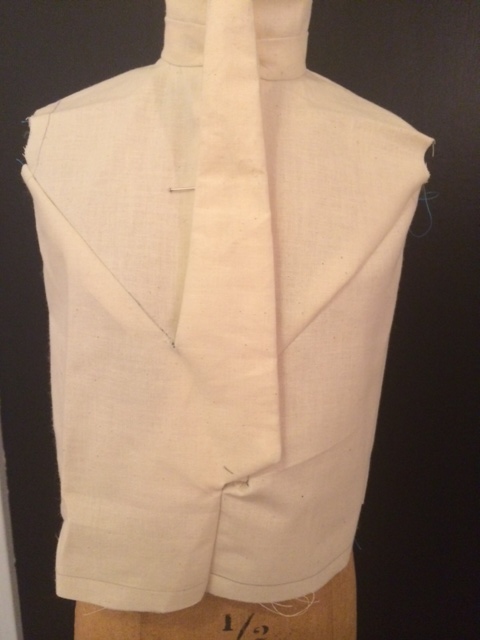
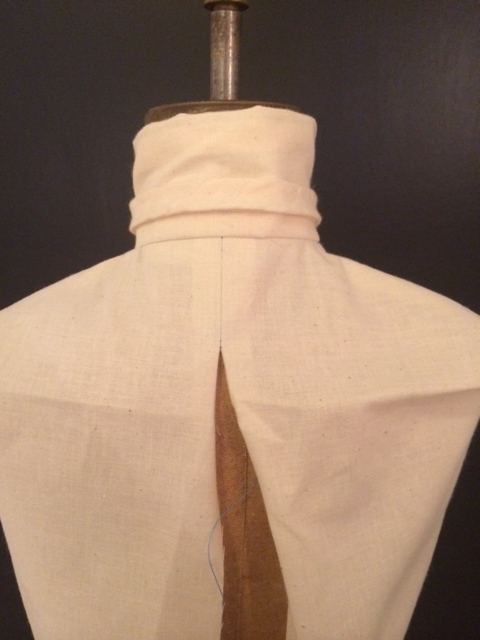
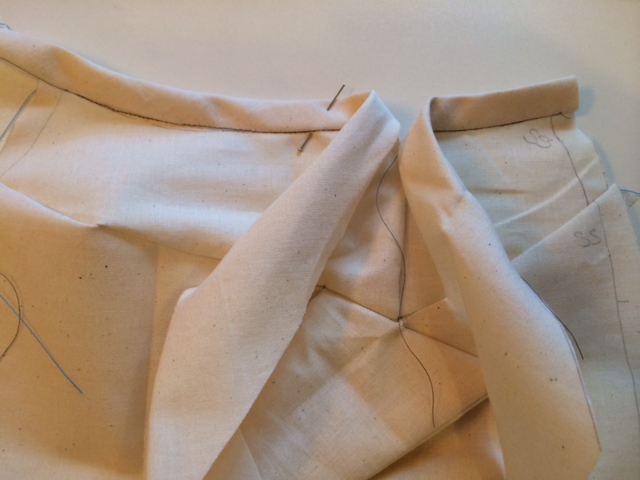
10) The next step was to attach the front and back together by inserting and top stitching the shoulder piece, I intentionally did not sew the side seams yet- it will be much easier to do all the collar manipulation, especially in half scale.
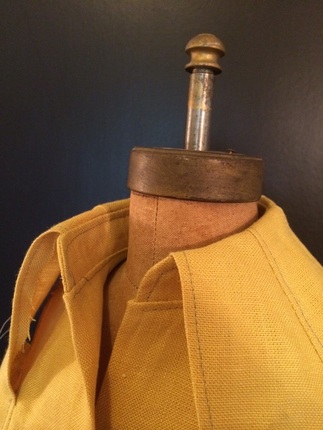
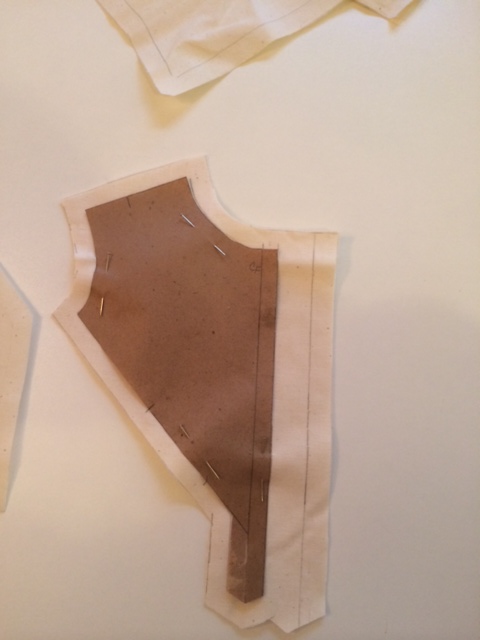
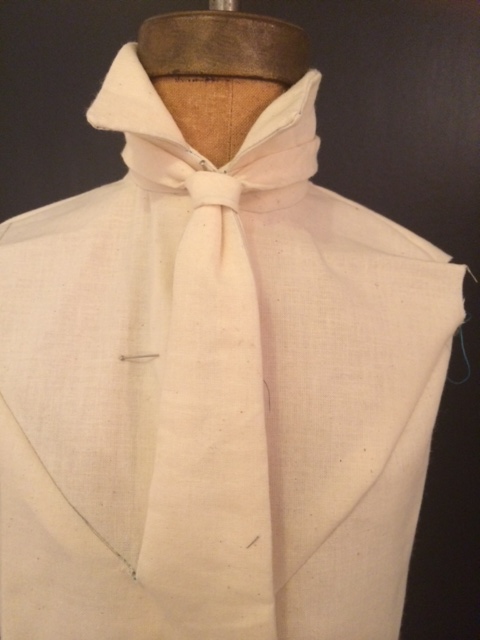
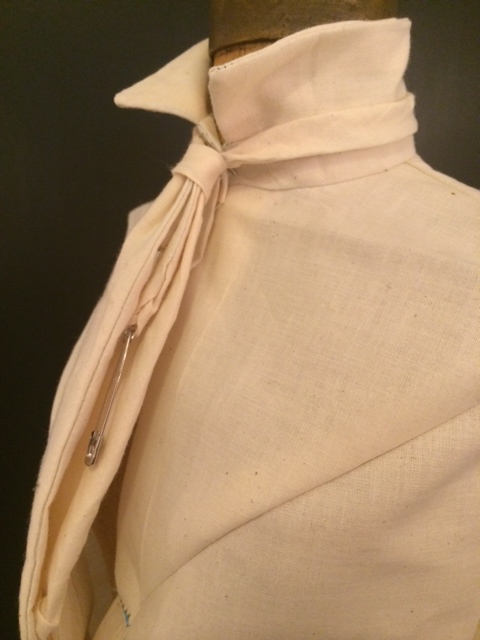
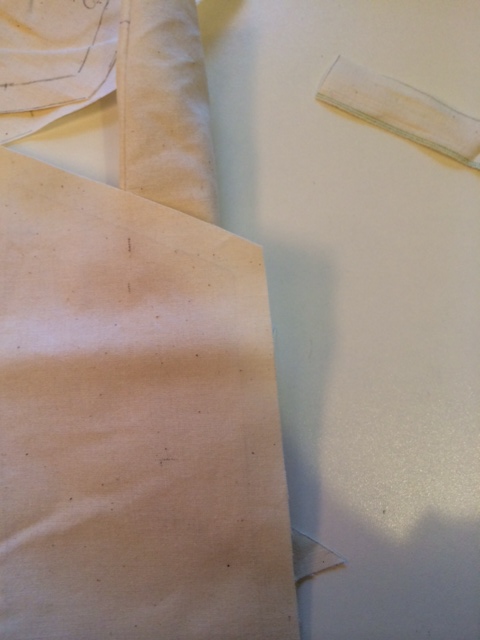
11) I thought the next step should be to attach the neckline edge of the bodice to the top edge of the collar. This is very unusual because the bodice is typically stiched to the neckline edge of the collar but because the collar is basically used as a stay and is not seen (except at the very front where it is traditionally stitched). I staystitched and clipped the curved edge and pinned the collar and the facings (stitching the facings could have been done before the collar).
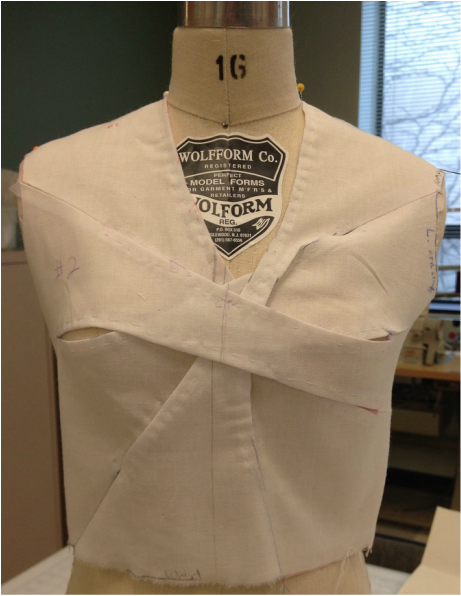
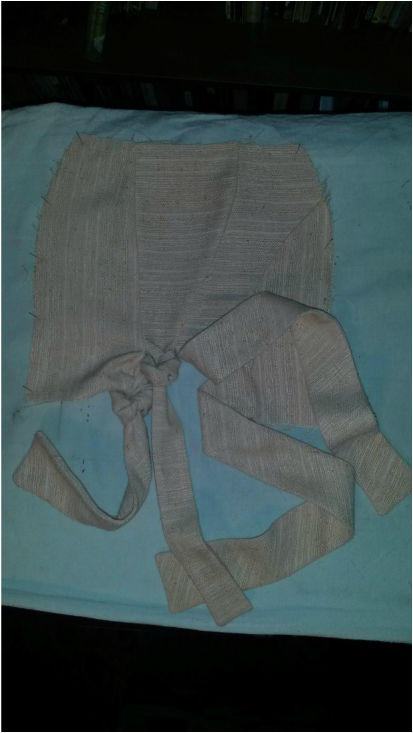
Using the second collar(lining/facing). I stitched right sides together leaving the “true” neckline edge free
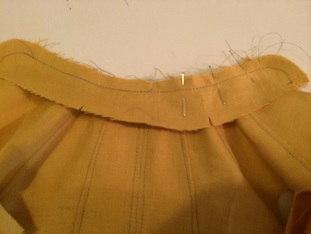
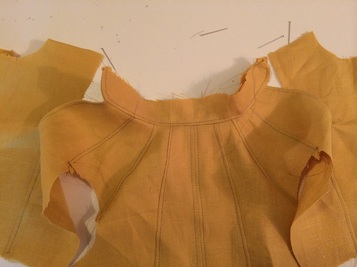
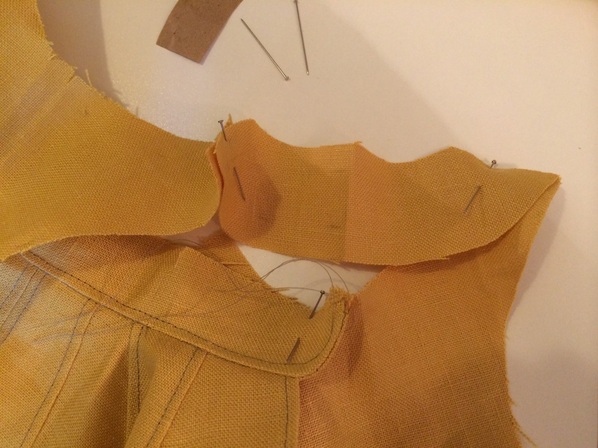
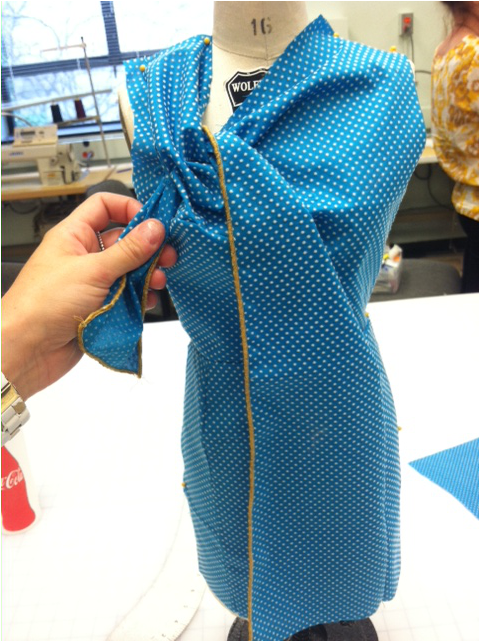
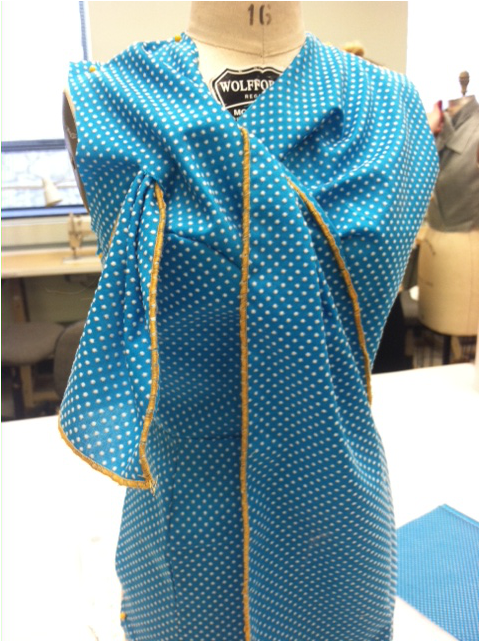
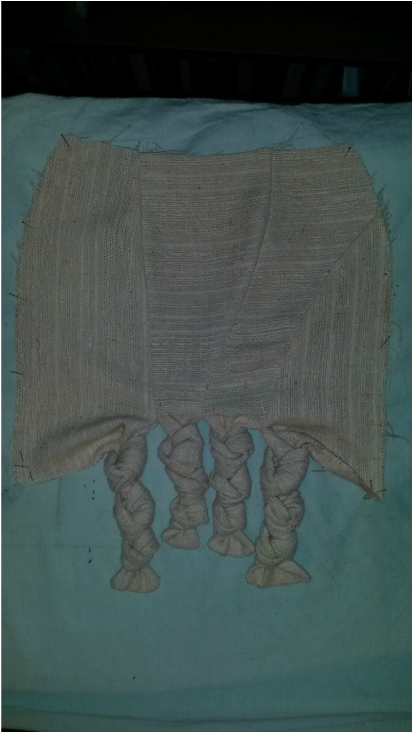
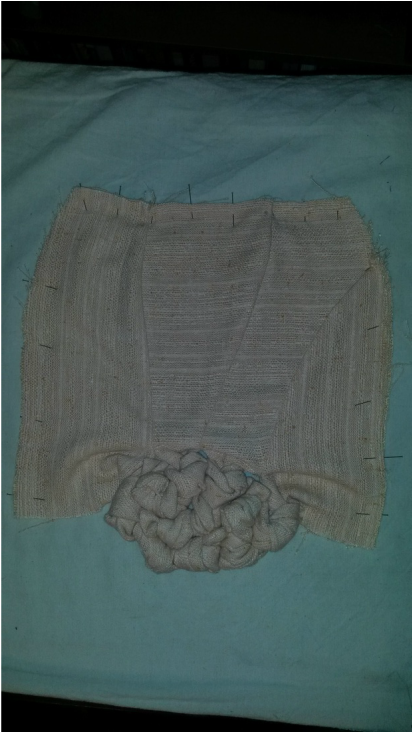
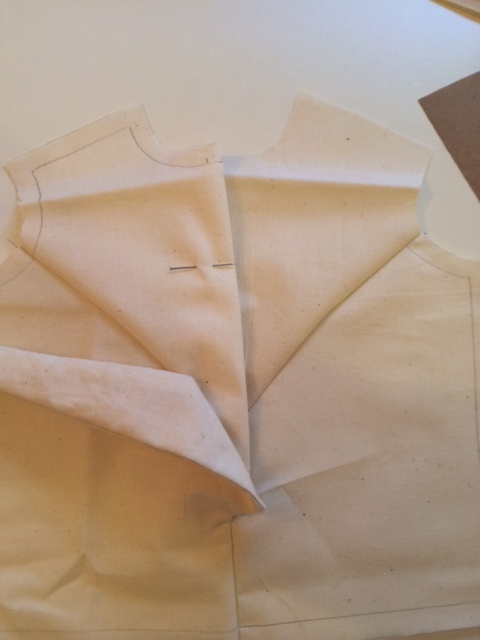
Clipped and turned the collar, topstitched, and prepared for the complicated assembly of the overlap, facing, collar, connection. I pinned and stitched two facings in order to have a better finish since most of the “true” neckline edge of the collar is left free from the garment. Again staystitching and clipping curved edges before stitching. I flipped the facing and topstitched before I stitched up the side seams.
 |  |
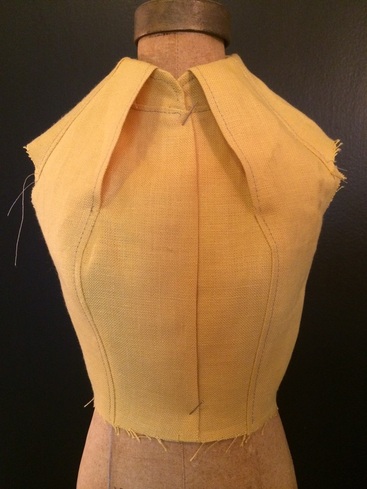
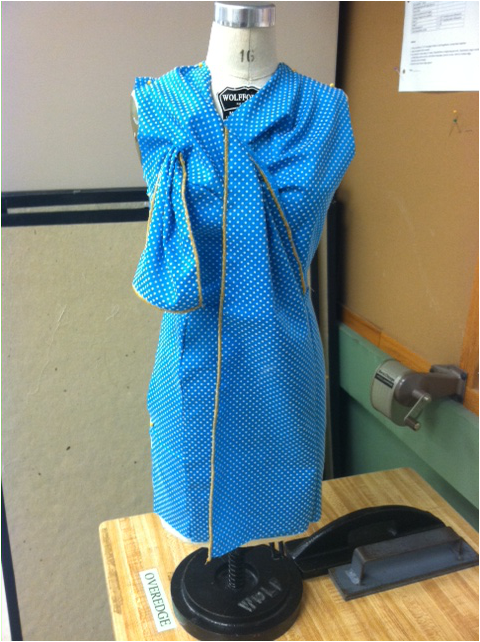
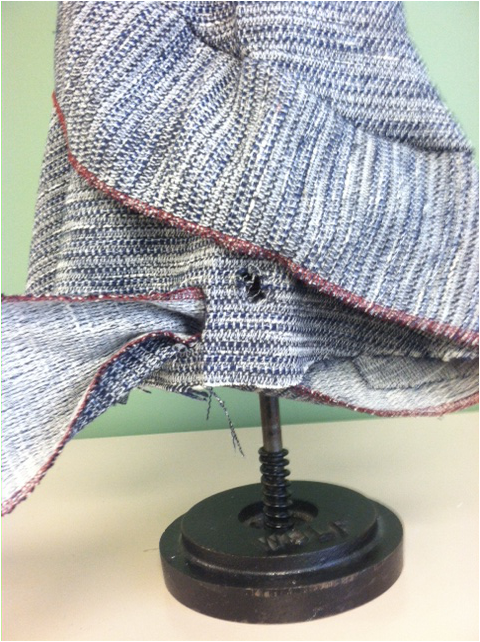
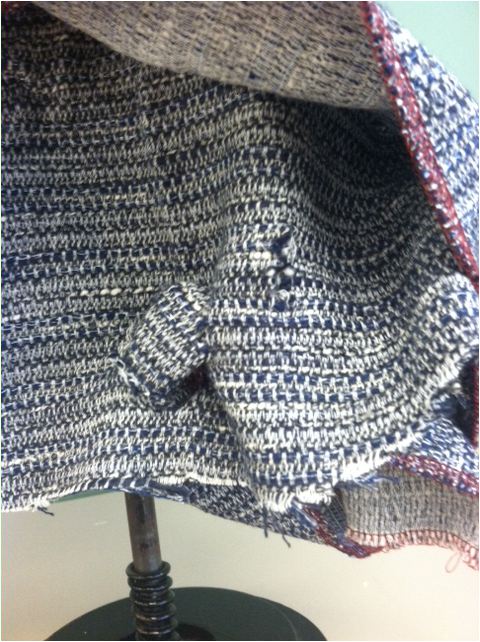
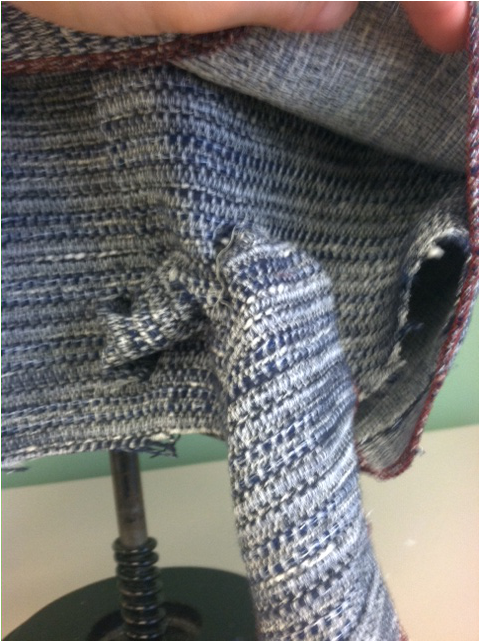
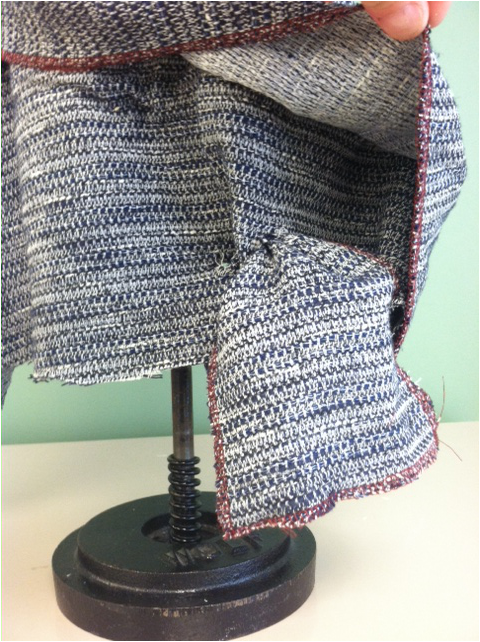
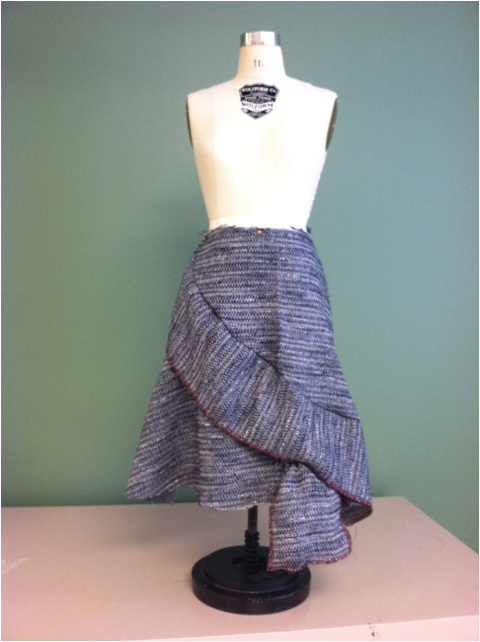
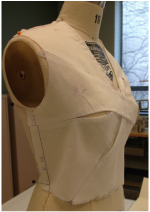
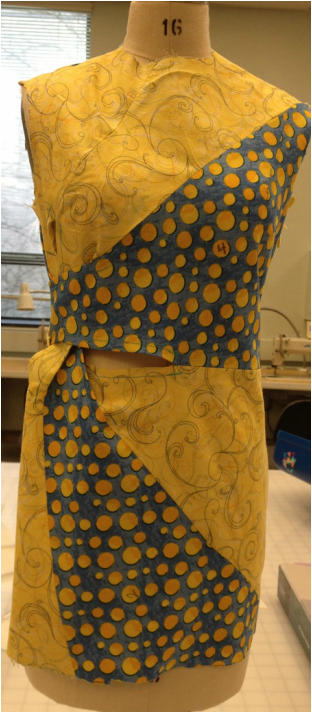
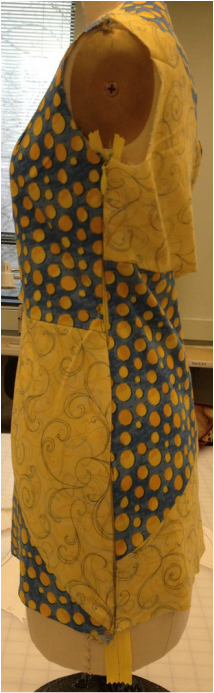
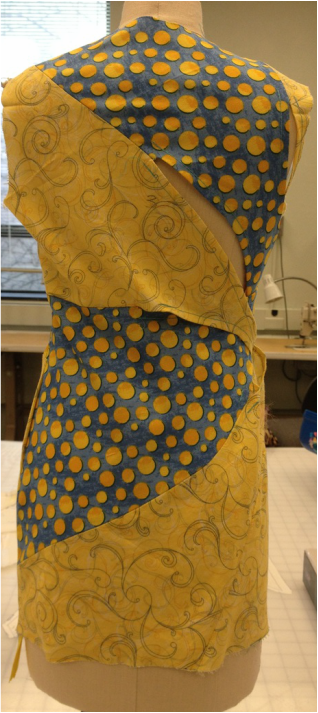
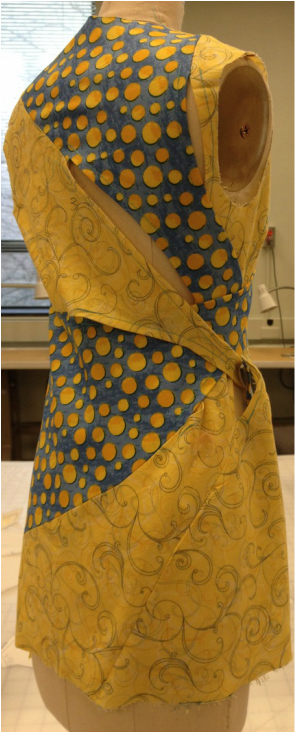
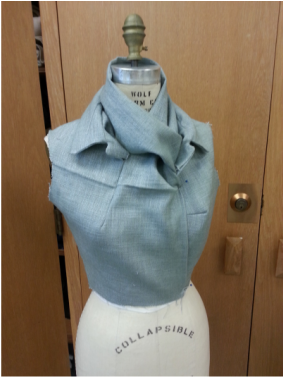
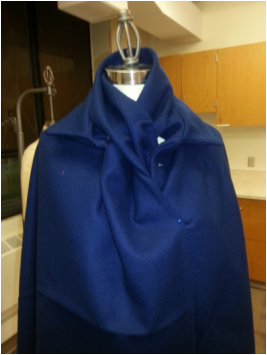
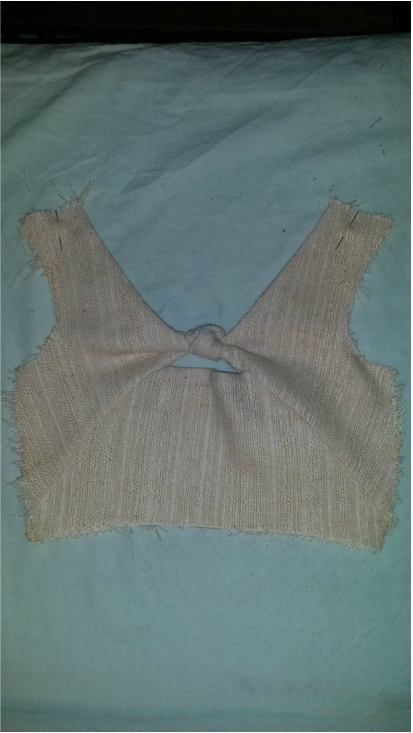
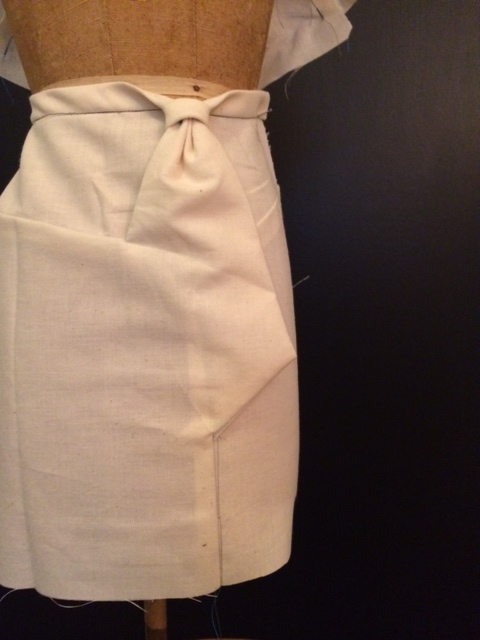
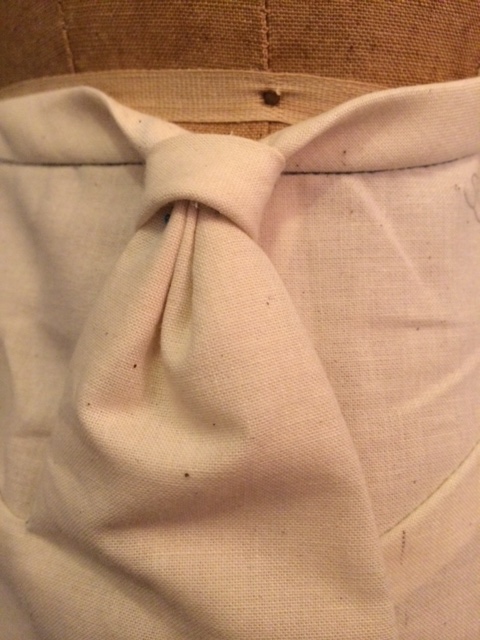
Finished sample:
 |  |
Analysis:
The Challenge: Study this pattern to discover what you can learn and apply to future work. Start with these questions and include any additional insights.
Q. 1: What type of flat patternmaking is this: Dart manipulation? Added fullness? Contouring? Something else? A combination?
Wearing a balloon is a technique to incorporate expanding pieces into other parts of a garment. The dart manipulation into design stylines is evident, as is added fullness to create the balloon shape, however the use of contoured under pieces, foundations, or stays seemed to be used especially if this techniques is tried somewhere else.
Q. 2: What are the basic principles of this pattern?
1. Style lines were drawn to create the seam lines that manipulate the darts and section the garment
2. Added fullness was used sparingly to create balloon shape
3. Contouring was used in the foundational pieces (collar, acts more as a stay/ foundation in this design)
Q. 3: What are the basic rules of this pattern?
1. Place the stylelines to intersect bust point and dart legs
2. Use a base patter that has your stylines, overlap lines and shapes, as well as lines for facings and then trace off to avoid confusion
3. Once pattern pieces are cut apart tape onto another piece of paper to accommodate neck extension and width for balloon shape
4. Be consistent with where the balloon shape fullness starts and stops, it cannot go into the new extended neckline edge.
5. Draw straight line to connect neckline edge on pattern pieces before you add the extention to ensure perpendicular line, transfer the original neckline cure to the new extension.
6. Mark the transition and overlap spots accurately
7. Plan your stitching sequence to accommodate intersecting seams
8. Pin and stitch in sections
Q. 4: Are these rules and principles always true?
Yes, I think the principles are definitely always true however I may think differently when I move the technique
Q. 5: What rules of traditional patternmaking are “broken” in this pattern?
No traditional patternmaking rules are “broken” in this pattern.
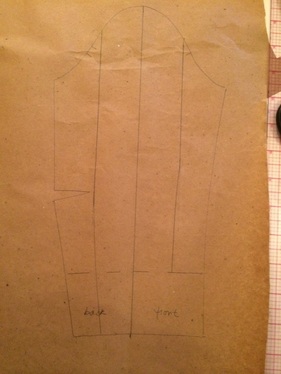
Application of technique:
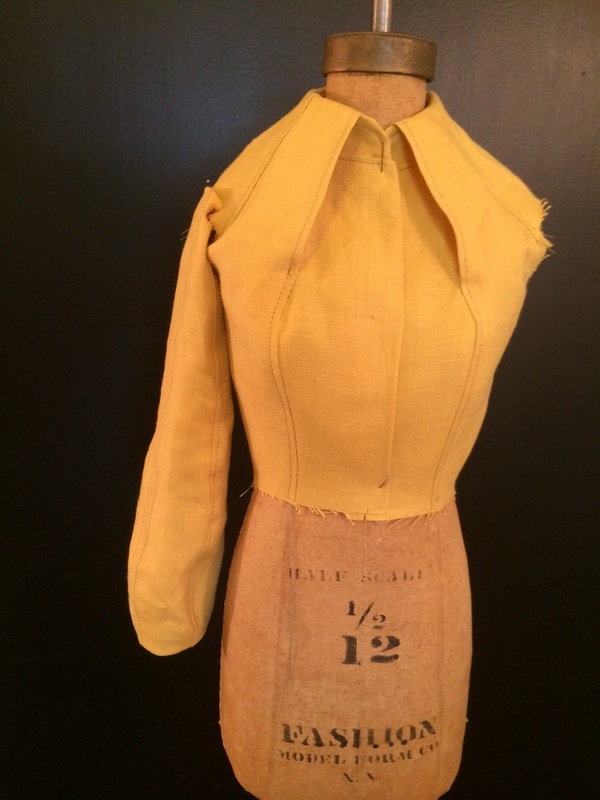
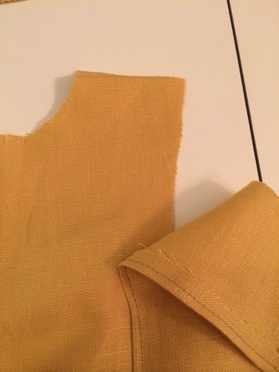
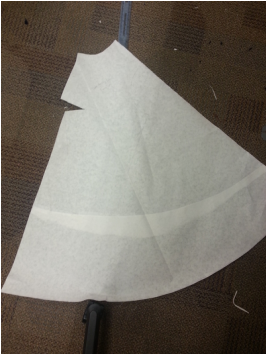
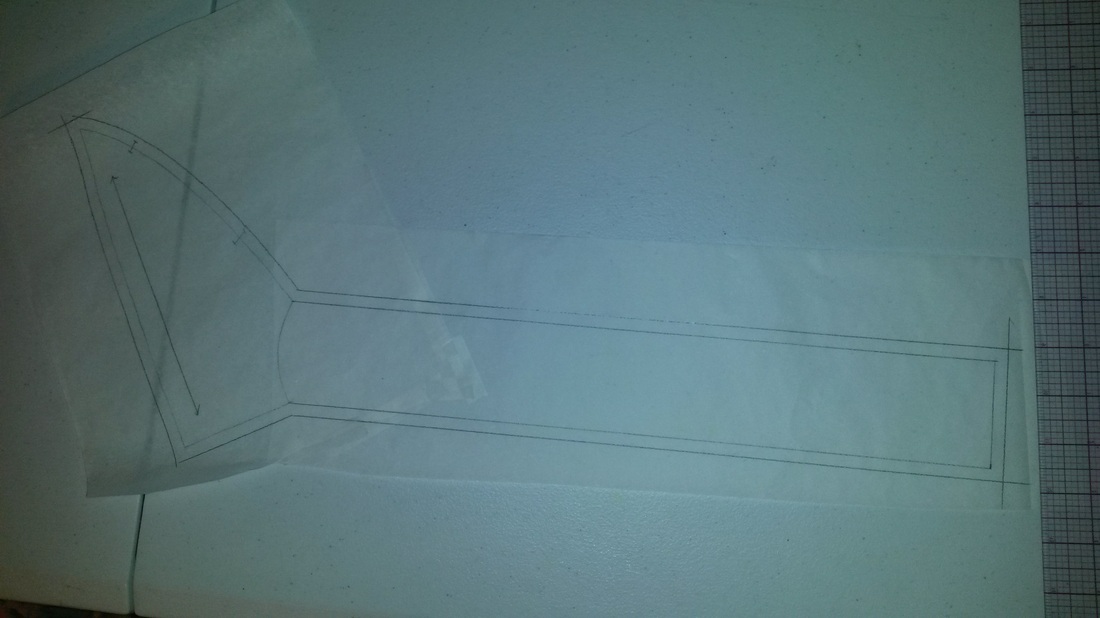
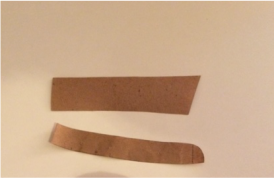
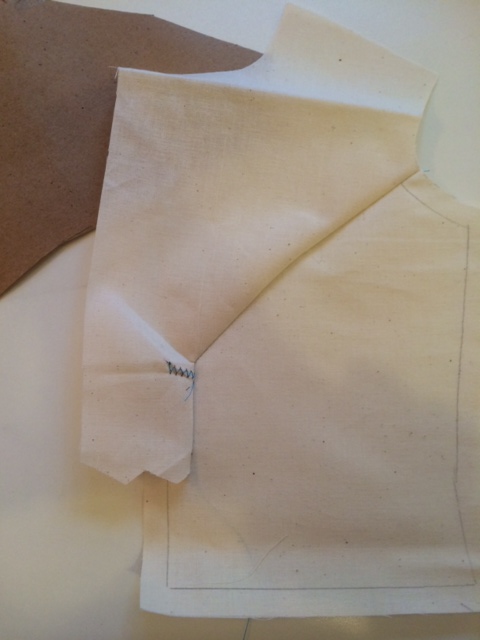
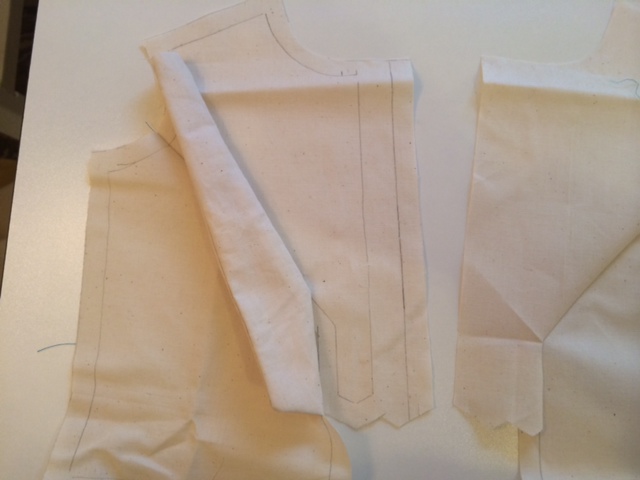
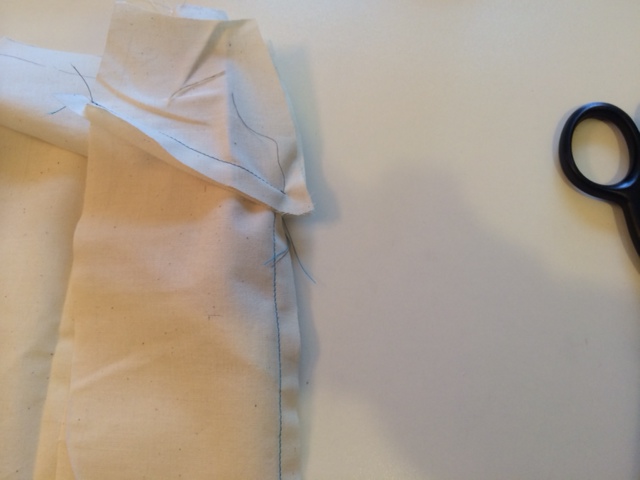
trace off fitted darted sleeve sloper and draw in design stylelines and guide line for cuff facing, like I did with the bodice front and back. Trace off facing, plan for overlap section by tracing off what will need to be added, cut sleeve pieces apart and add extra fullness where the balloon shape is desired. Cut, stitch, topstitch sleeve pieces, overlap and stitch cuff, understitch, and then stitch full underarm seam, turn cuff to wrong side of garment to act as a facing
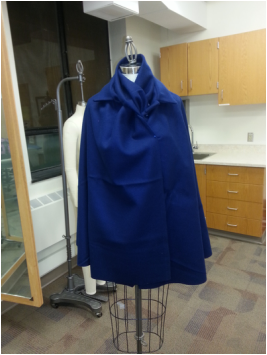
 |  |
Evaluation:
The Challenge: Study your pattern to discover what you can learn and apply to future work. Start with these questions and include any additional insights.
Q.1: Did you stay true to the basic principles of the original pattern?
I did stay true to the basic principles of the original pattern, the flat patterning principles were pretty straight forward, use style lines to cut apart the pattern and then add fullness to create the balloon shape and use parts of the design to anchor the shape.
Q. 2: Where did you move the pattern manipulation and how well did that work?
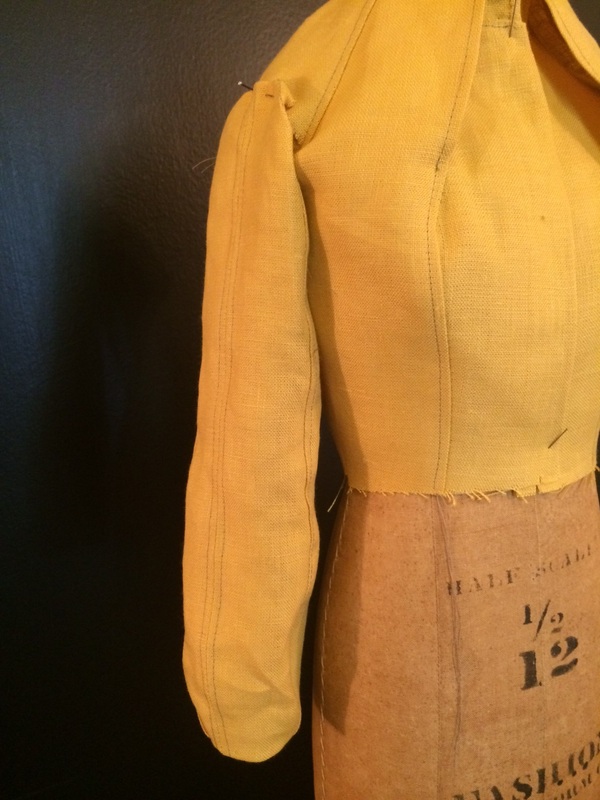
I moved it to the sleeve and this worked well, except I think I should have added more fullness to get the effect that the design has on the bodice neckline. I did like the way the contoured cuff was hidden yet gave structure to the shape of the sleeve. I would love to try it on the waistline of a skirt, I really like this manipulation!
Q. 3: Do all the same rules still apply? Did the need for new rules appear when you made this change?
In general, the same rules apply. I think it is just the proportion that I mentioned earlier
Bonus:
The Challenge: Identify a designer and a picture of their work that uses this pattern technique.
I did not find a good example of this one, but I am already thinking of how I can incorporate it into my projects.
The Challenge: Study your pattern to discover what you can learn and apply to future work. Start with these questions and include any additional insights.
Q.1: Did you stay true to the basic principles of the original pattern?
I did stay true to the basic principles of the original pattern, the flat patterning principles were pretty straight forward, use style lines to cut apart the pattern and then add fullness to create the balloon shape and use parts of the design to anchor the shape.
Q. 2: Where did you move the pattern manipulation and how well did that work?
I moved it to the sleeve and this worked well, except I think I should have added more fullness to get the effect that the design has on the bodice neckline. I did like the way the contoured cuff was hidden yet gave structure to the shape of the sleeve. I would love to try it on the waistline of a skirt, I really like this manipulation!
Q. 3: Do all the same rules still apply? Did the need for new rules appear when you made this change?
In general, the same rules apply. I think it is just the proportion that I mentioned earlier
Bonus:
The Challenge: Identify a designer and a picture of their work that uses this pattern technique.
I did not find a good example of this one, but I am already thinking of how I can incorporate it into my projects.


 RSS Feed
