Analysis of Pattern Application #1:
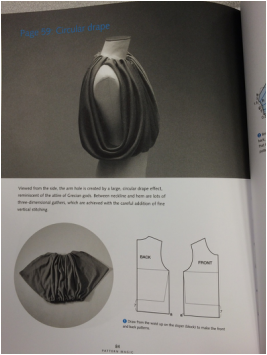
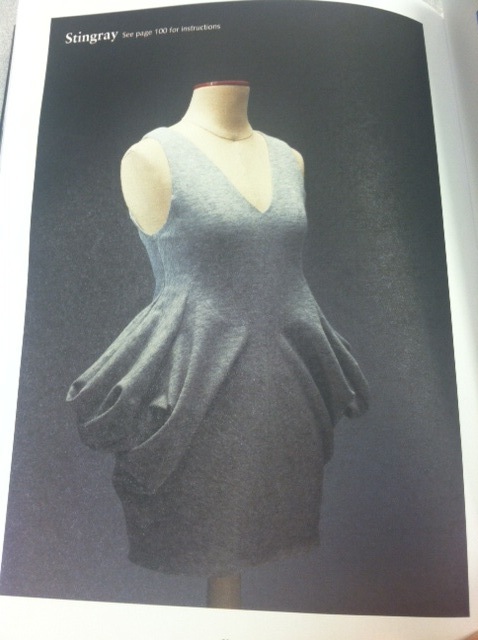
According to Nakamichi (2012, p. 79), this method creates an apple peel shape pattern, which multiples the effect when worn through generating more “ripples.”
Applying the “Apple Peel A” technique
NOTE: I found that all the measurements that Nakamichi gave in her book (e.g. 2012, p. 79) should fit an extra-small to small American woman.
Step 1:
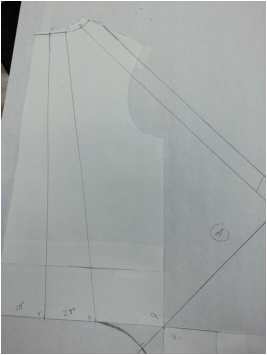
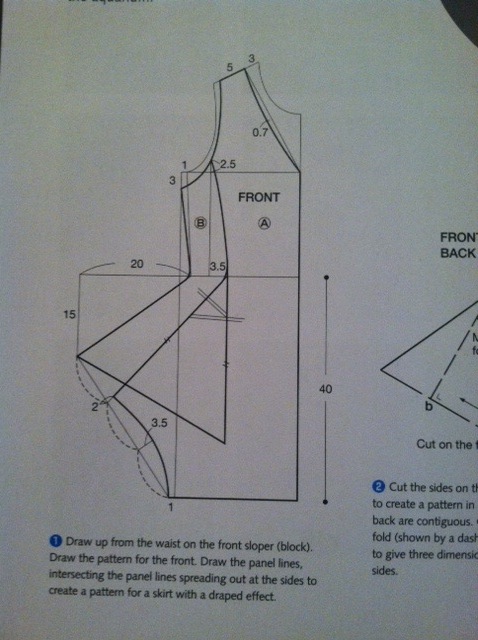
For the purposes of creating this Nakamichi pattern technique, I drafted the pattern according to her exact instructions in her book; I used the measurements that she gave.
- This Nakamichi pattern technique uses pattern principle #2 added fullness or one-sided fullness to be specific.
- The basic principles of this pattern are described in the patternmaking textbook by Joseph-Armstrong (2010, p. 133) as one-sided fullness, which is defined as “one side of a pattern is spread to increase fullness, forming an arc shape at the top and bottom.”
- I think the basic rules of this pattern are to create one-sided fullness using traditional patterndrafting methods to convey a play on a traditional idea. This concept is similar to the circle application for creating cascades (Joseph-Armstrong, 2010, pp. 288 – 290) although due to maintaining one side of a pattern, the cascade concept would not work as efficiently.
- For the case of “Apple Peel A,” I believe the pattern principle of added fullness, i.e. one-sided fullness, holds true. Nakamichi demonstrates that her ideal can be patterned using traditional pattern methods.
- I did not discover any “broken” patterning rules for this technique. Nakamichi upheld to traditional patternmaking rules while creating her design.
According to Nakamichi (2012, p. 79), this method creates an apple peel shape pattern, which multiples the effect when worn through generating more “ripples.”
Applying the “Apple Peel A” technique
NOTE: I found that all the measurements that Nakamichi gave in her book (e.g. 2012, p. 79) should fit an extra-small to small American woman.
Step 1:
For the purposes of creating this Nakamichi pattern technique, I drafted the pattern according to her exact instructions in her book; I used the measurements that she gave.
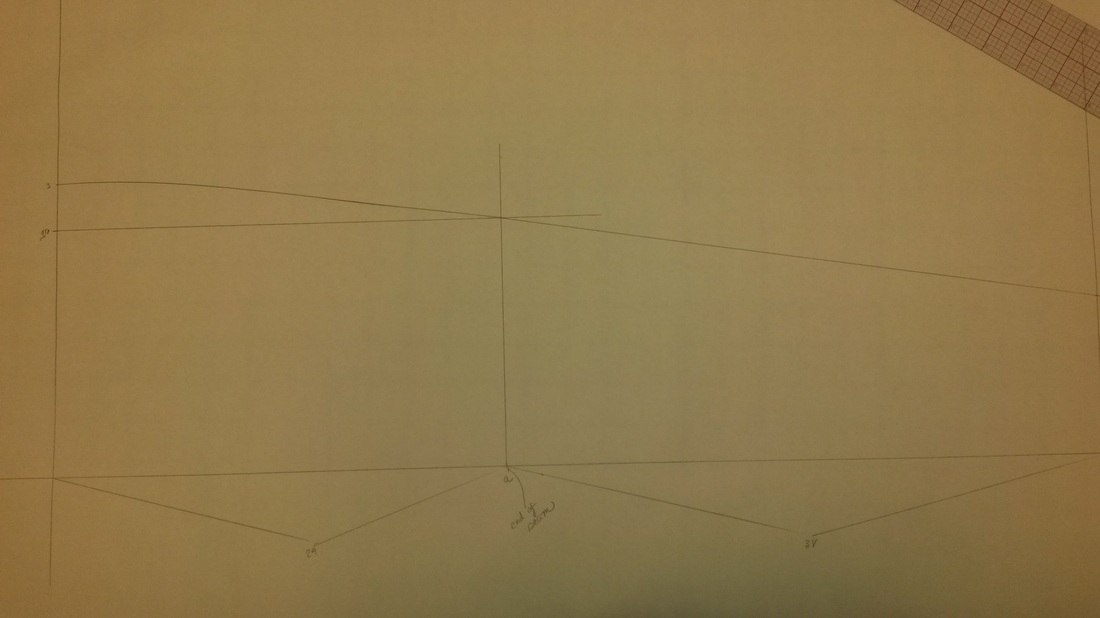
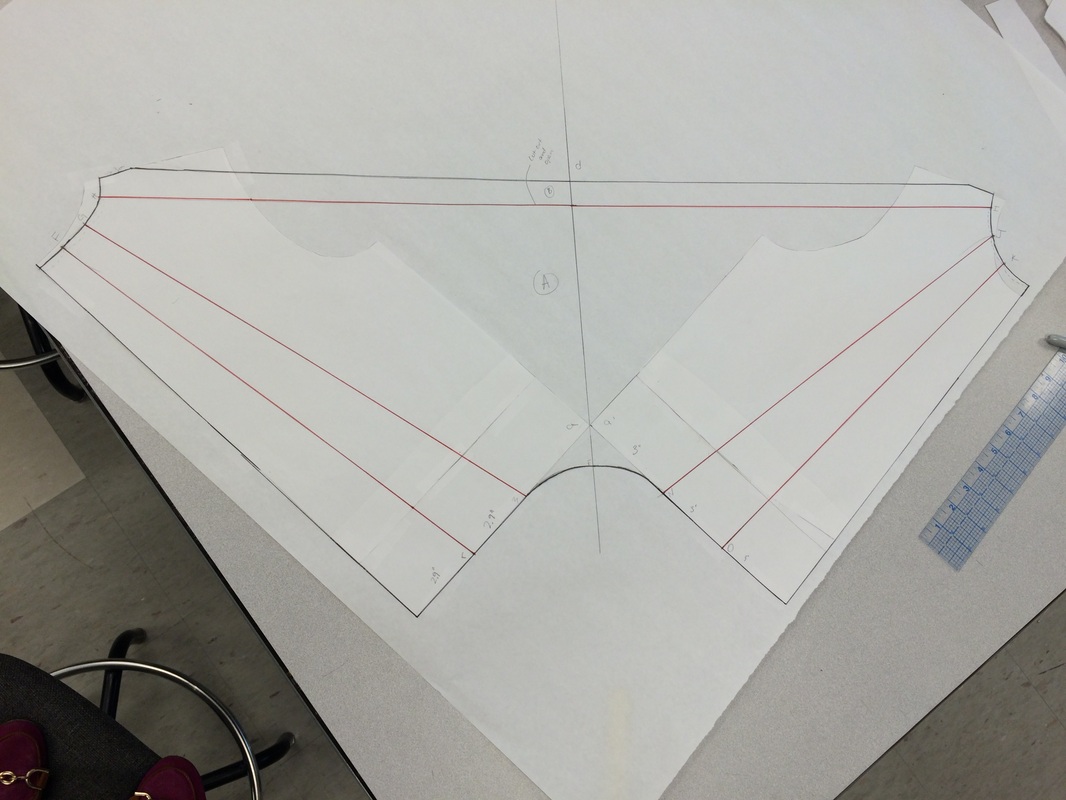
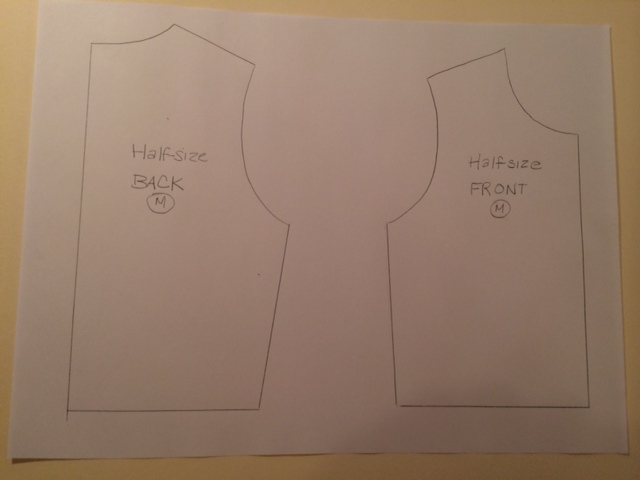
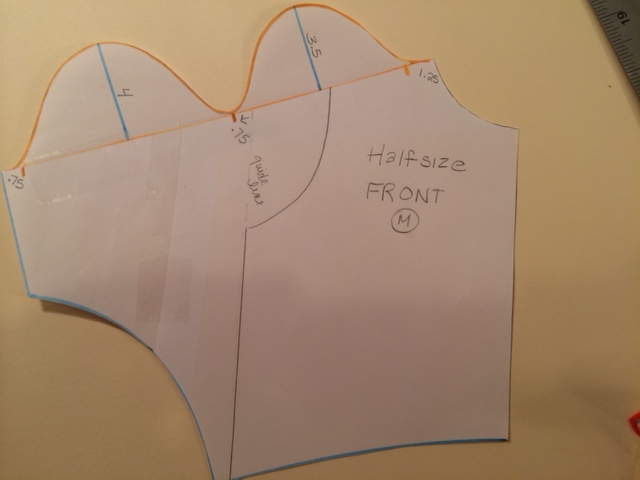
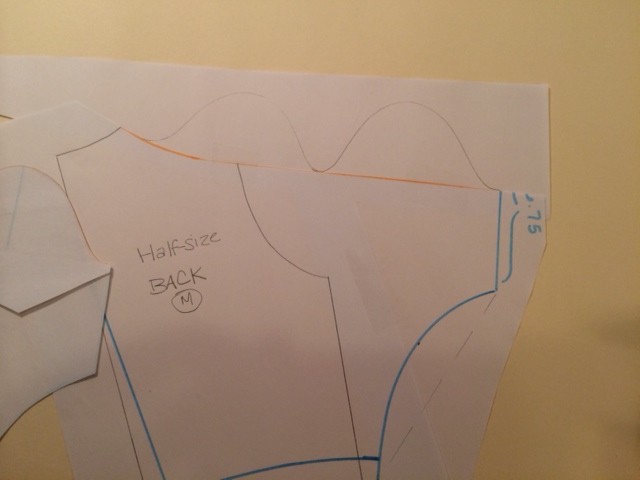
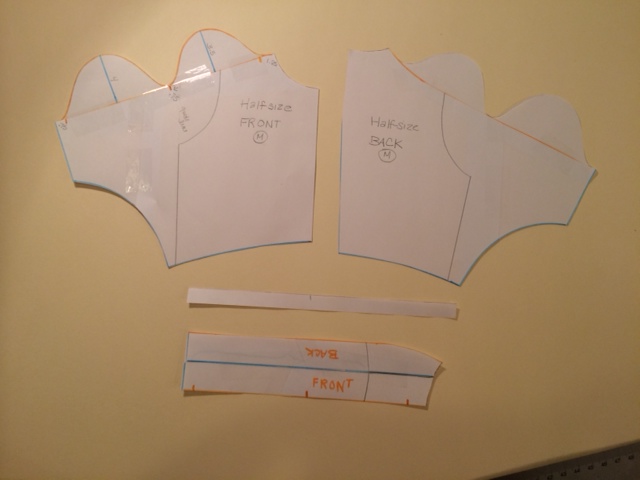
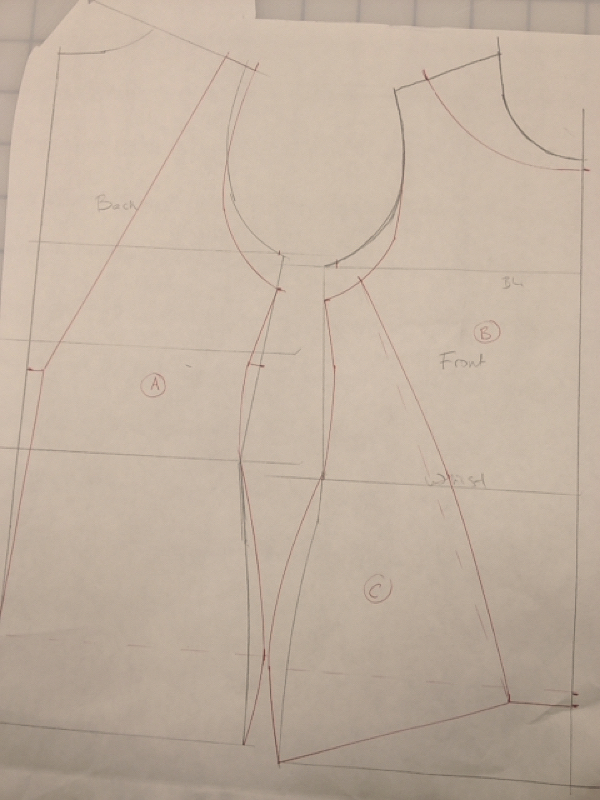
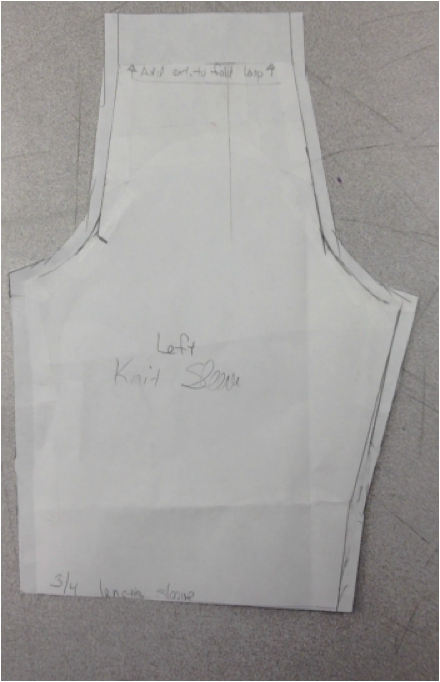
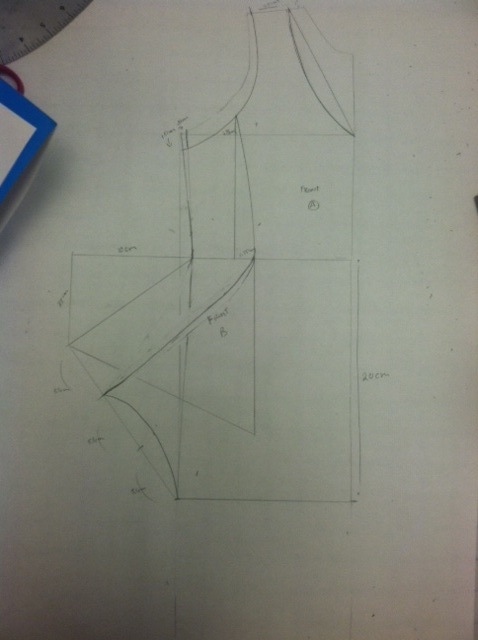
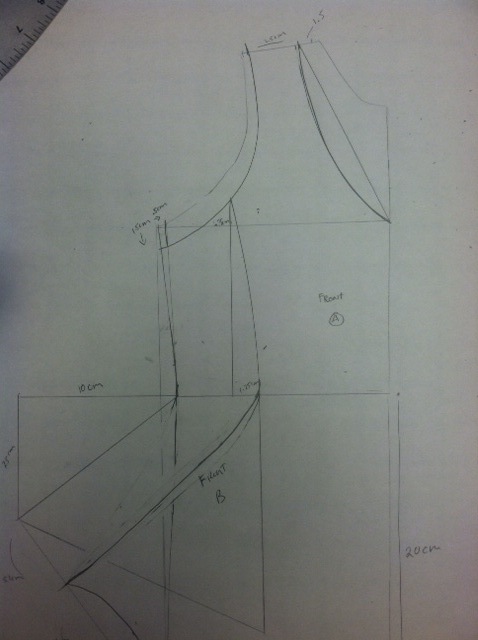
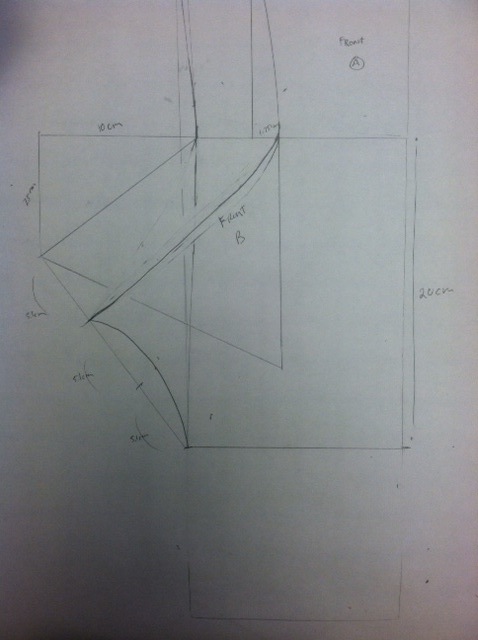
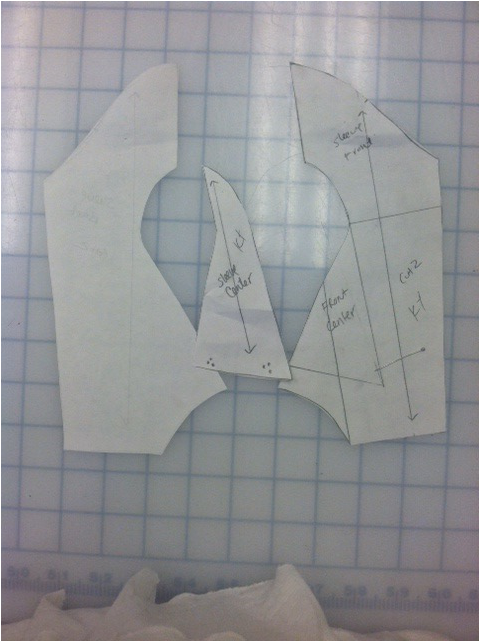
“Apple Peel A” – Foundation Pattern According to Nakamichi’s Measurements
Step 2:
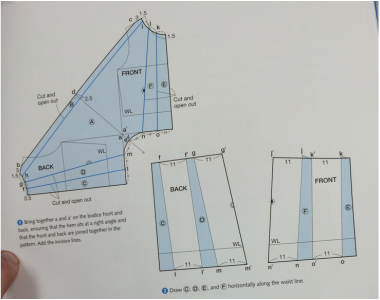
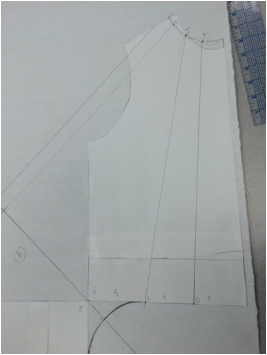
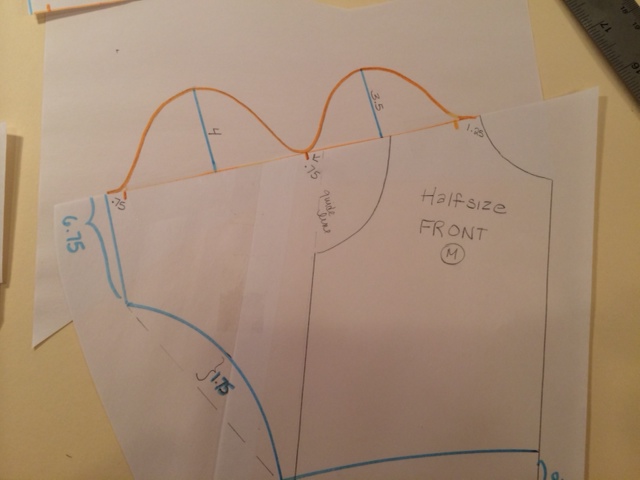
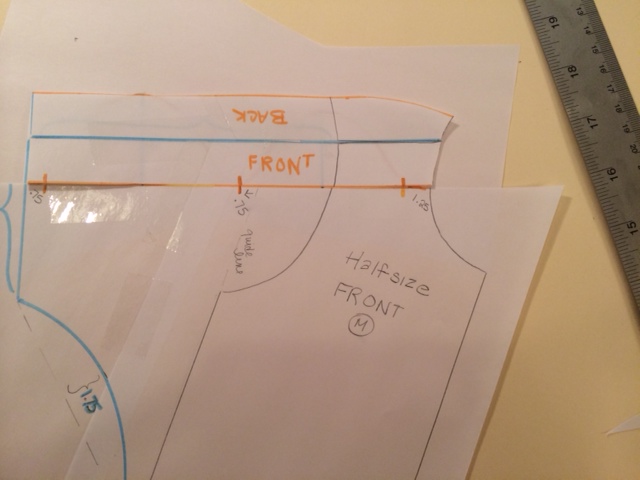
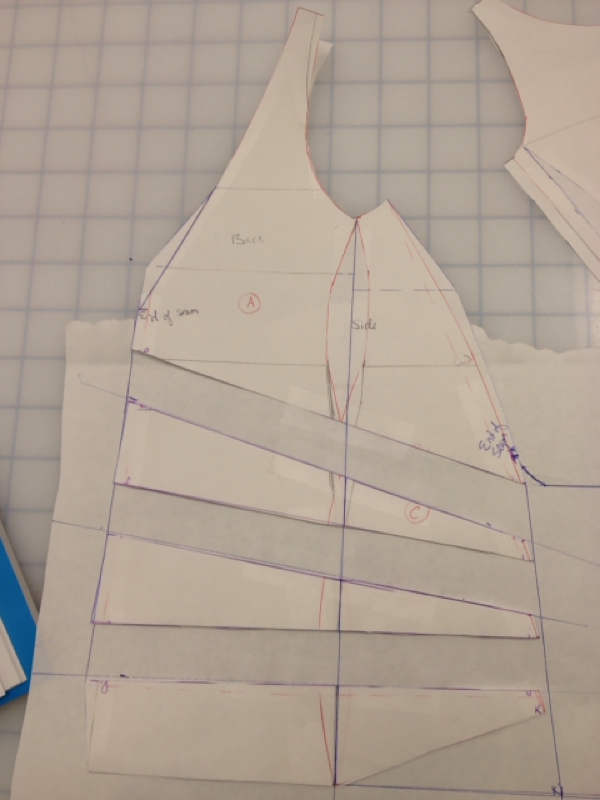
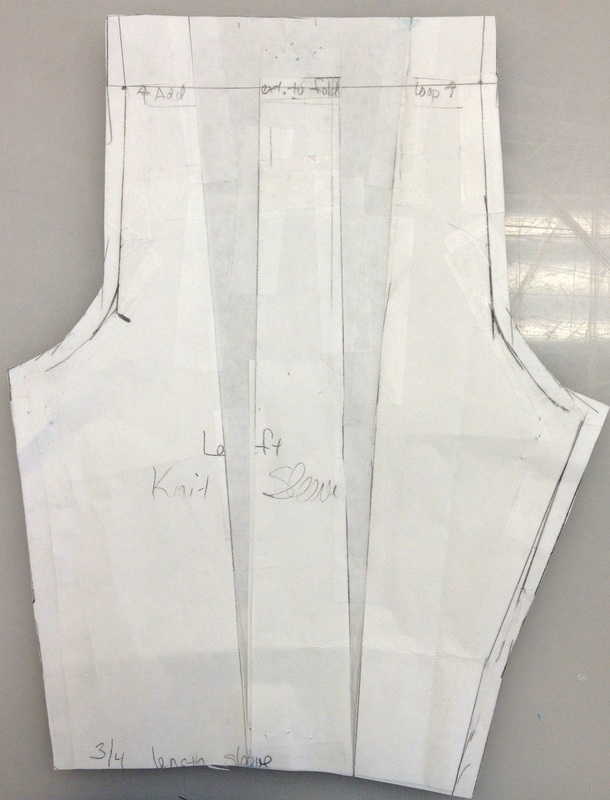
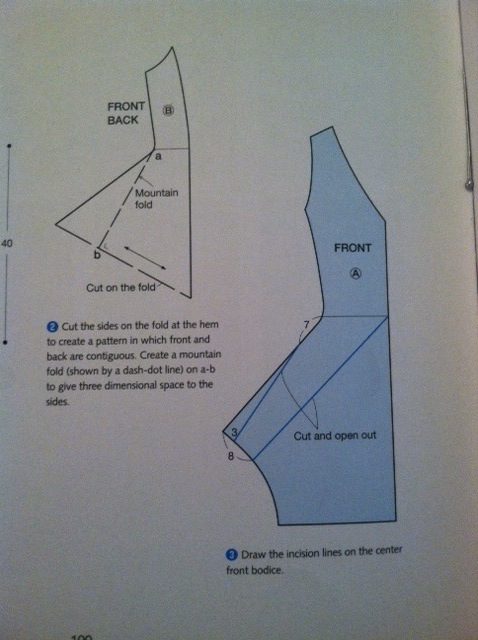
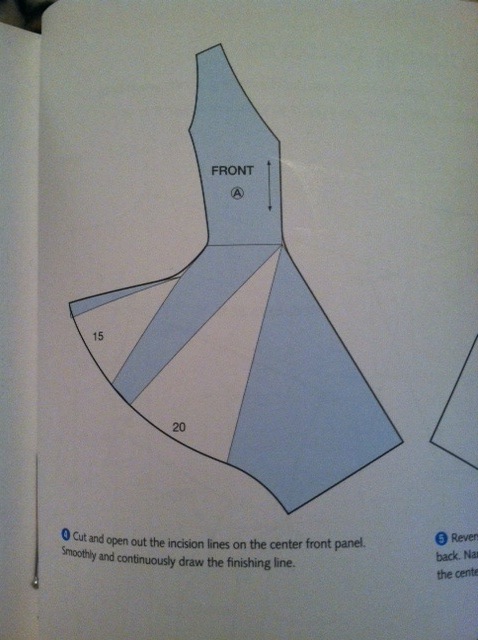
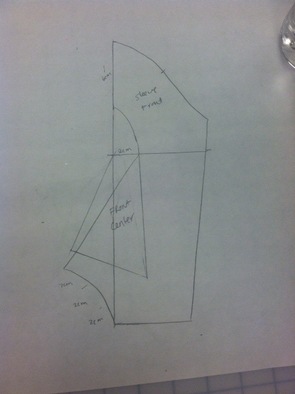
Following Nakamichi’s instructions in her book (e.g. 2012, p. 79), I made incision lines on the pattern foundation.
NOTE: Nakamichi shows 11 incision lines in her book, which creates 12 divisions. My slashed lines (vertically) begin at point a and were approximately 3 1/5 cm apart with the last line being about 2 4/5 cm from point b.
Step 2:
Following Nakamichi’s instructions in her book (e.g. 2012, p. 79), I made incision lines on the pattern foundation.
NOTE: Nakamichi shows 11 incision lines in her book, which creates 12 divisions. My slashed lines (vertically) begin at point a and were approximately 3 1/5 cm apart with the last line being about 2 4/5 cm from point b.
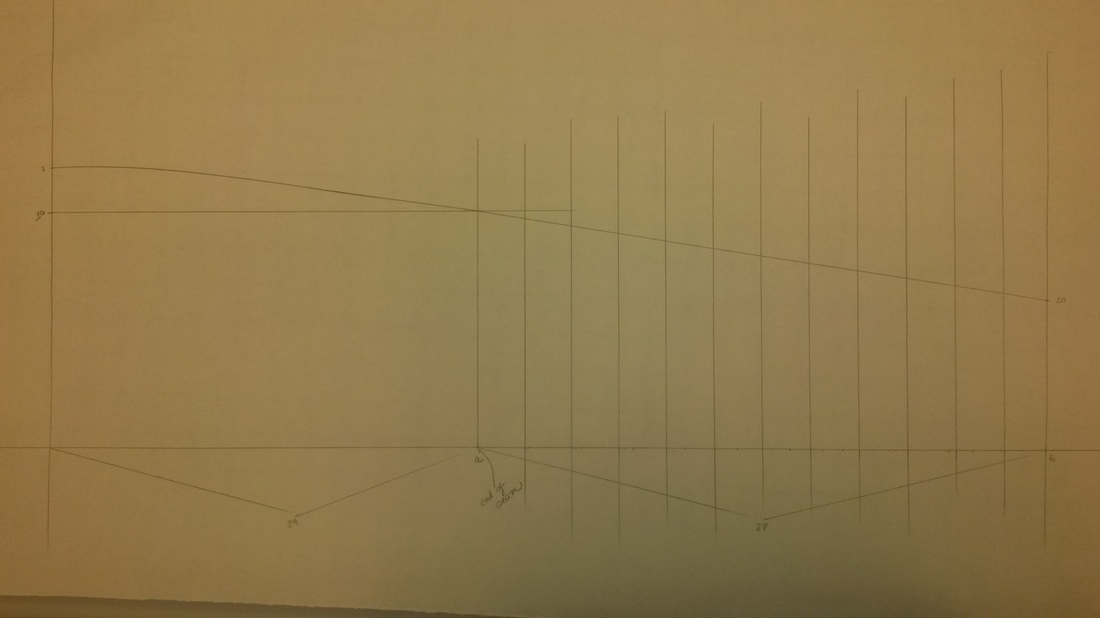
Click here to “Apple Peel A” - Adding Incision Lines
Step 3:
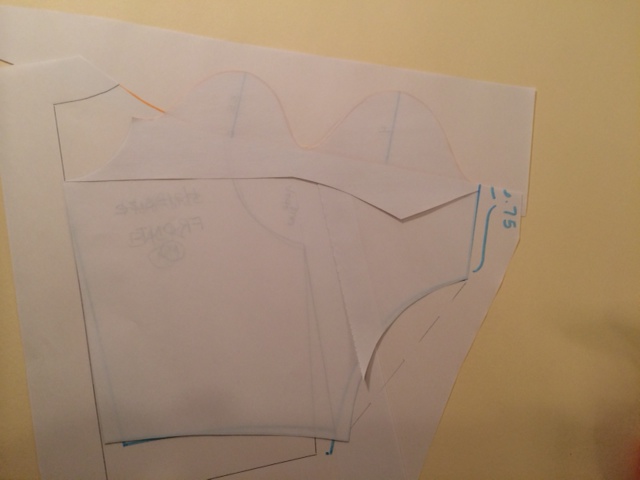
Slash the vertical incision lines beginning from the top of the pattern down to the bottom edge but not completely through the end of the line (about 1/16” from the edge).
NOTE: Nakamichi does not specify the amount of spread between each incision piece. I used the picture in the book as a visual guide to estimate about how far apart I thought the incision pieces might be. Most of my pieces ranged from approximately one to 2 inches based on Nakamichi’s picture of the design (e.g. 2012, p. 79).
edit.
Step 3:
Slash the vertical incision lines beginning from the top of the pattern down to the bottom edge but not completely through the end of the line (about 1/16” from the edge).
NOTE: Nakamichi does not specify the amount of spread between each incision piece. I used the picture in the book as a visual guide to estimate about how far apart I thought the incision pieces might be. Most of my pieces ranged from approximately one to 2 inches based on Nakamichi’s picture of the design (e.g. 2012, p. 79).
edit.

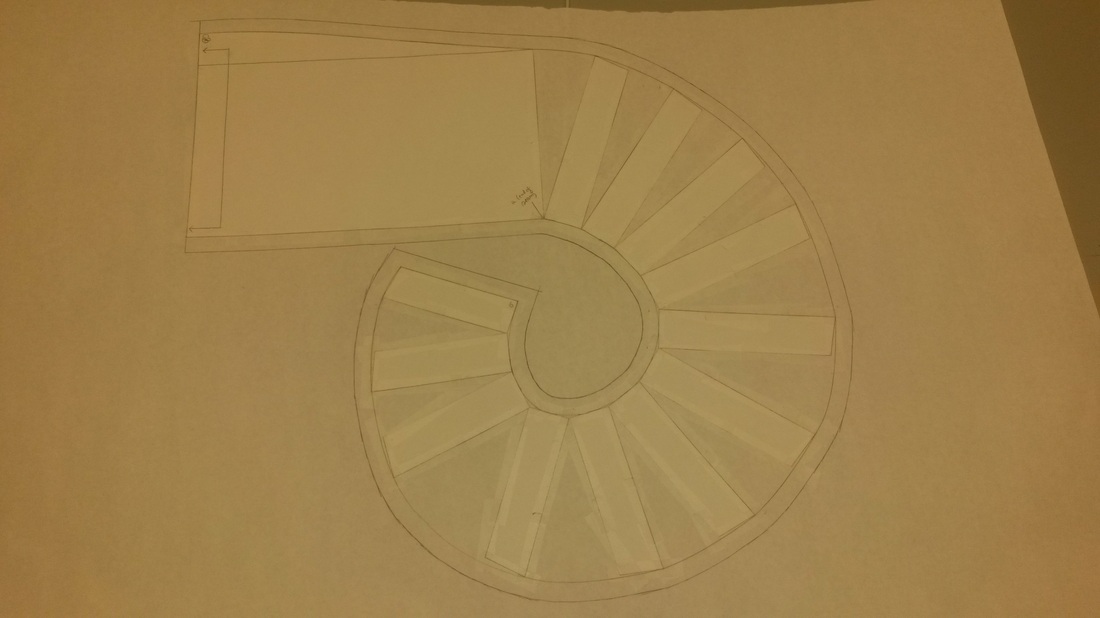
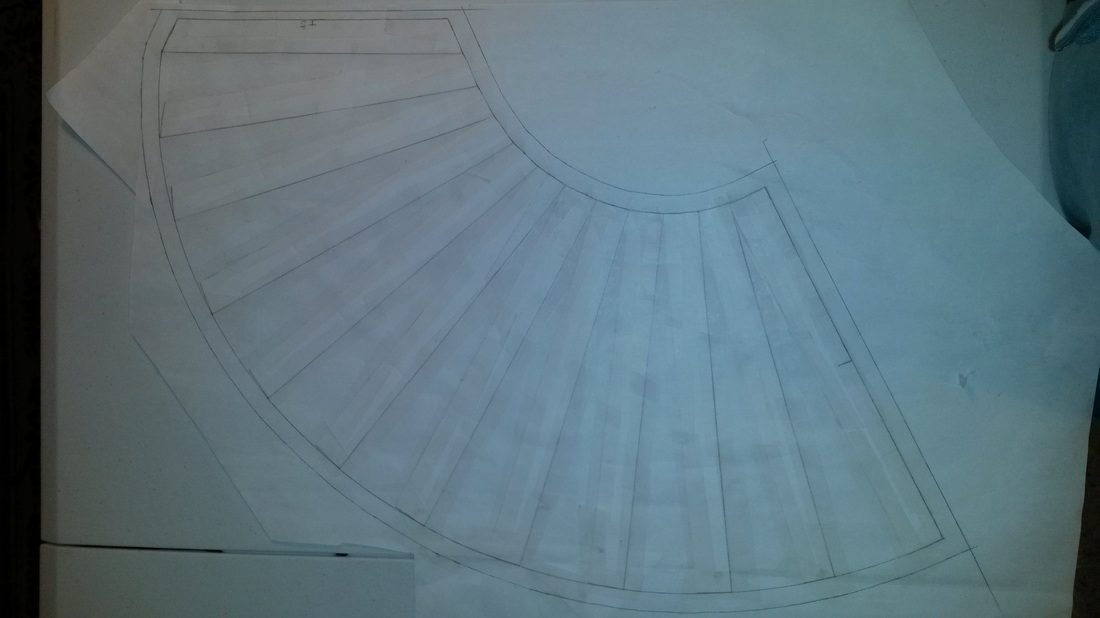
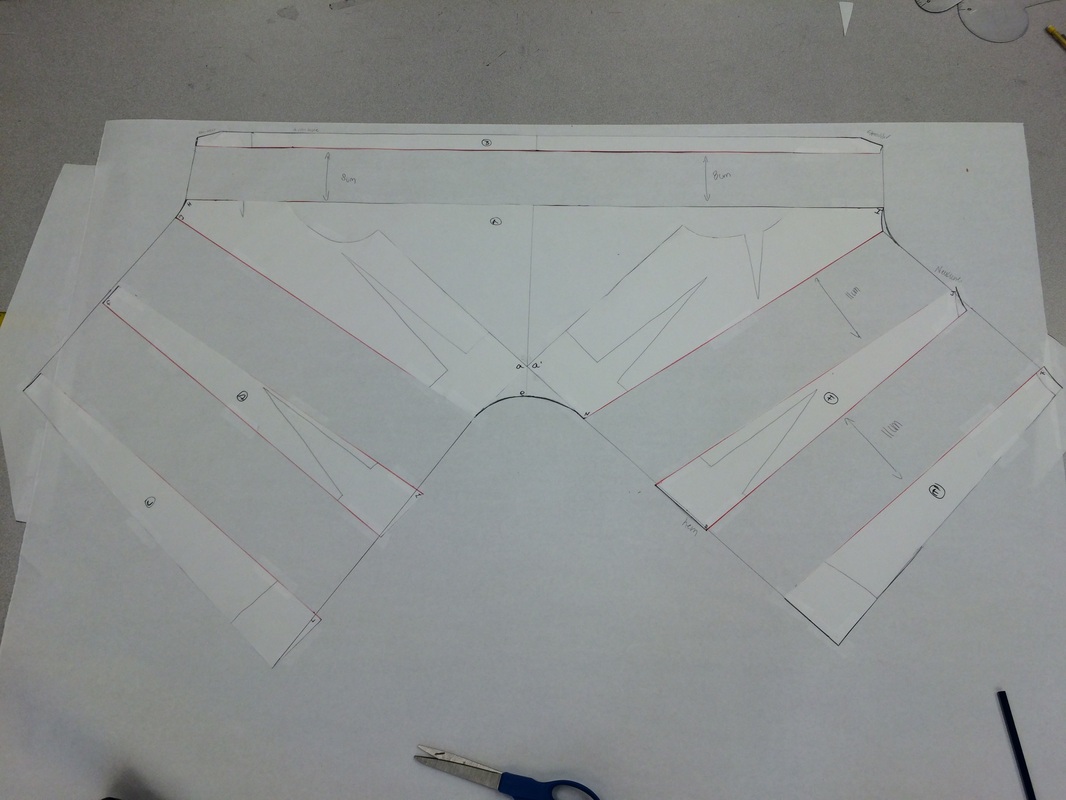
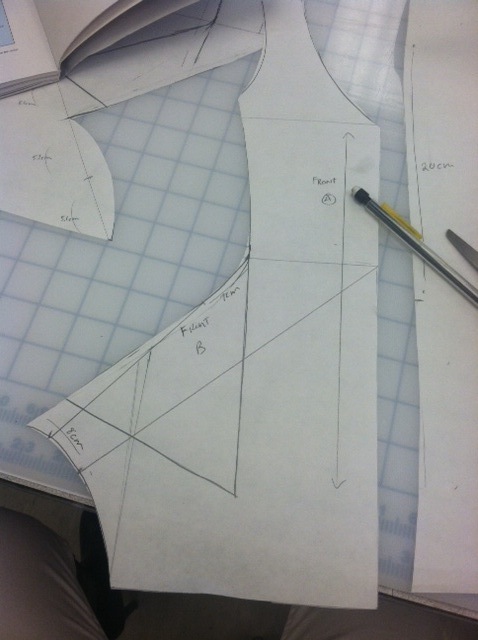
“Apple Peel A” – Spreading Incision Lines
Step 4:
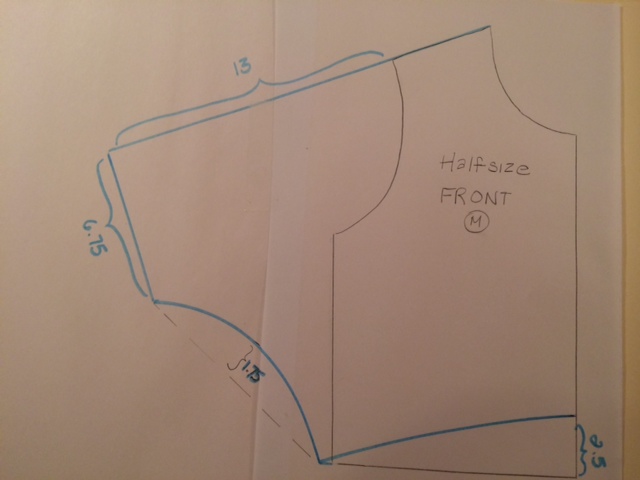
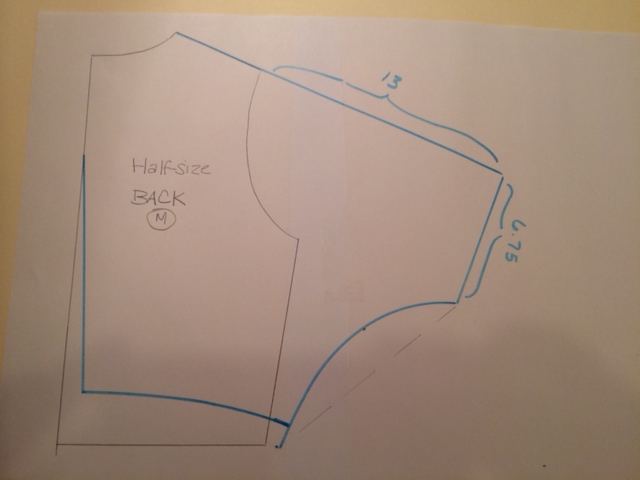
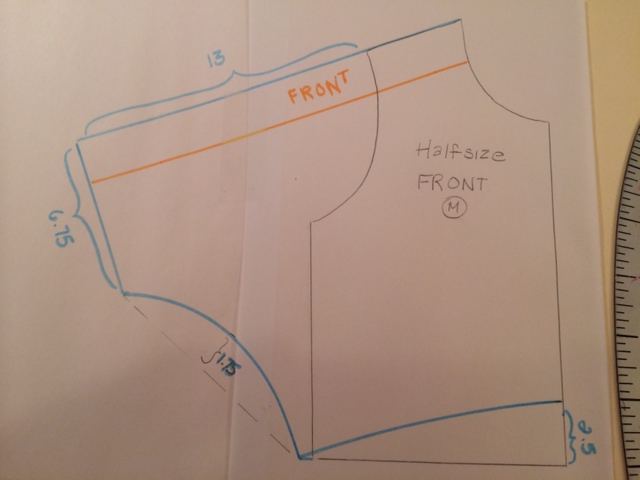
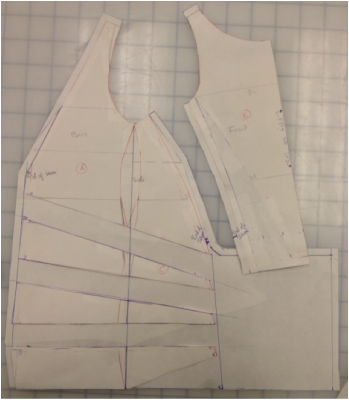
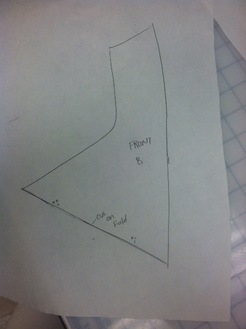
Next I reshaped the edges of the slashed and spread incision lines using a French curve. Mark the center back of the pattern and draw a cut-on-fold grainline along the center back of the pattern. Add seam allowances to the pattern piece. Cut out paper pattern piece.
Step 4:
Next I reshaped the edges of the slashed and spread incision lines using a French curve. Mark the center back of the pattern and draw a cut-on-fold grainline along the center back of the pattern. Add seam allowances to the pattern piece. Cut out paper pattern piece.
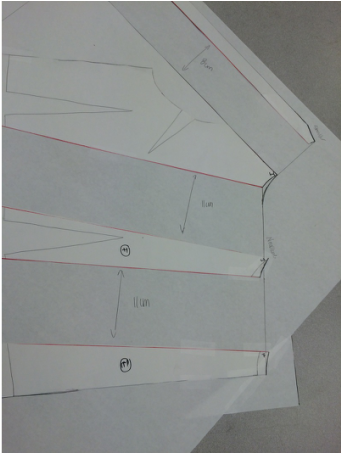
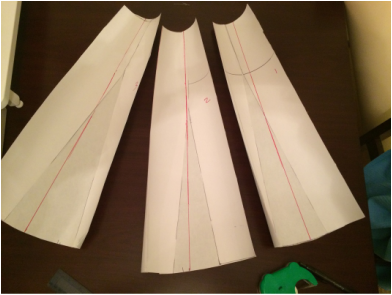
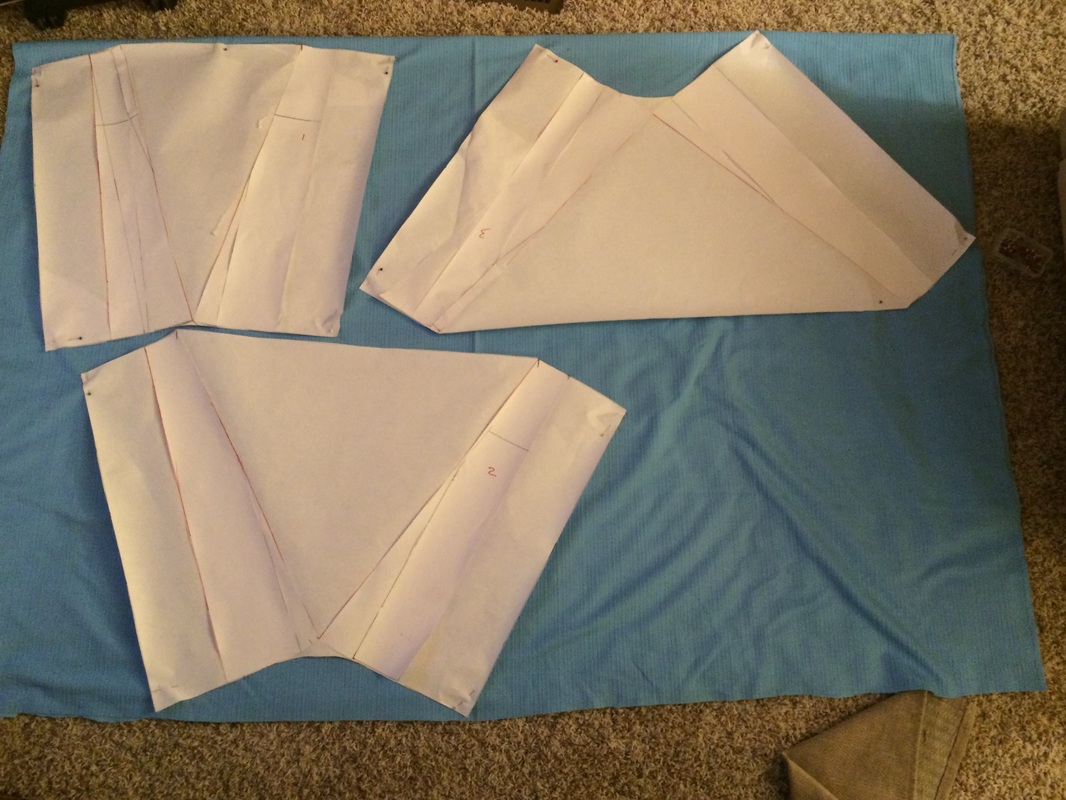
“Apple Peel A” – Reshape Edges, Add Grainline, and Add Seam Allowance
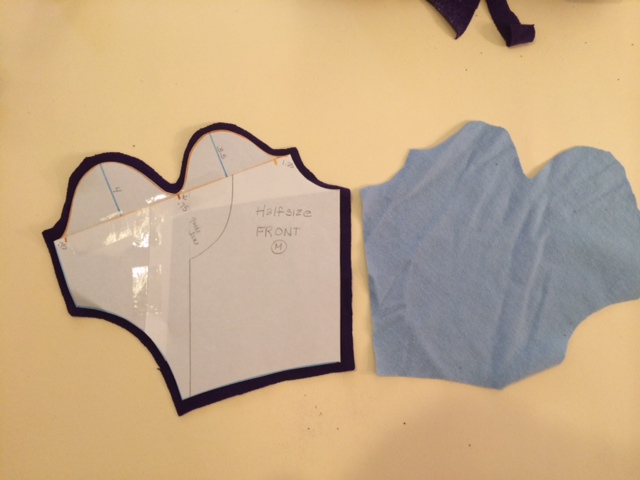
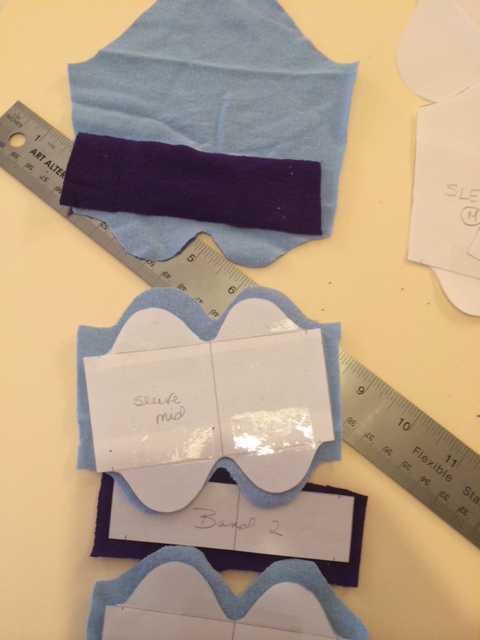
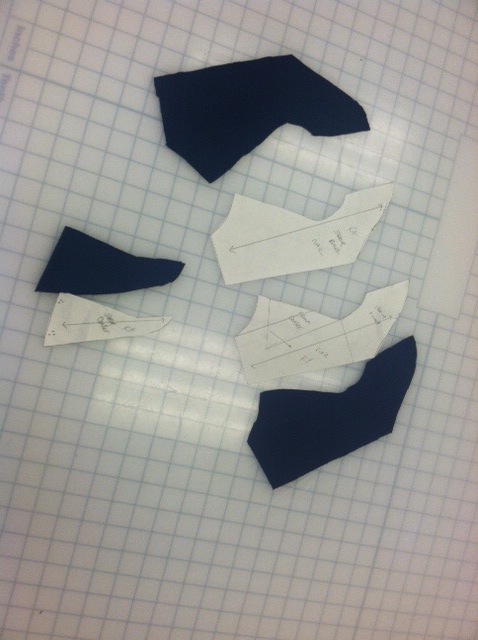
Step 5:
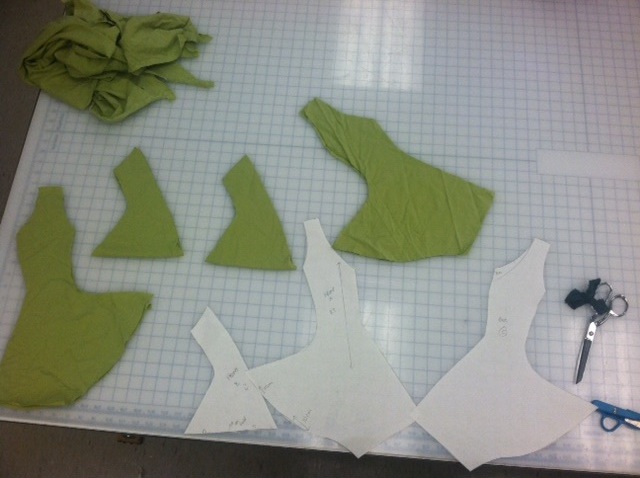
Using my newly drafted pattern, I placed the pattern on my fabrics and cut out my pieces.
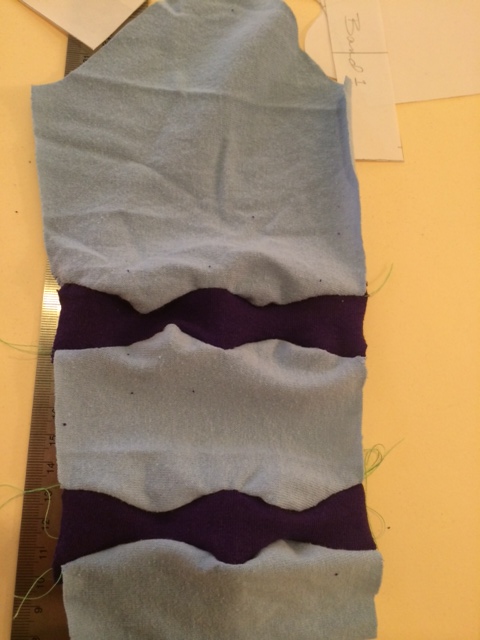
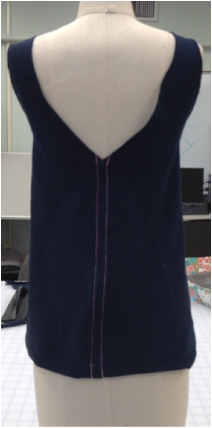
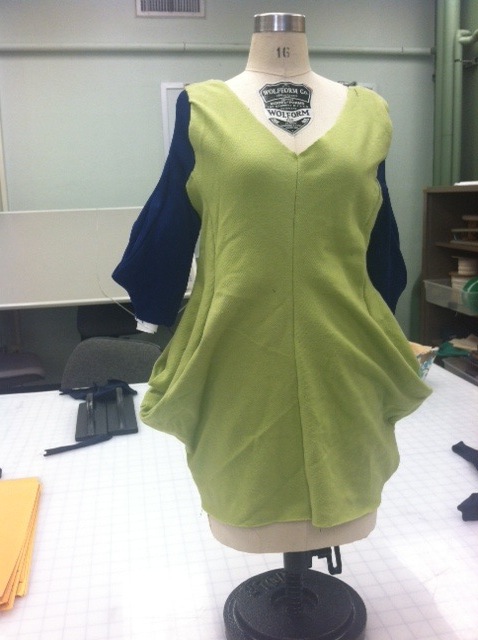
NOTE: I started cutting my first pattern out forgetting to place it on the fold; I had already chosen to use contrasting fabrics for the front and back due to the fact that I did not have much knit fabric left that would allow me to cut such large pieces. Therefore, I had to resort to cutting the pattern out twice, not on the fold, which caused there to be a seamline down the center back. I think that it turned out just fine in spite of that fact although I feel it adds a slight amount of bulk in the center back.
Step 5:
Using my newly drafted pattern, I placed the pattern on my fabrics and cut out my pieces.
NOTE: I started cutting my first pattern out forgetting to place it on the fold; I had already chosen to use contrasting fabrics for the front and back due to the fact that I did not have much knit fabric left that would allow me to cut such large pieces. Therefore, I had to resort to cutting the pattern out twice, not on the fold, which caused there to be a seamline down the center back. I think that it turned out just fine in spite of that fact although I feel it adds a slight amount of bulk in the center back.
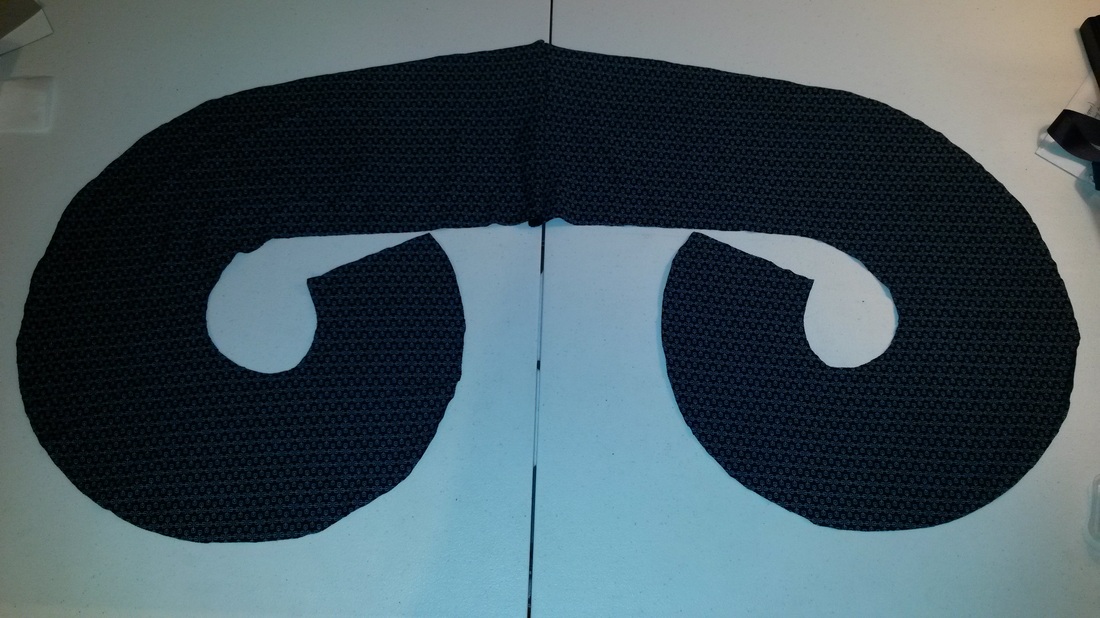
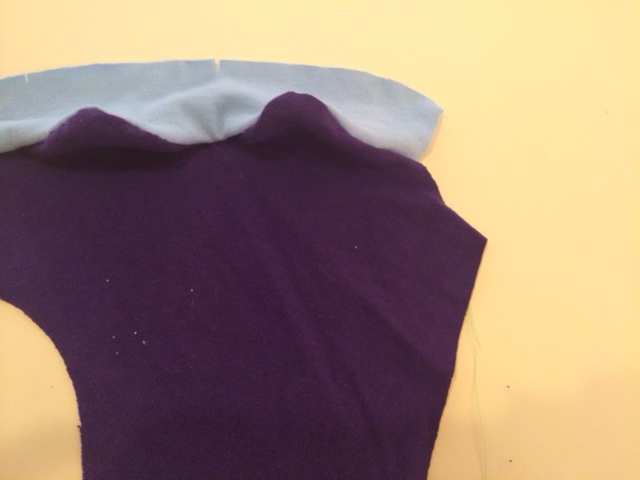
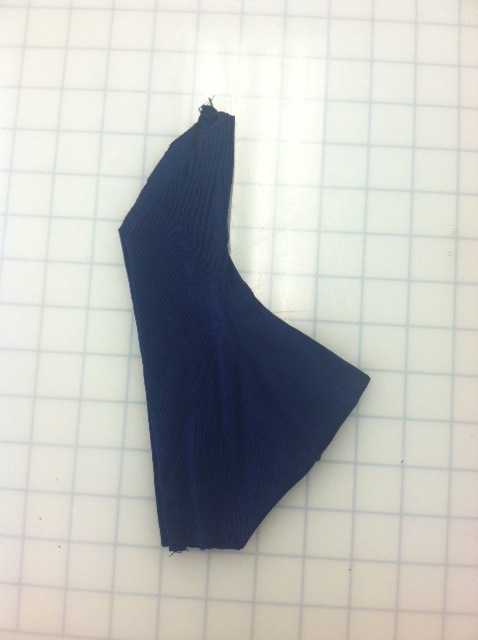
“Apple Peel A” – Back Fabric Piece of Contrasting Fabric
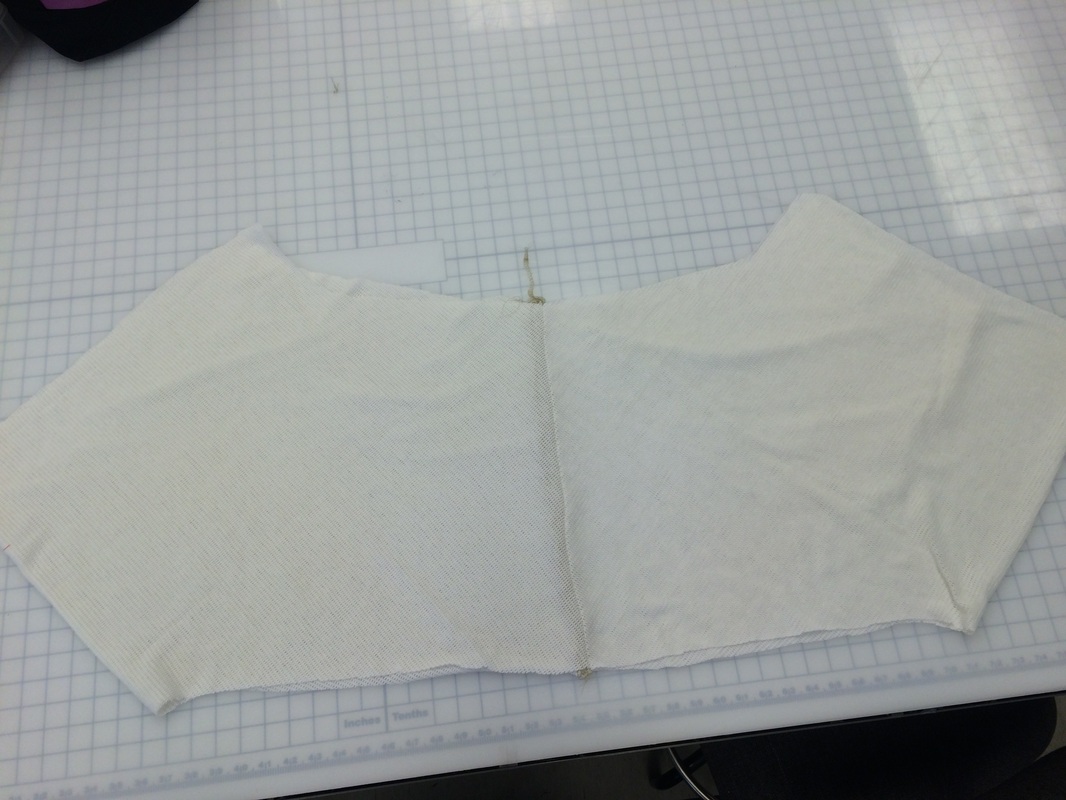
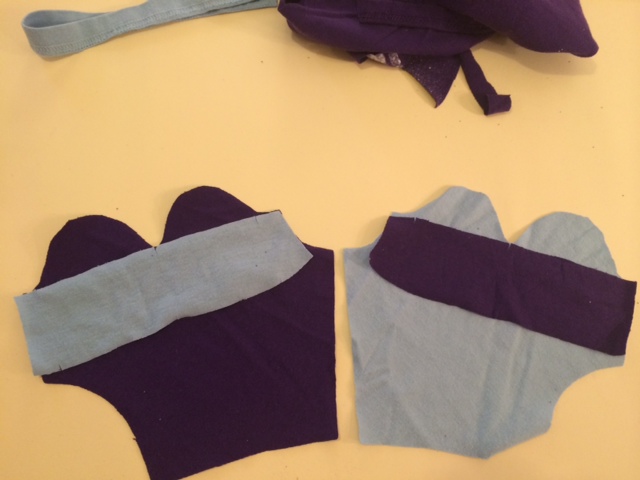
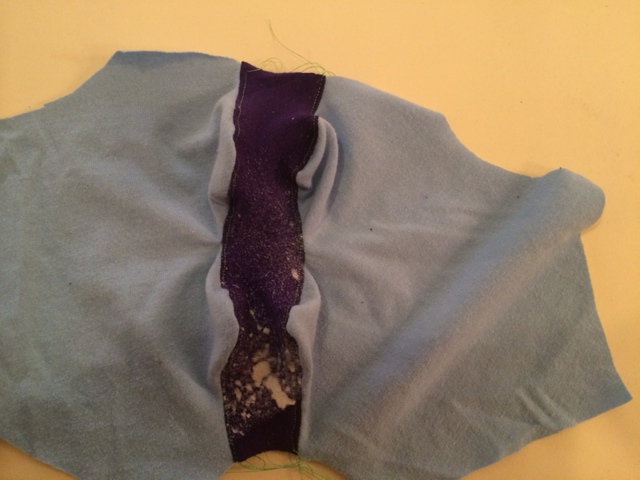
Step 6
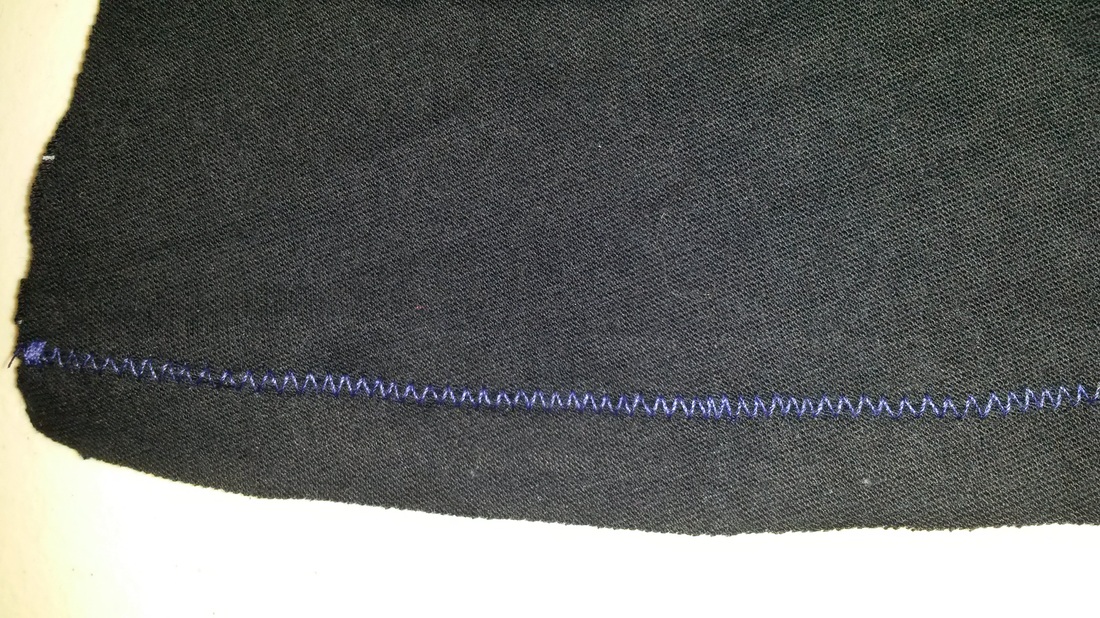
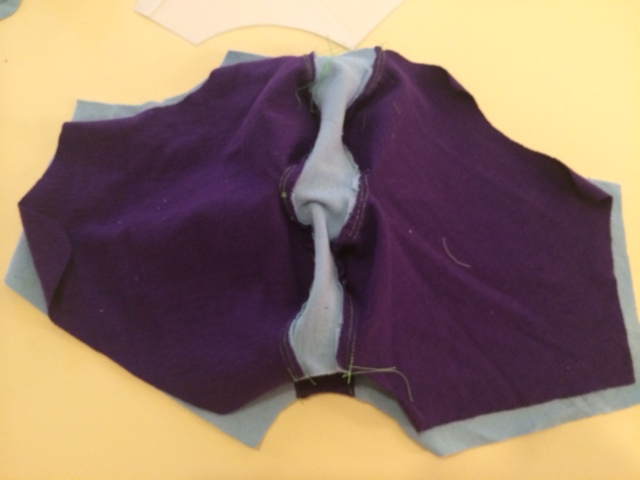
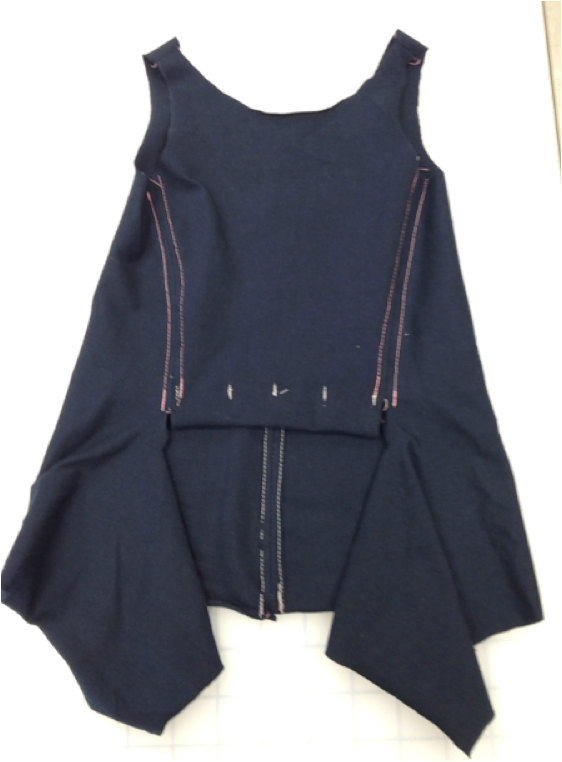
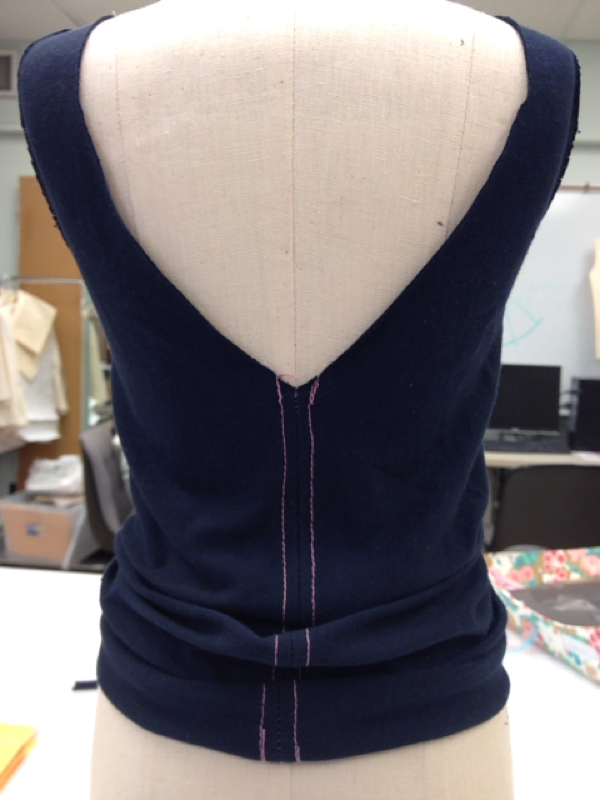
In my case, I had to sew the center back seam together (right side to right side); I used a zigzag stitch to sew my pieces together. Then I pinned both of my “Apple Peel A” fabric pieces together (right side to right side) and stitched them together using a zigzag stitch.
Step 6
In my case, I had to sew the center back seam together (right side to right side); I used a zigzag stitch to sew my pieces together. Then I pinned both of my “Apple Peel A” fabric pieces together (right side to right side) and stitched them together using a zigzag stitch.
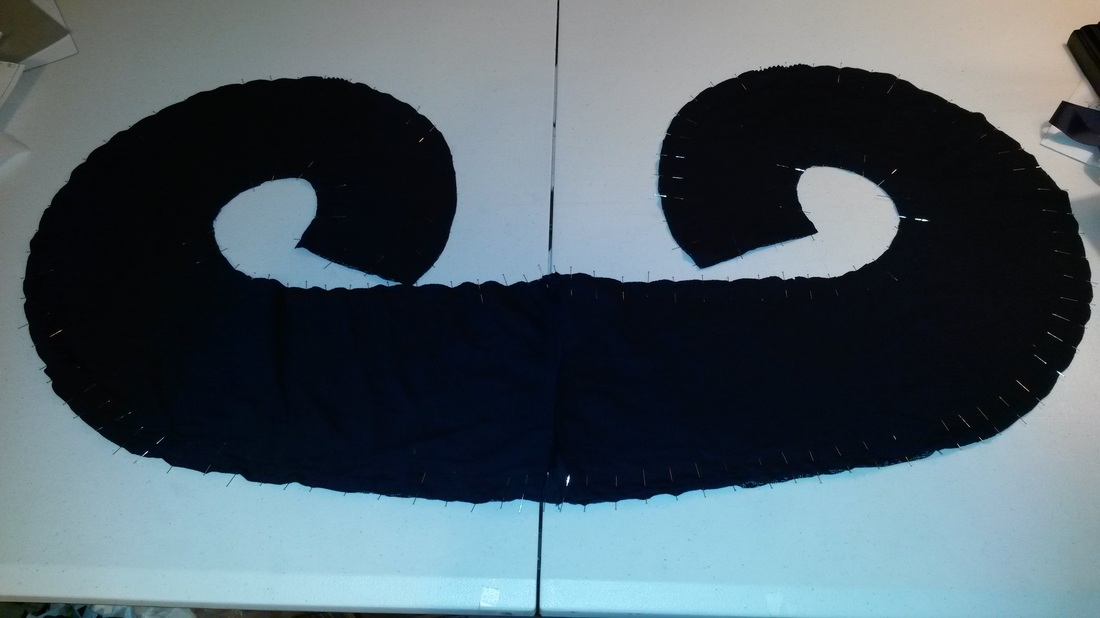
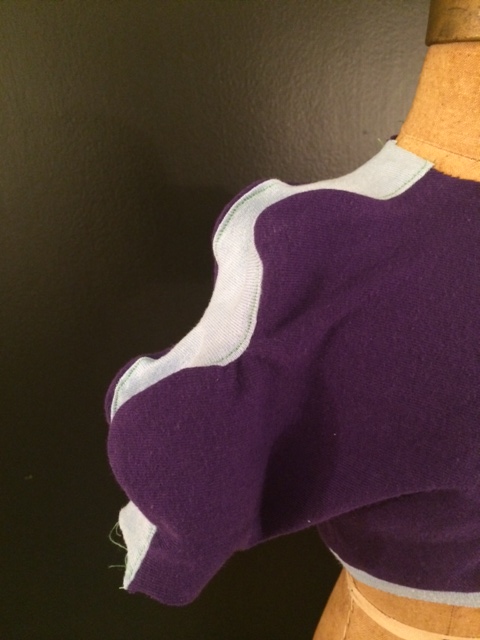
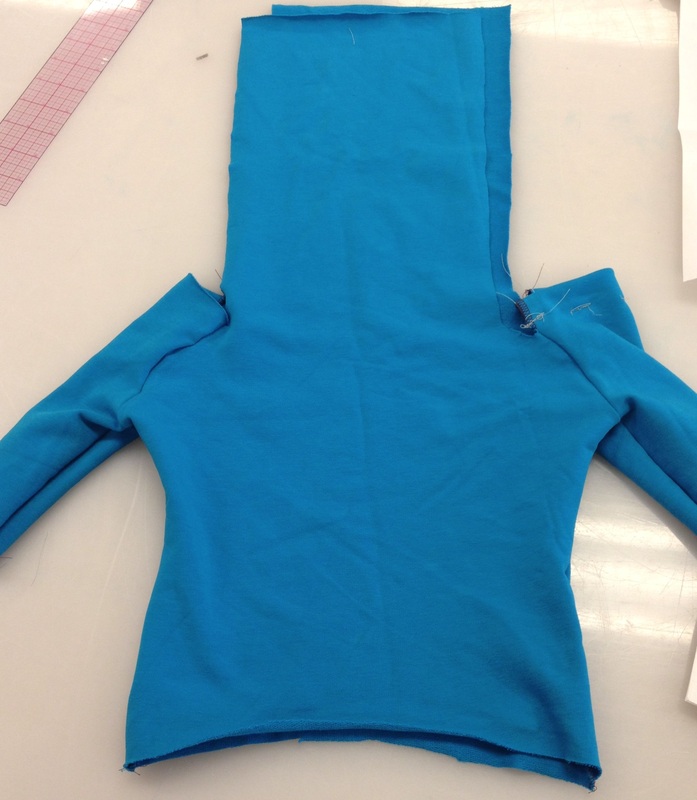
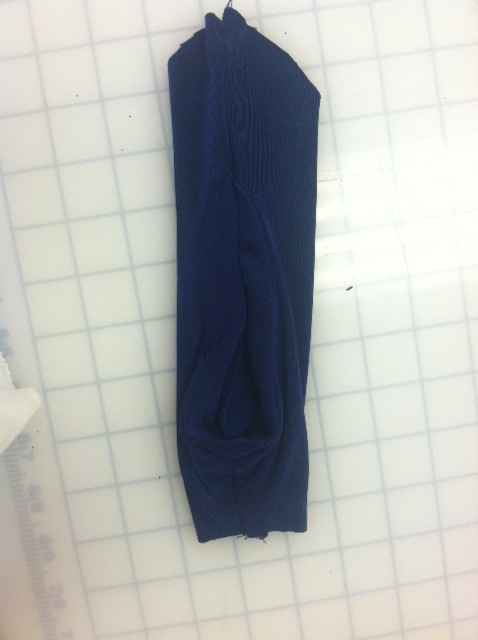
“Apple Peel A – Pin Right Sides Together and Sew
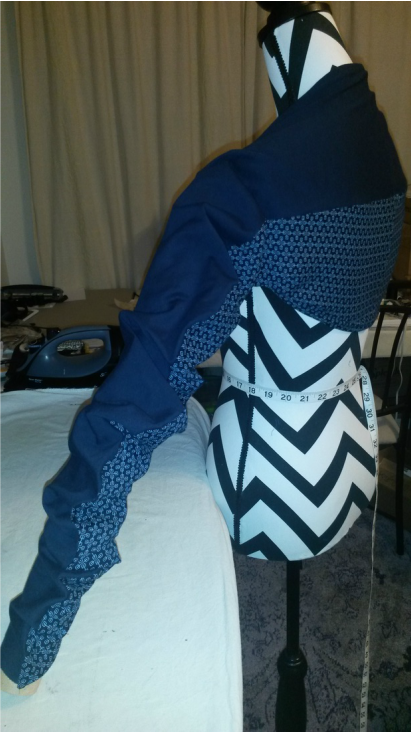
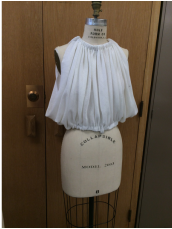
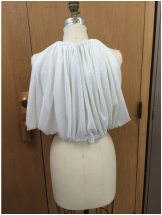
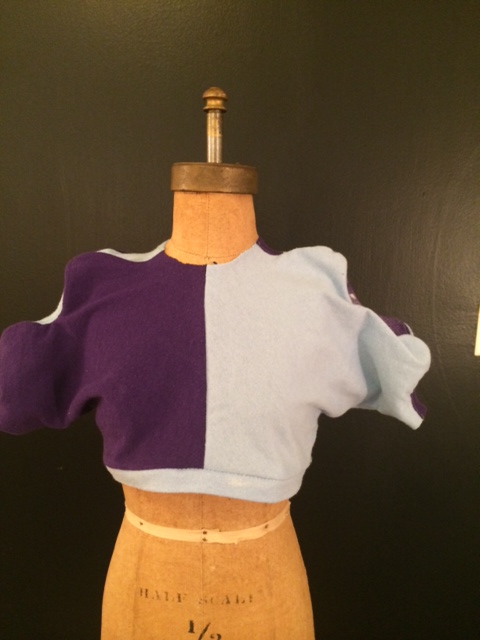
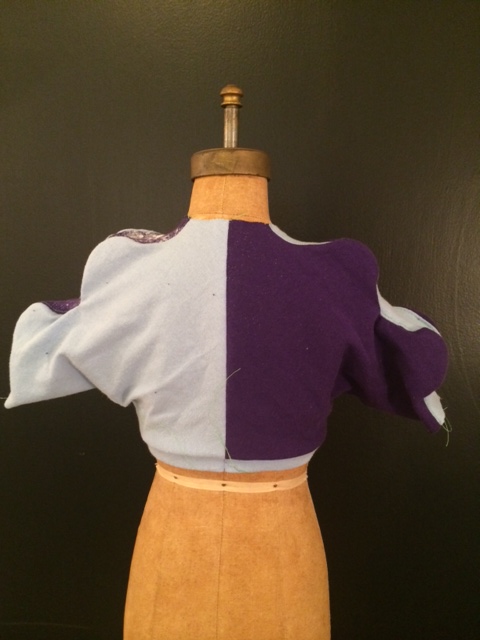
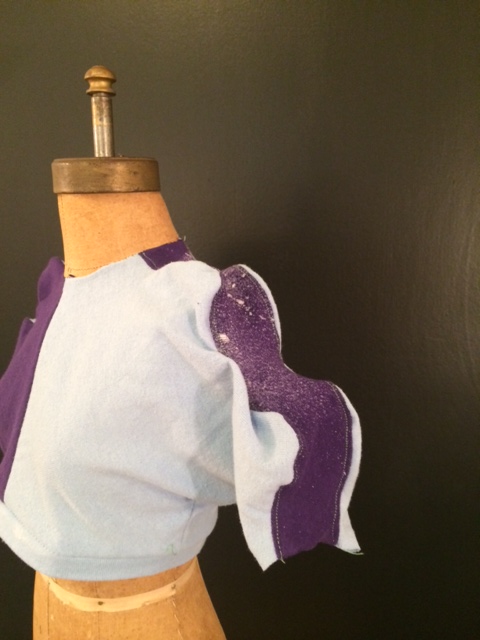
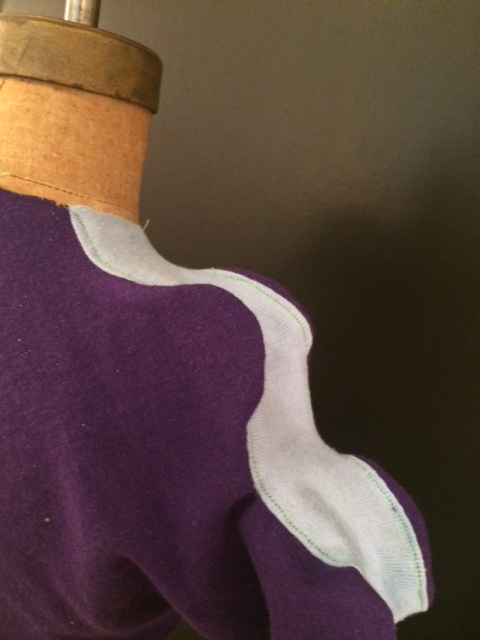
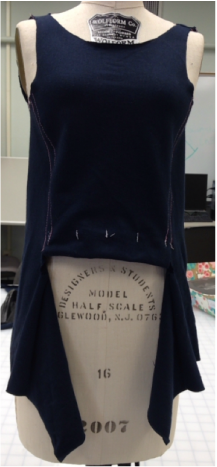
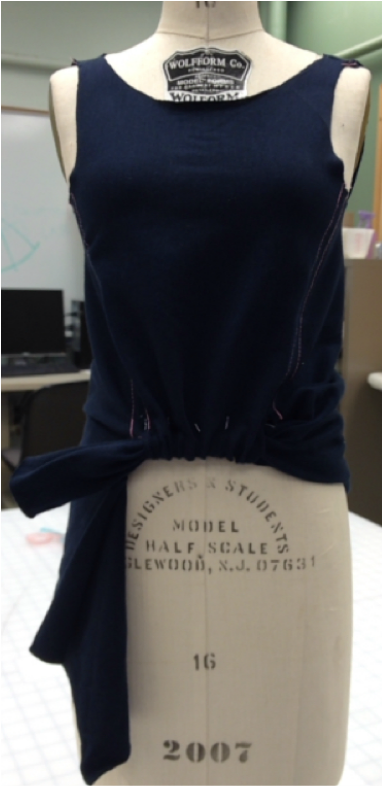
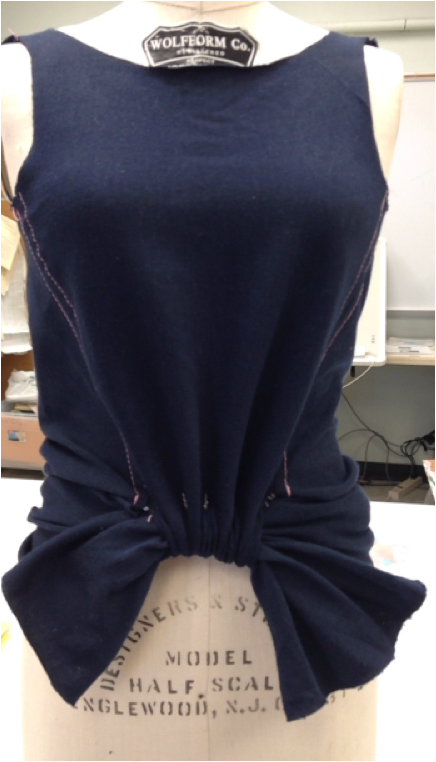
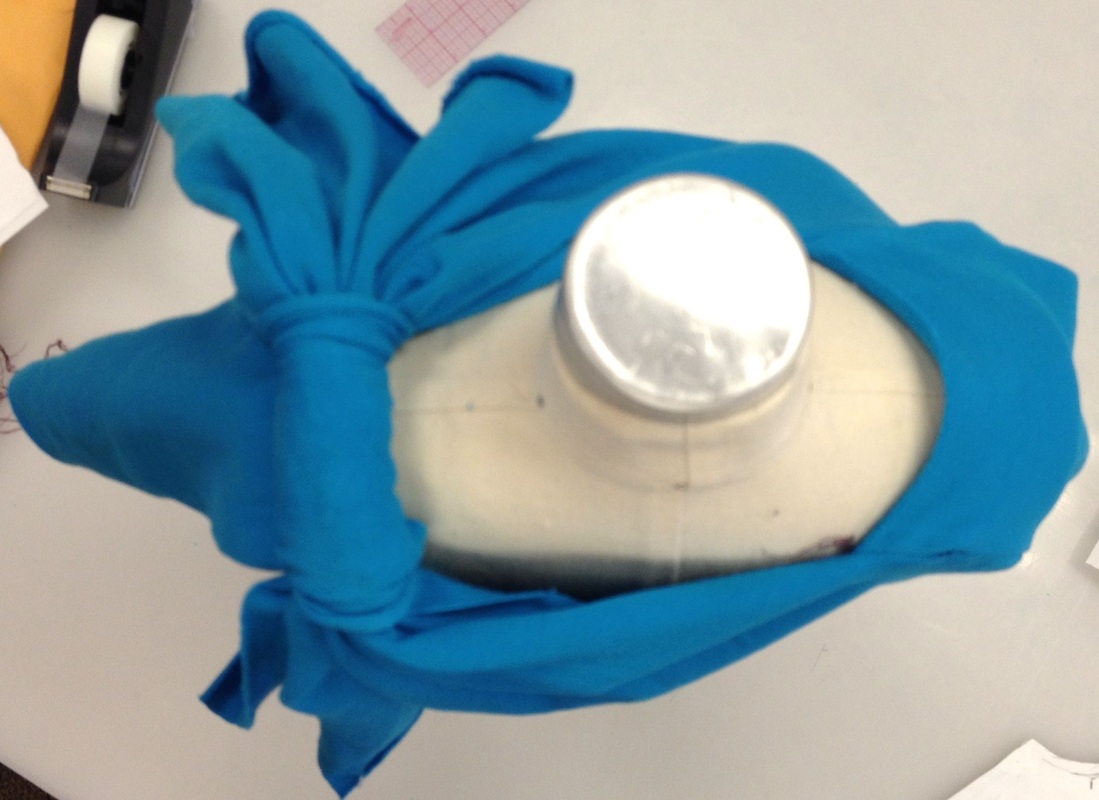
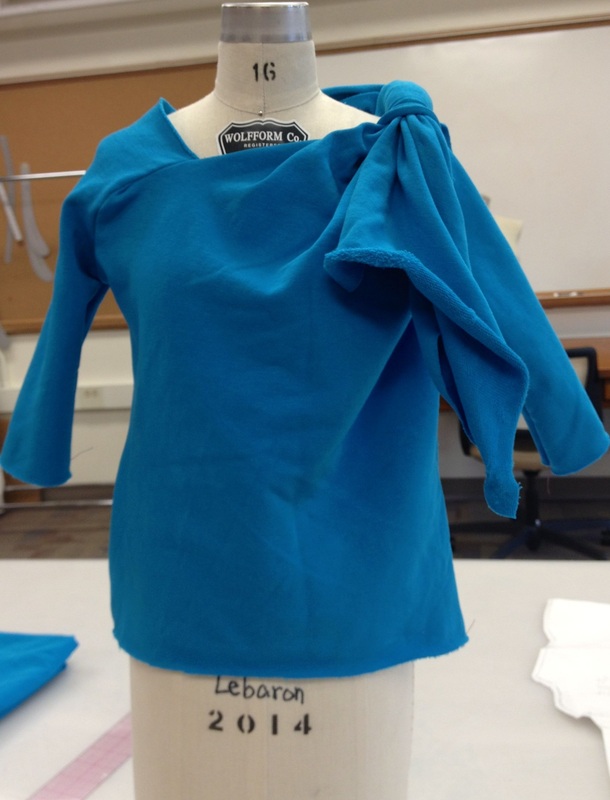
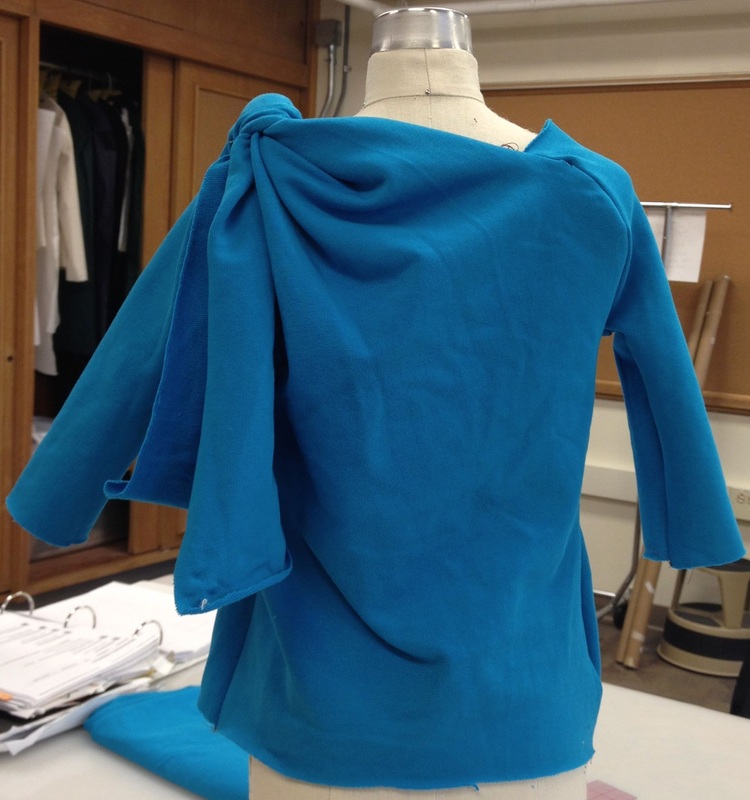
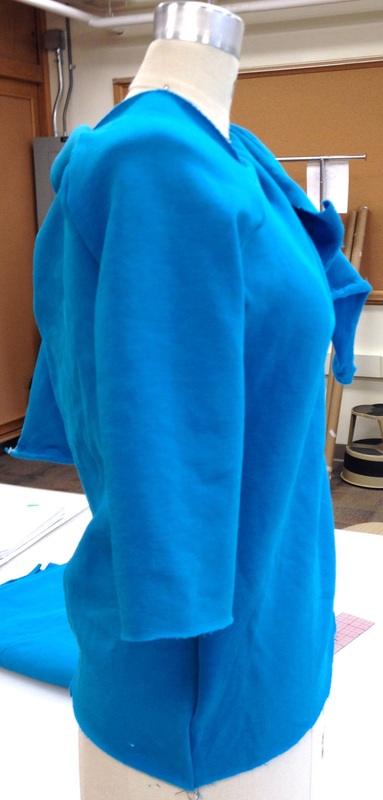
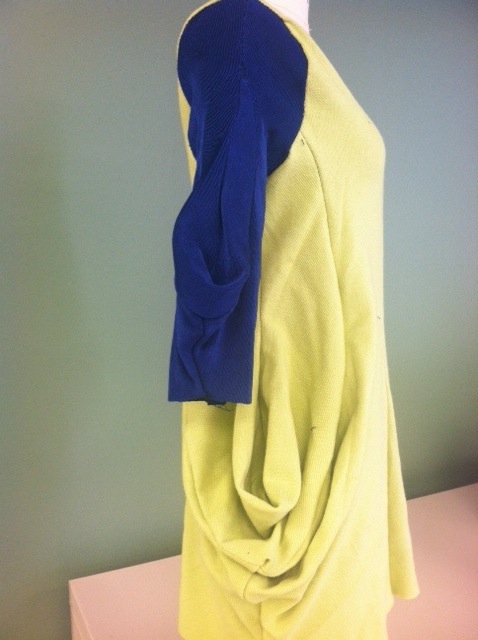
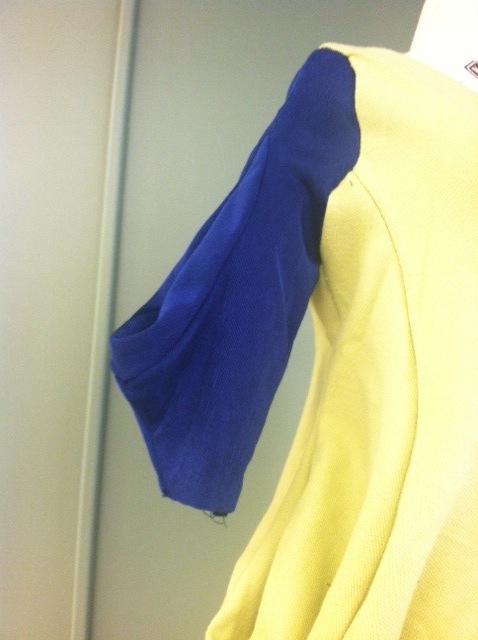
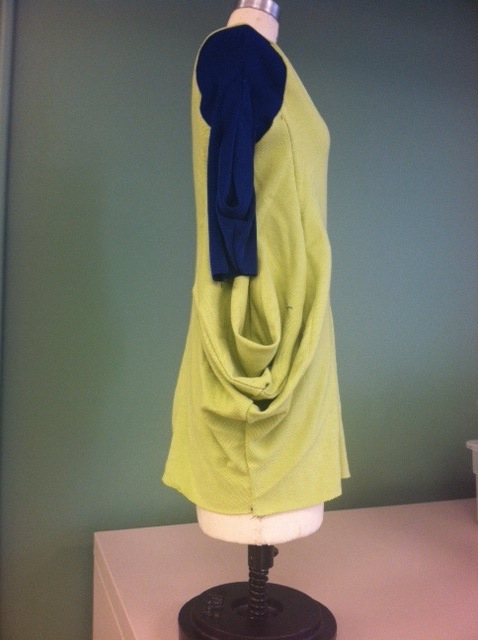
Completed Nakamichi “Apple Peel A”
Adapting the “Apple Peel A” technique
In order to adapt my own version of Nakamichi’s “Apple Peel A” technique, I used my knit skirt pattern to draft an “Apple Peel A” style design.
NOTE: I drafted a full front pattern for my skirt, not a cut-on-fold version! Otherwise, this technique would not work.
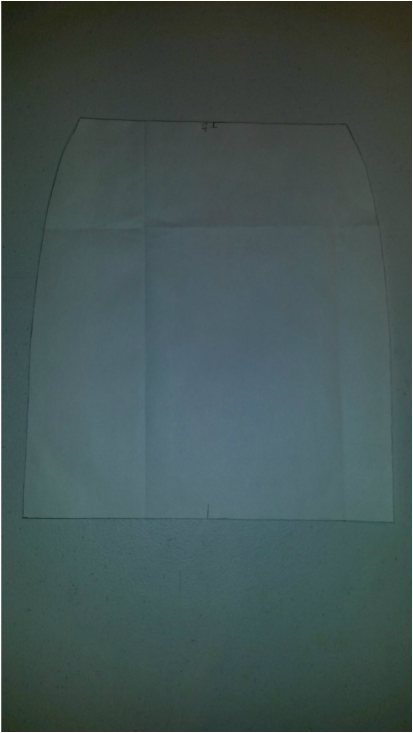
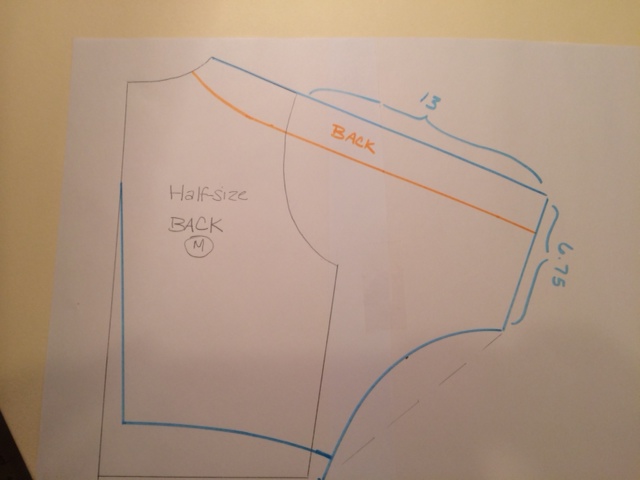
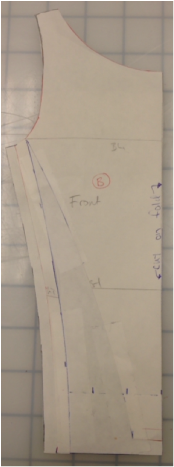
Knit Skirt Pattern Foundation
Step 1:
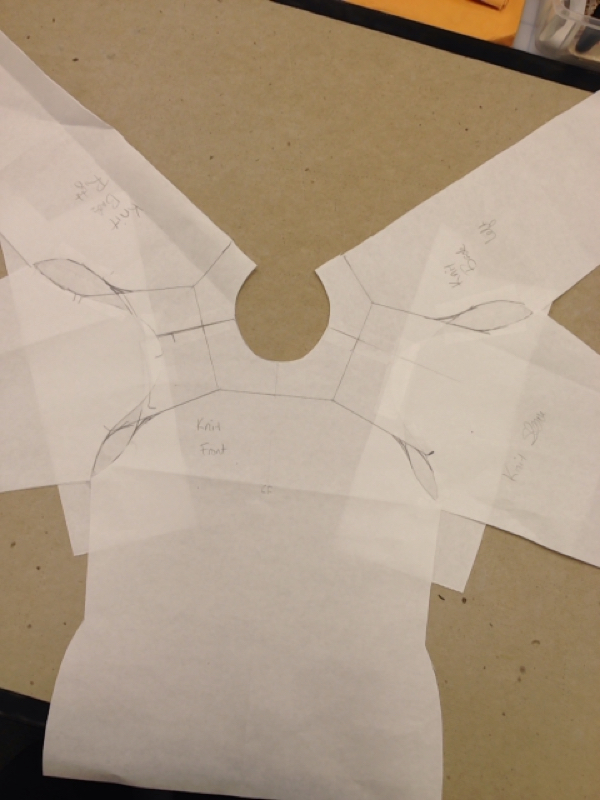
After drafting the patterns for the knit skirt, I drew incision lines across (horizontal) my pattern following Nakamichi’s method. I drew 11 incision lines to create 12 divisions for my pattern.
Step 1:
After drafting the patterns for the knit skirt, I drew incision lines across (horizontal) my pattern following Nakamichi’s method. I drew 11 incision lines to create 12 divisions for my pattern.
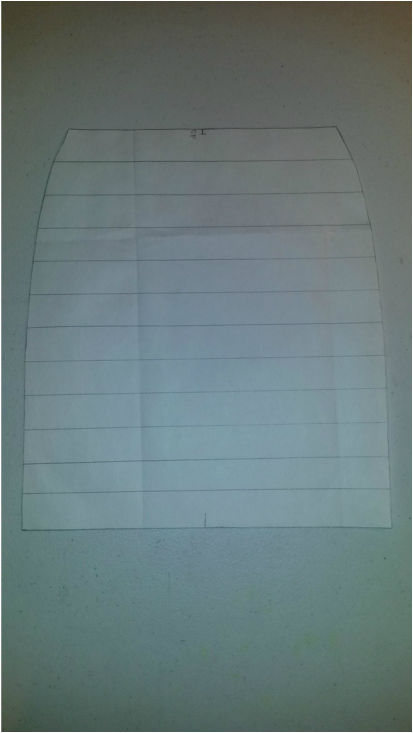
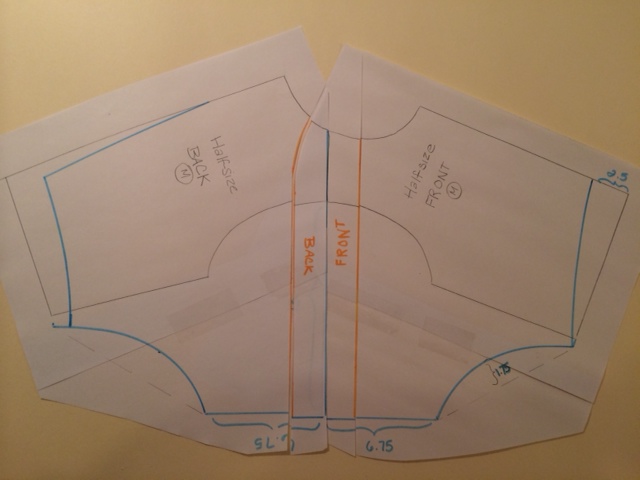
Knit Skirt with Incision Lines
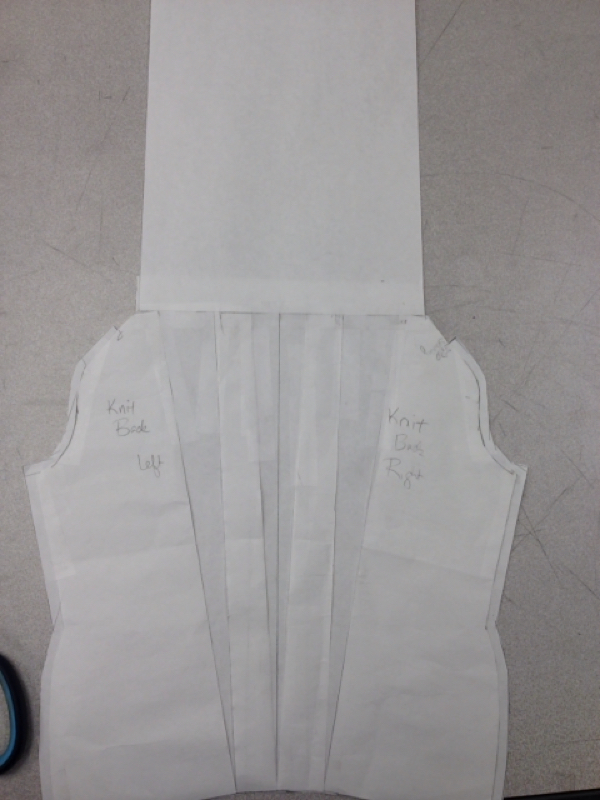
Step 2:
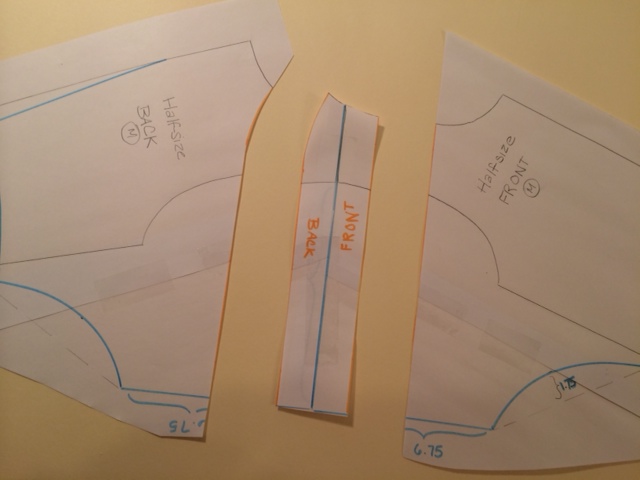
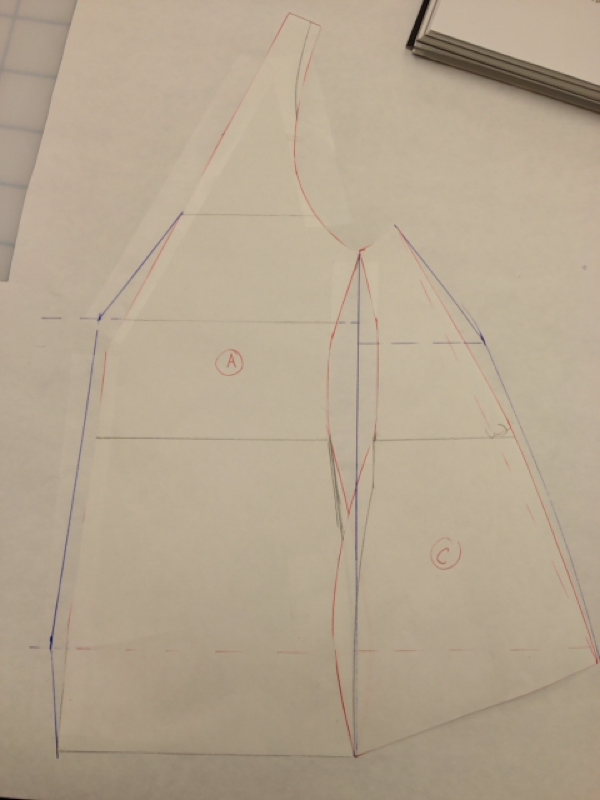
Next, I slashed (cut) the incision lines from the right side all the way across up to 1/16” from the left edge. I spread my incision lines as shown below, which created a larger right side while maintaining the left side length although both sides are now curved.
Step 2:
Next, I slashed (cut) the incision lines from the right side all the way across up to 1/16” from the left edge. I spread my incision lines as shown below, which created a larger right side while maintaining the left side length although both sides are now curved.

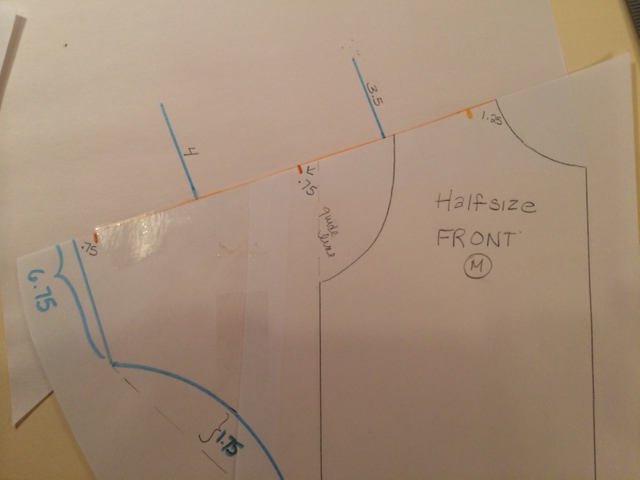
Knit Skirt with Incision Lines Slashed and Spread
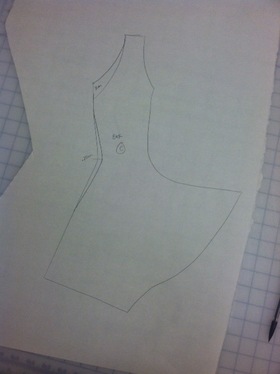
Step 3:
I reshaped my skirt pattern along the incision lines using a hip curve this time around. I also added seam allowances to my skirt pattern.
Step 3:
I reshaped my skirt pattern along the incision lines using a hip curve this time around. I also added seam allowances to my skirt pattern.
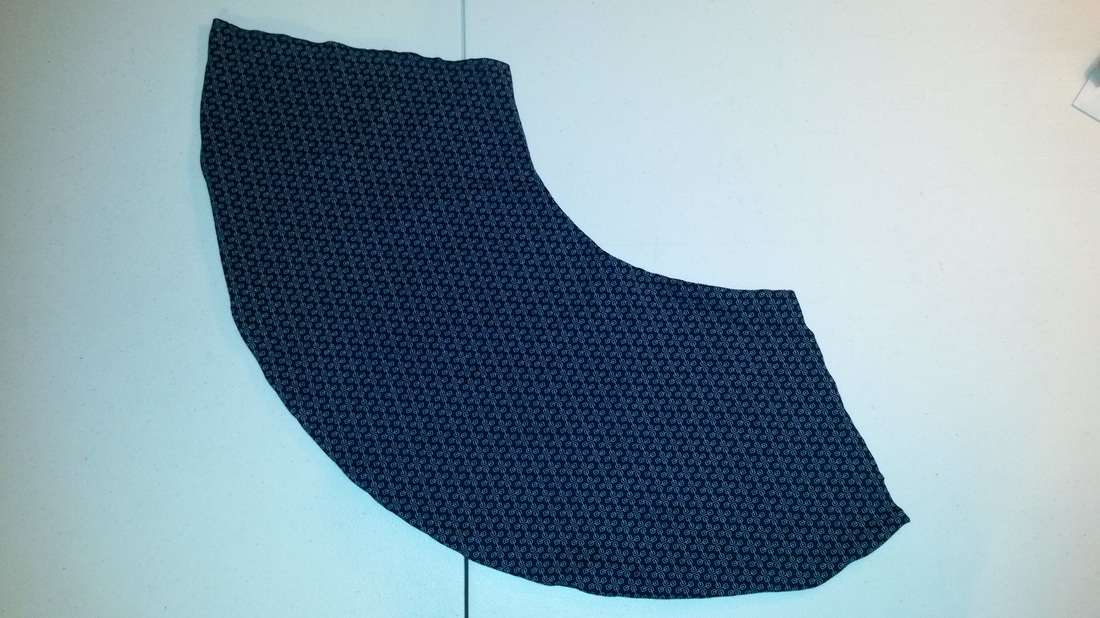
Knit Skirt – Reshaped and Seam Allowance Added
Step 4:
Cut 2 of pattern out of knit fabric. Place fabric pieces (right sides together) and pin.
Step 4:
Cut 2 of pattern out of knit fabric. Place fabric pieces (right sides together) and pin.

Knit Skirt – Pinned with Right Sides Together
Step 5:
Stitch the side seams together using a zigzag stitch.
Step 5:
Stitch the side seams together using a zigzag stitch.
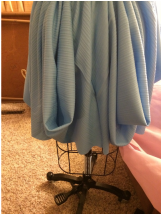
Knit Skirt – Zigzag Stitch Side Seams Together
Knit Skirt – Both Side Seam Sewn with Zigzag Stitch
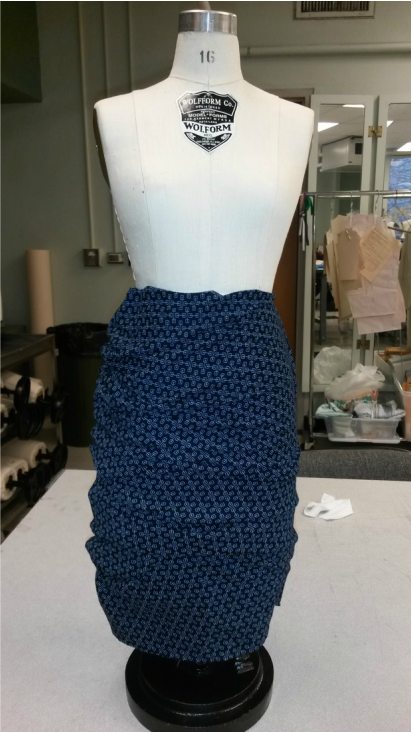
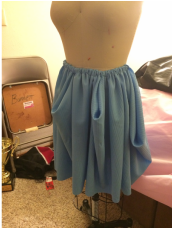
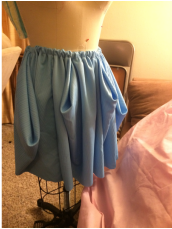
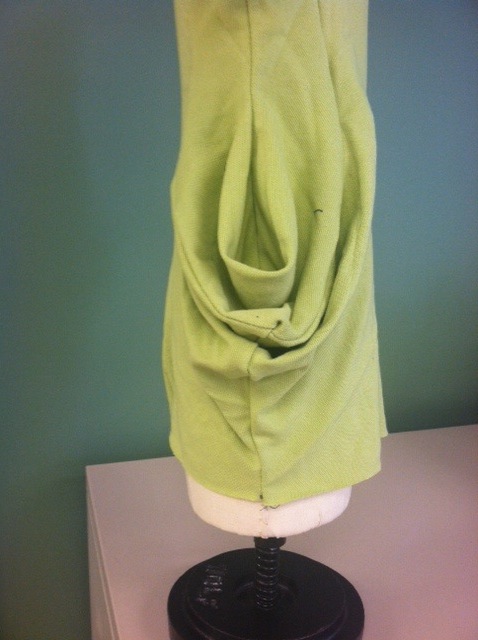
Knit Skirt – Completed View
I really like the result of this design. Although the reality would demand that most likely some type of stabilizer would need to be added to the right (ruched) side of the skirt design. It may look great on a half scale mannequin but a real person has legs and needs to be free to move around without fear of losing a garment. Therefore, a design such as this would require either a clear elastic sewn into the right side seam in order to both stabilize it and permit a normal amount of stretching or this design would have to be attached to an underskirt.
Evaluation of Patternmaking Application #5
- Yes, I felt that I stayed true to the basic principles of Nakamichi’s pattern technique.
- I moved the pattern manipulation from the center seamline of a bodice pattern to side seams of a skirt pattern. Although I moved the location of the method, it remained unchanged. I had worked the kinks out of the pattern when I created the bodice. I feel this is a simple concept, which creates an interesting effect, and is easily adaptable to new pattern locations.
- Yes, all of the same rules still applied in this case. No new patterning rules were created for this technique.


 RSS Feed
