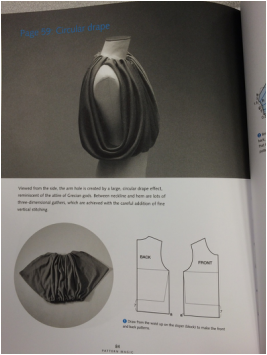
Circular Drape is a patternmaking application that involves cutting and spreading to create added fullness. The finished garment will be one conitinuous piece after sewing the front and back together, with no closures. You will need a little bit of 3/8'' elastic to complete this application.
 | 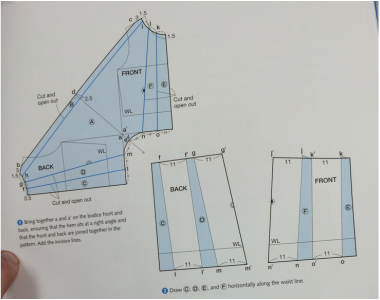 |
In the initial stages of creating this pattern I added 7cm to both the front and back bodice hemlines. The 7cm extension is drawn straight down from the underarm corner and all darts are ignored because fit is not a factor in this application. The front and back bodice pieces were placed perpendicular to each other and the side seam, waistline corner. There was a line drawn from shoulder seam of the front to the shoulder seam of the back. This would connect the two pieces, and this line would now become the armhole.
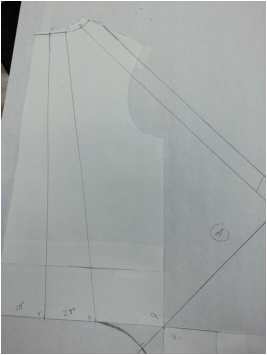 | 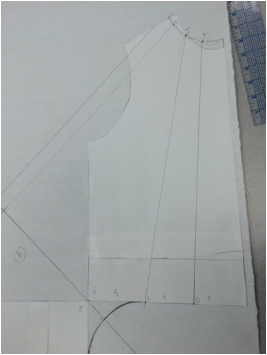 |
The blue cutting lines were drawn according to the measurements given in the directions. The blue lines were completely cut open and spread 11cm to add equal fullness between each slash line. The blue line along the armhole seam was spread to add fullness as well.
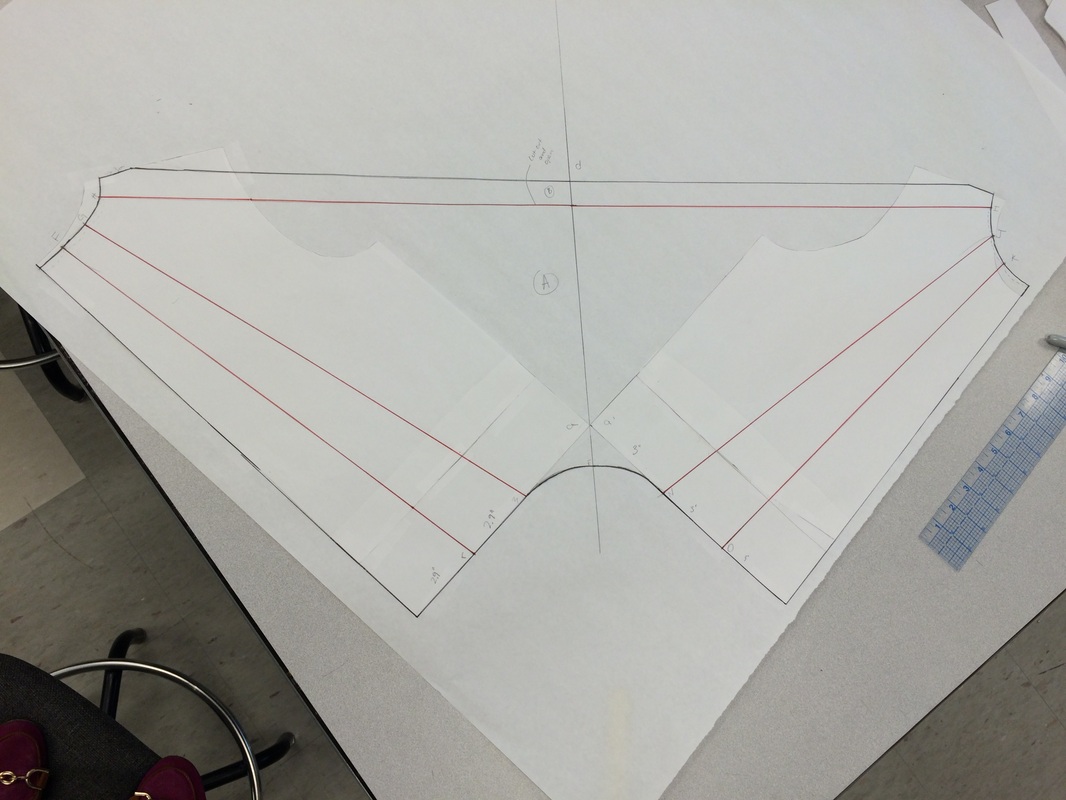 | 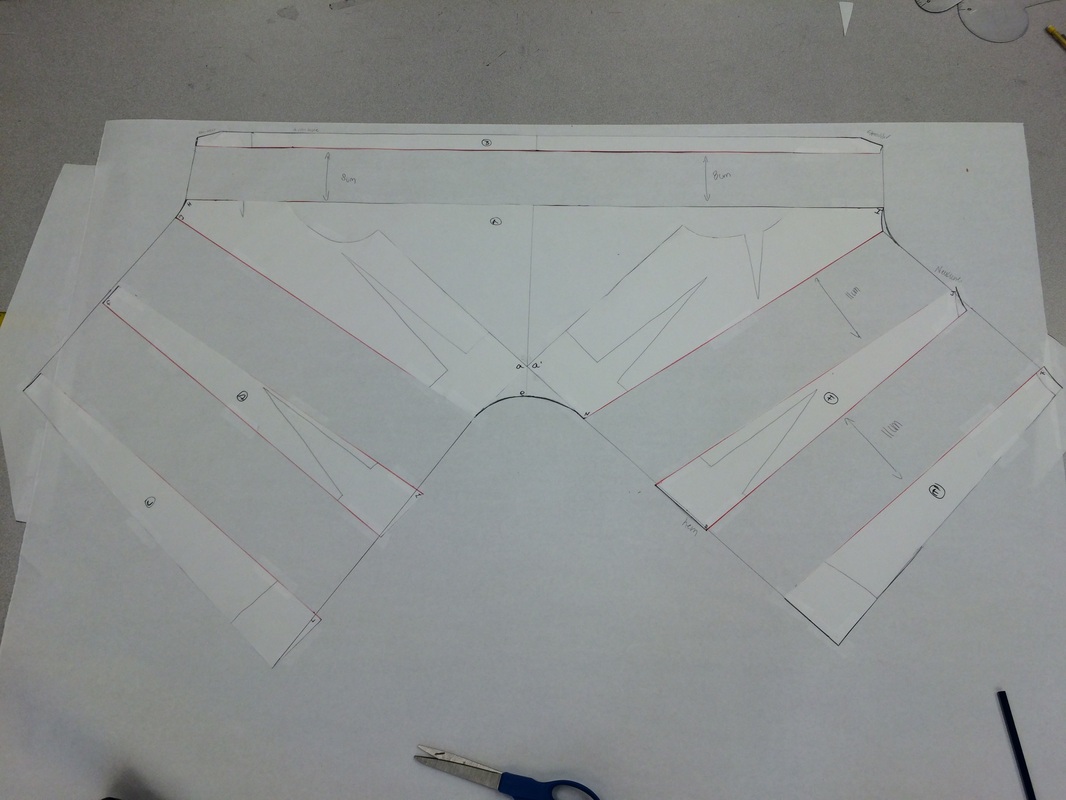 |
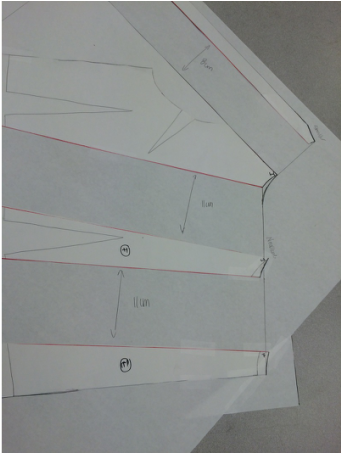
The picture above on the left is what the bodice pieces look like when they are placed perpendicular to each other with the cut lines drawn. The picture above on the right is what the pattern piece looks like when you are finished cutting and spreading the pieces to the desired width. Nackamichi had me spread the pieces along the bodice 11cm. The cut line along the new armhole was cut and spread 8 cm, as seen in the picture to the left. When the pattern is complete it will be cut twice and sewn together along the center front and center back seam. The elastic will be placed in the neckline and hem of the garment.
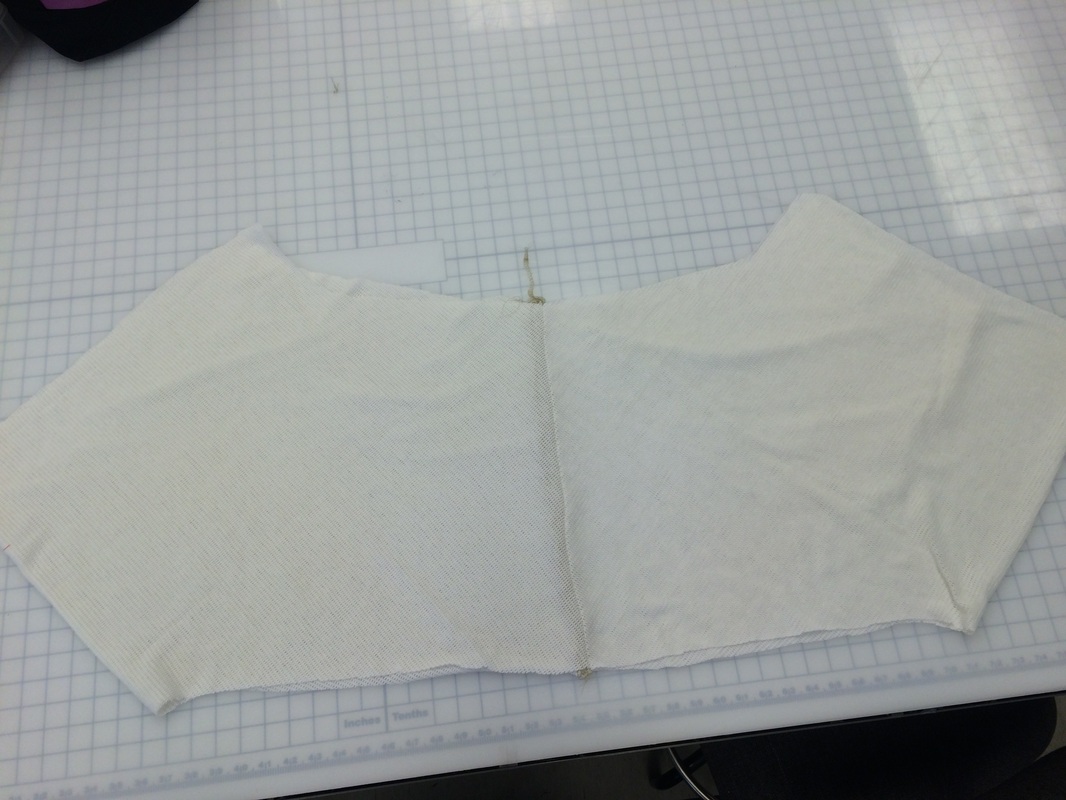
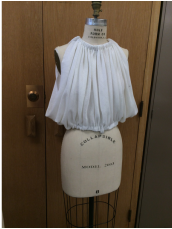
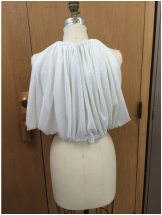
The finished garment turned out just like the picture in the Pattern Magic book. The drape of the armhole is cut very low and it raises the question of what undergarments would one wear with this because they would be seen under the arm. The patternmaking principles involved in this pattern are again non traditional. There is a form of added fullness but not the typical added fullness. The idea of cutting out multiple slash lines entirely and added a set amount of fullness between those pieces is an element Nackamichi has carried throughout a lot of her patterns. This non traditional pattern piece is again not very fabric yield friendly and would be fairly expensive to produce because of the shape of the pattern piece unless the piece was cut in half along the side seam. This might affect the drape of the armhole if it was done though. The basic rule of this pattern would be placing the pattern pieces perpendicular to each other so that the triangular segment in between the pattern pieces becomes a cowl drape. No traditional patternmaking rules are broken in this application. The picture directly below is what the pattern pieces look like sewn together before adding elastic. The elastic needs to be added to provide the gathered drape.
 |  |  |
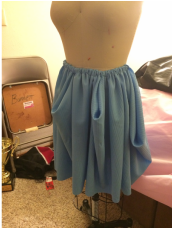
In my personal take on this technique I wanted to use the same principle on the skirt. It was a little different viewpoint, but I think it worked out ok. I wanted multiple cowl drapes in my skirt like the armhole of the initial application, but I wanted them to be different sizes. I discovered that the trick to increasing or decreasing the cowl depth was to decrease the perpendicularity of the pattern placement. I took my skirt slopers and closed the waist darts. This added a little flare to the hemline of the skirt. The pattern pieces were placed together at the side seam. This also added flare to the skirt because the side seams are not perfectly straight. The new skirt pattern was sectioned off into 3 different parts. I divided the waistline by 3 and the hemline by 3. These cut lines were drawn respectively.
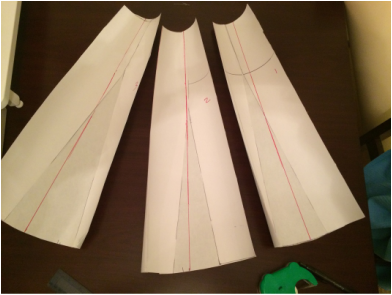 | Once the pattern was cut into 3 equal parts, another cut line was drawn directly down the middle of each piece. Once cut down the middle the 1st piece was connected at the hemline. As we mentioned in the first application, the less perpendicular the pieces are placed the smaller the cowl depth. I did not want this first cowl to be very deep so the angle of this was between 45-60 degrees. |
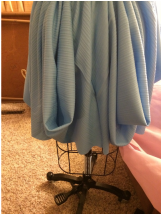
The second pattern piece had an angle of 60-75 degrees and the 3rd and final section was 90 degrees and perpendicular to each other for a deep cowl. I added 10cm of fullness to each side to add more fullness to the pattern. If I were to do this over again, I would not add as much fullness because I think the cowls get lost in the added fullness.
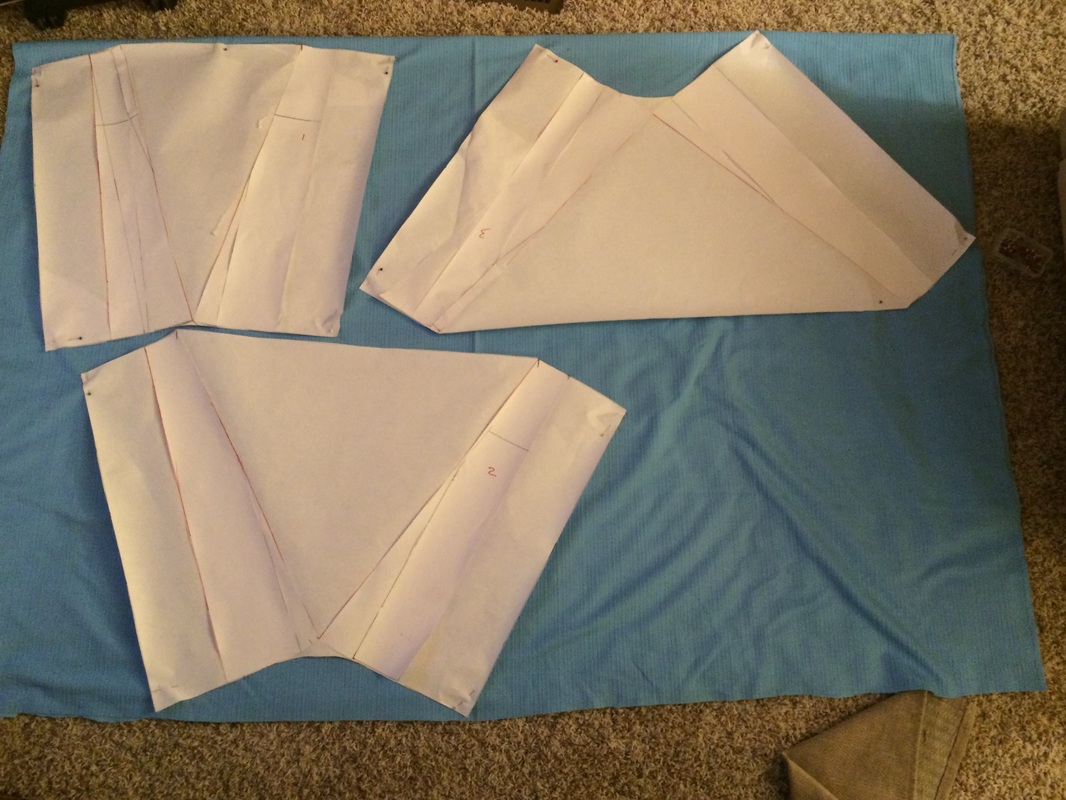
The three pattern pieces had a little different shape because of the cowl depth adjustment. The triangular section was ignored when sewing the waistline together because this was the cowl section that would hang down. Elastic was placed in the waistband as it was placed in the neckline and hem of the first application.
 |  | 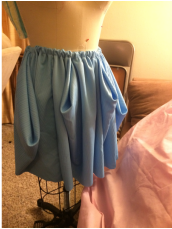 |
This application was a little different spin on the initial application, but the primary principles of the application remain. The degree at which the pieces are angled towards each other was a primary technique of this application. As you can see in the pictures above the angle varied the depth of the cowl. I would say that added fullness is a patternmaking principle included in this application. No patternmaking rules were broken with this application and the techniques used in my method stayed true to the initial rules of the application.
 RSS Feed
