The Challenge: Draft & Muslin: Create the assigned pattern in half scale. Sew a 1st sample. Document your process with notes and photographs.
The Pattern:
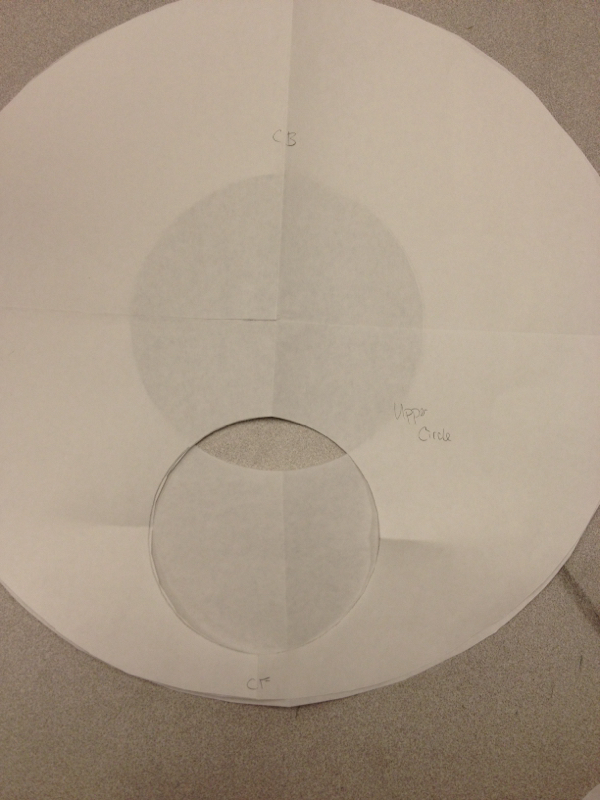
| Step 1: Draft the lower circle. I used the dimensions in the book.
| 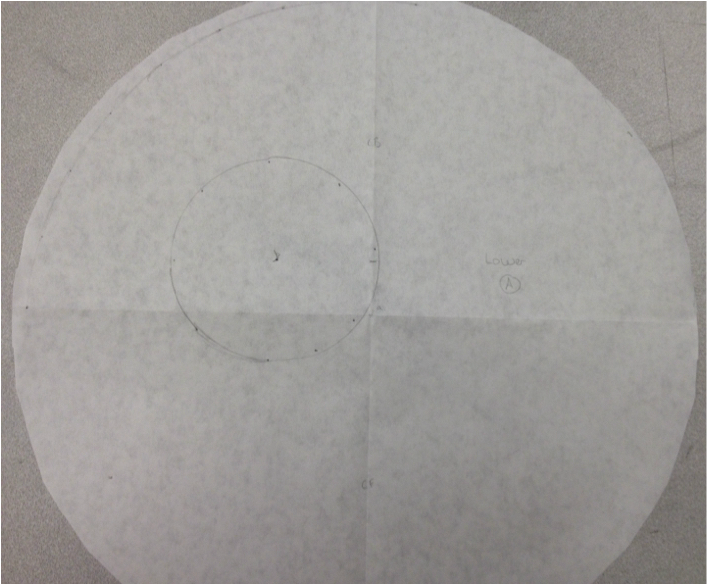 |
Step 2: Draft the upper circle.
- First, the circle is drawn using the same dimensions as the first circle.
| 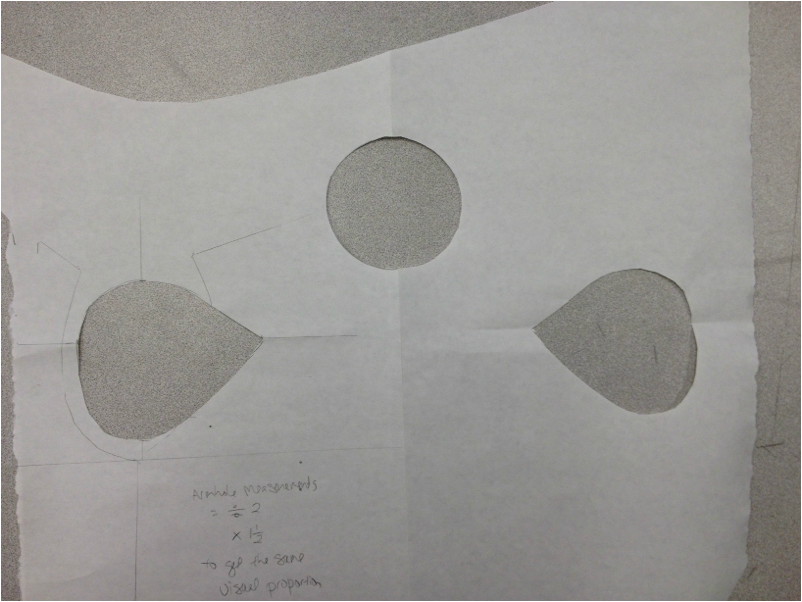 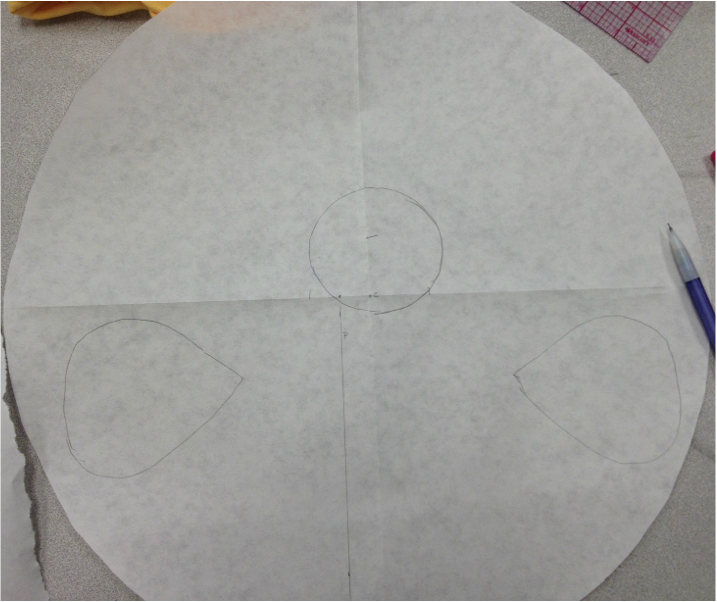 |
The "Muslin" 1st Sample:
| I cut out the two pattern pieces out of yellow jersey knit (terrible curling!) and placed them right sides together. I stitched them with a 1/4" seam (301 Straight Stitch) all the way around. I then turned it right-side-out. It is pretty quick-and-easy to sew this one up! | 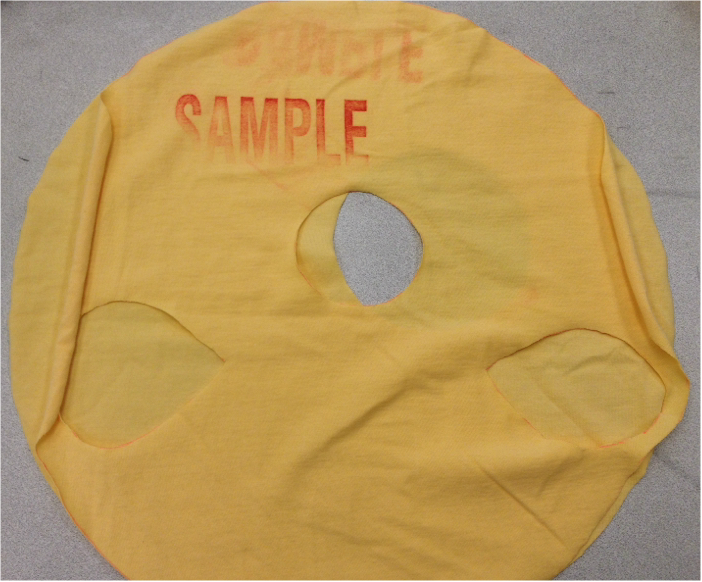 |
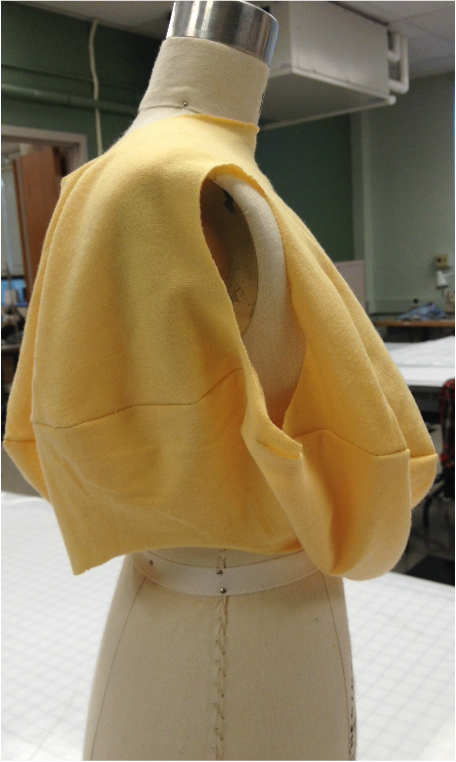
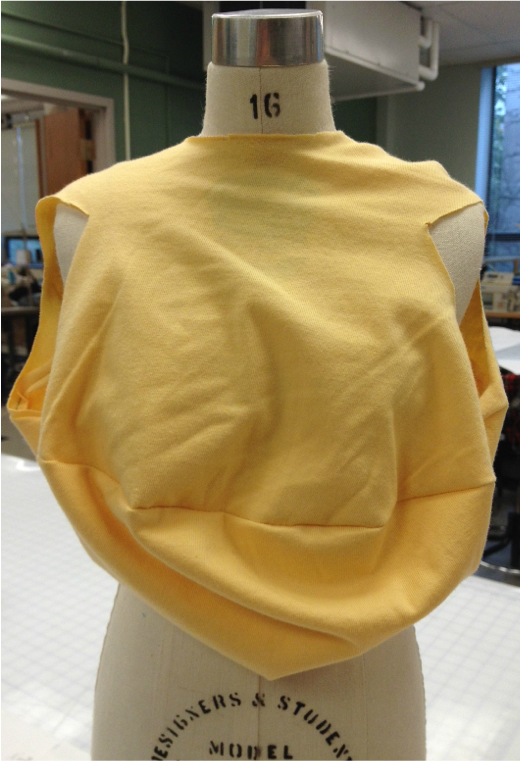
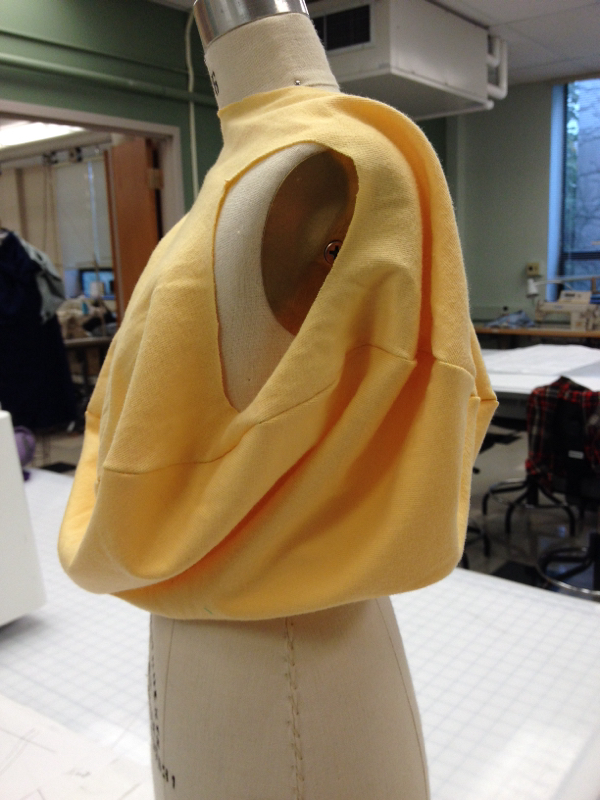
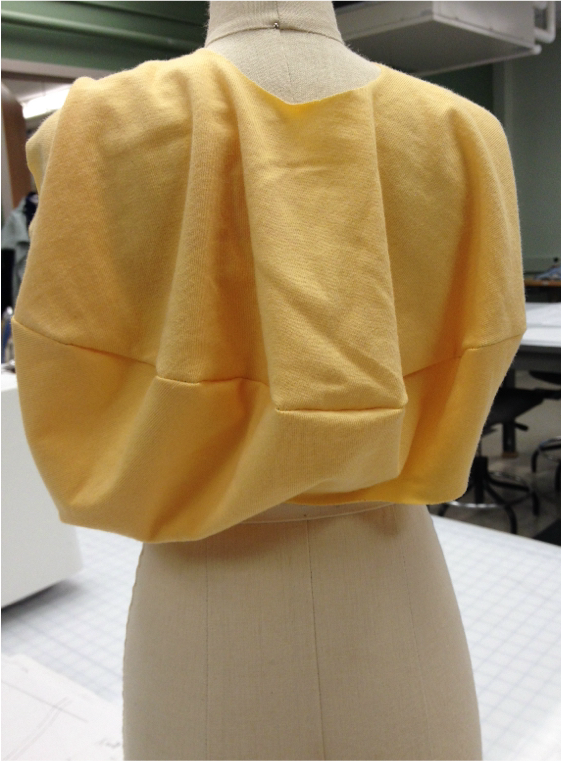
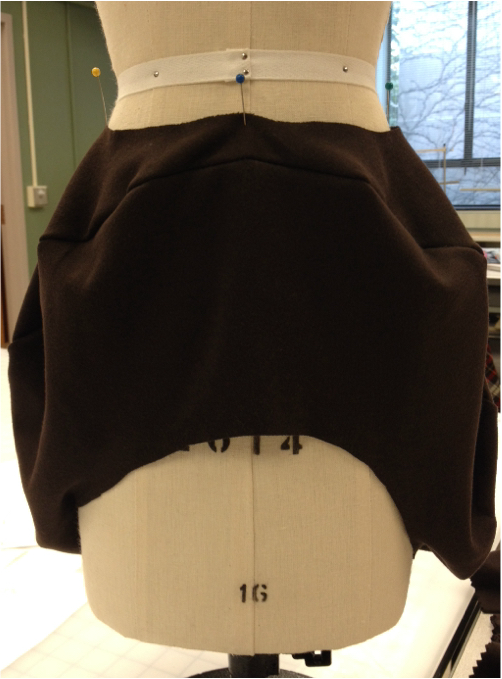
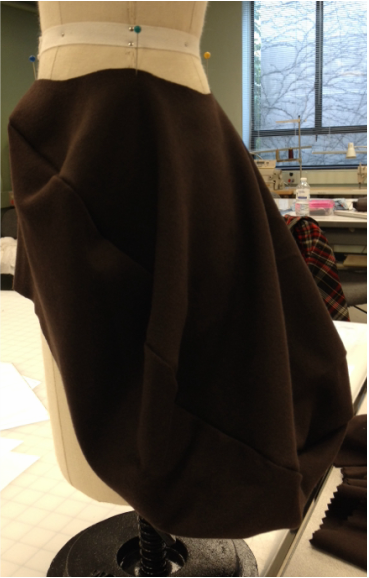
Here it is on the half-scale dress form. It's interesting . . . .
 |  |
 |  |
The Challenge: Analysis: Study this pattern to discover what you can learn and apply to future work. Start with these questions and include any additional insights.
- Q1: What type of flat patternmaking is this: Dart manipulation? Added fullness? Contouring? Something else? A combination?
A1: This is something else. 2D shapes (circles in this instance) are sewn together and then suspended by and around the body to create a 3D shape.
- Q2. What are the basic principles of this pattern?
- A1: A 3D shape to cover the body can be made from 2D shapes that do not directly mirror the body shape the way a sloper does.
- Two copies of the same shape are cut and attached entirely around their perimeter.
- The pattern shapes do need openings to accommodate entrance and exit for the body (neck, arm, and waist in this instance).
- The openings must be large enough for the intended body part to pass through.
- The distance of the openings from each other must be at least as far apart from each other as the actual body locations are.
- Moving the openings away from the center of the shape (circle) creates a shift in where the bulk of the shape hangs and creates a change in the 3D draping that occurs.
- At least one of the openings must allow suspension of the garment from that body location, down to cover the rest of the body (as much as design-intended). To do this, the opening must be on a horizontal plane with a larger area of the body below it.
- Q3: What are the basic rules of this pattern?
- Use knit fabric.
- Sew your pieces right sides together. Then, flip them inside out, so the seam is hidden.
- Q4: Are these rules and principles always true?
- The principles are always true. They seem to be necessary for this pattern to be accomplished.
- The rules, however, could be bent a bit, I think. It does not seem necessary to use knit, so long as the openings are large enough to go around the body dimensions, as needed. For instance, in this situation, the waist opening would need to be big enough for the bust and the neck opening would need to be big enough for the head.
- Q5: What rules of traditional patternmaking are “broken” in this pattern?
- The idea that the pattern should be based on a sloper is the biggest rule that is broken. The sloper IS referenced in this pattern to help with the placement of the neck and arm openings. However, in general, the pattern shape is unrelated to the sloper shape.
The Challenge: Application: Create your own half scale pattern by applying the rules and principles of this pattern in a different location of the garment. Sew a 1st sample.
The Pattern:
I thought it would be interesting to try to apply these patternmaking principles to a skirt.
I thought it would be interesting to try to apply these patternmaking principles to a skirt.
 | Step 1: I made the diameter of the circle half the length of the skirt portion of the half-scale form, thinking when it was hanging, the two circles together would be approximately the length of the skirt portion of the form. Step 2: In the upper circle, I made an opening for the waist. I measured the waist circumference, then "googled" to find the diameter that would make that circumference, to draft the circle for the opening. I placed the opening near one edge of the circle that went with the front of the body, thinking that would put more volume in the back of the skirt. Step 3: In the lower circle, I made an opening for the legs. The circumference equaled the lower edge of the skirt of the form. I placed that opening in the center of the circle. |
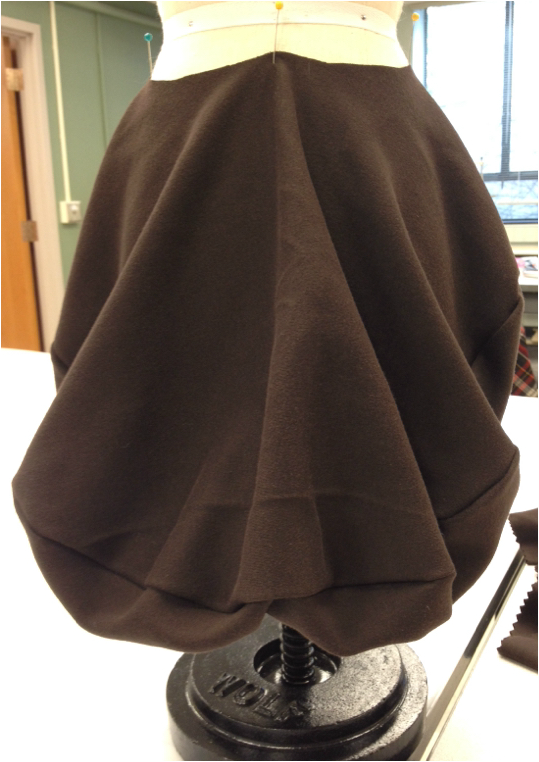
| The Muslin 1st Sample I cut my pattern pieces out of a dark brown interlock knit. I placed the two circles right-sides together and stitched with a straight stitch. I turned it right-side out and placed it on the form. (Pictures below). | 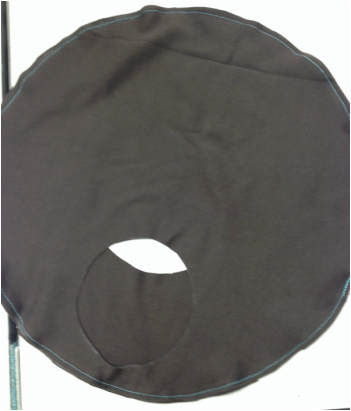 |
Skirt Front, Side, and Back
Notice how the location of the volume changes from front to back, due to the placement of the waist opening near the edge of the upper circle.
Notice how the location of the volume changes from front to back, due to the placement of the waist opening near the edge of the upper circle.
 |  |  |
The Challenge: Evaluation: Study your pattern to discover what you can learn and apply to future work. Start with these questions and include any additional insights.
- Q1: Did you stay true to the basic principles of the original pattern? Yes
- Q2: Where did you move the pattern manipulation and how well did that work? I moved it to the skirt. It did not work as well as the bodice, because the waist is not nearly as horizontal a surface as the shoulders, so the skirt slid down below the waist. This is due to the weight of the skirt as well as the stretch of the knit fabric used. Some elastic at the waist and/or a smaller opening would probably help to keep the waist opening at the waist. I am also not happy with the placement of the openings relative to each other. They are too close, resulting in a front length that (in my opinion) is too short. Playing with the relationship of this circle could lead to an improved design.
- Q3: Do all the same rules still apply? Did the need for new rules appear when you made this change? Yes, the rules still apply. However, as mentioned above, there is a greater need for stabilization of the top opening on the body, due to the sloped nature of the waist.
Challenge: Bonus: Identify a designer and a picture of their work that uses this pattern technique.
I did not find any garments utilizing this pattern technique. Have you?
I think this technique could be a lot of fun to use in children's wear. Where would you use it?
I did not find any garments utilizing this pattern technique. Have you?
I think this technique could be a lot of fun to use in children's wear. Where would you use it?
 RSS Feed
