The Challenge: Draft & Muslin: Create the assigned pattern in half scale. Sew a 1st sample. Document your process with notes and photographs.
Pattern Draft:
Pattern Draft:
| Step One: Draw pattern plot lines on front and back knit slopers as indicated by measurements in the book. (Measurements were halved, since this pattern was completed in half-scale.) It is worth noting that the book indicates to trace the sloper from the "waist up". However, it is clearly from the hip (not waist) level up.
| 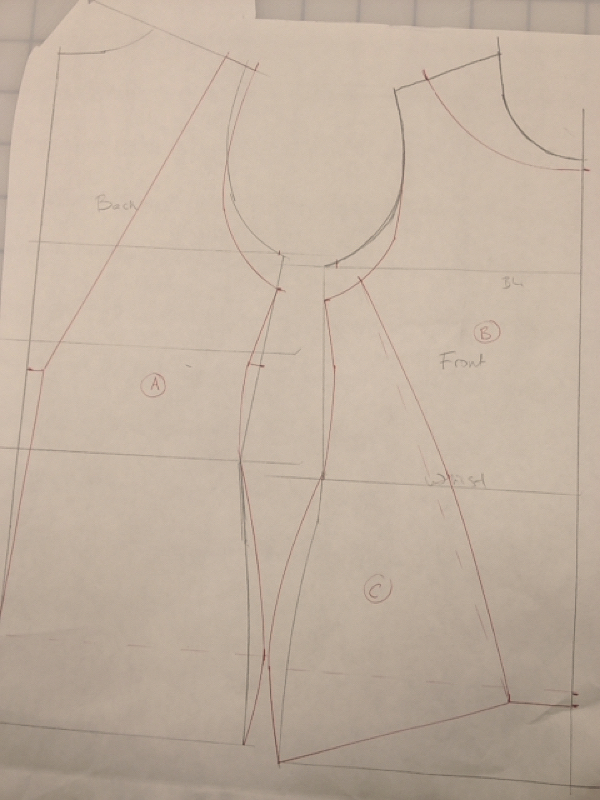 |
| Step Two: added fullness to the center front panel using a slash and spread technique. The placement and amount are indicated in the text | 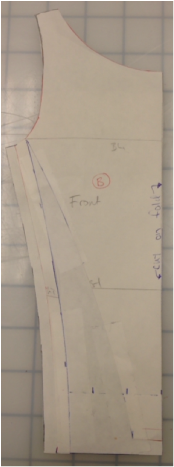 |
| Step Three: Combine back (Piece "A") and side front (Piece "C") pattern pieces. There is some "bumping out" of the CB and SF princess seams to make up for the shaping at the side seam that is lost by combining the two side seams. (See blue lines.) | 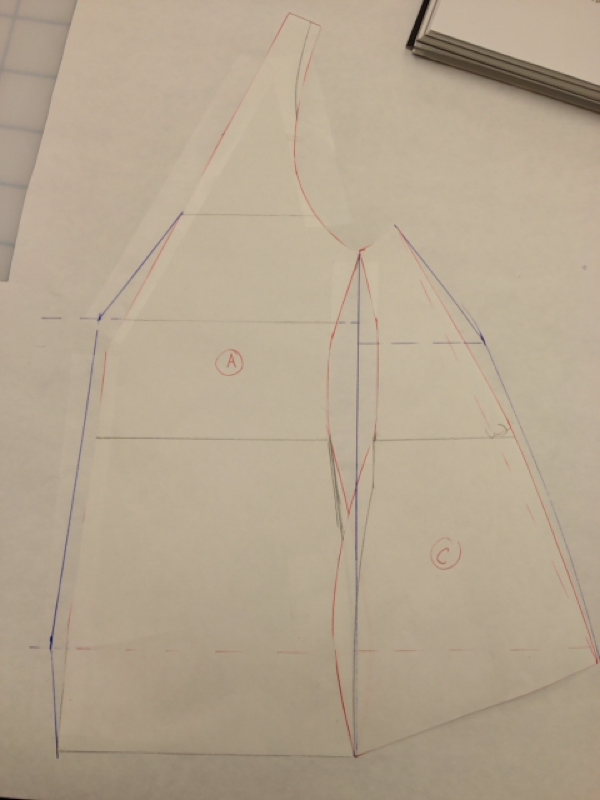 |
Step Four: Create unequal added fullness in the Back / Side Front combo piece through unequal slash-and-spread. The slash lines (blue) are not parallel; however, the space added between them is.
 | 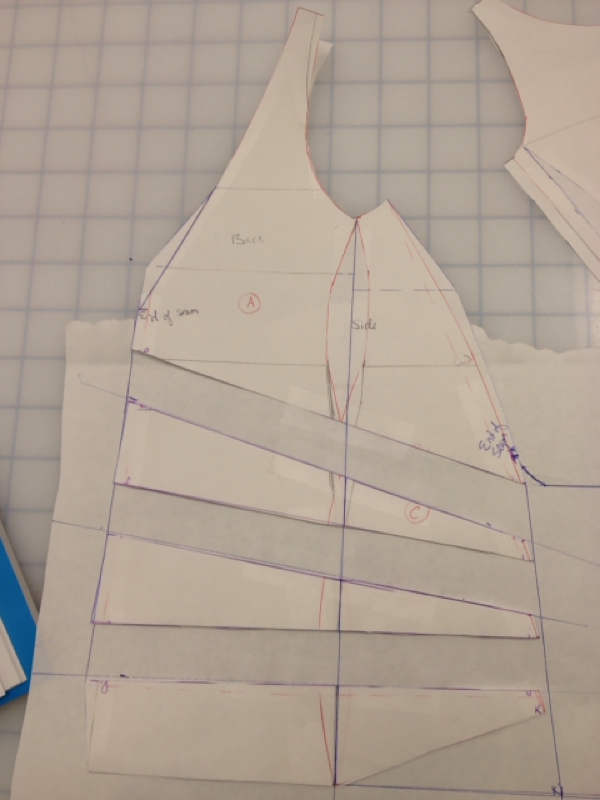 |
| Step Five: Add an extension to the Back / Side Front piece at the Side Front princess line. In the process, the bottom of this pattern piece is squared up. it is important to look at how this piece will connect back with the center front panel and mark notches where to STOP sewing (slightly before you come to the extension). The remaining part of the front panel is folded under and stitched into the "loop" that the extension is then pulled through. Add seam allowances, as desired. | 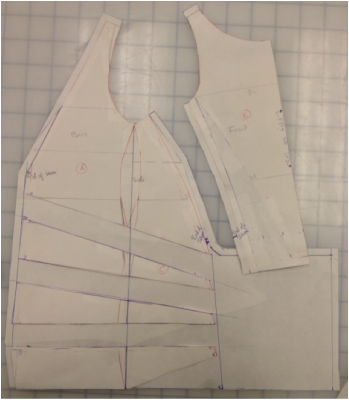 |
The Muslin:
| This one is pretty easy to sew up:
| 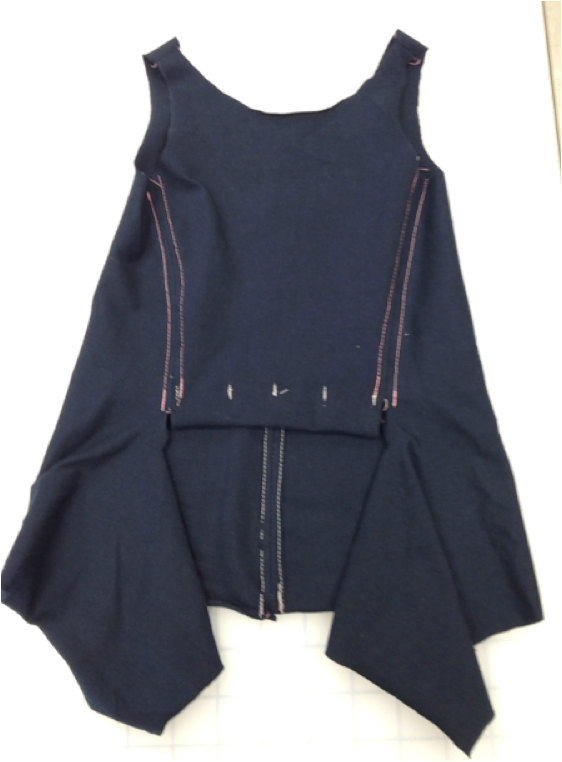 |
How much cute is THAT?
and, that's BEFORE the little ties are even put in the way they should be. (BTW, you WILL need a safety pin attached to the end of the extension to pull it through the loop--no joke!)
and, that's BEFORE the little ties are even put in the way they should be. (BTW, you WILL need a safety pin attached to the end of the extension to pull it through the loop--no joke!)
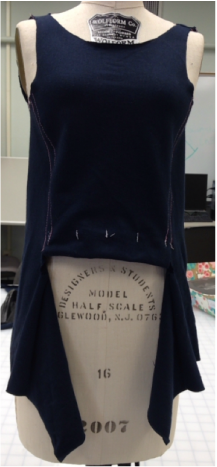 |  |
Here's putting the extension in the loop. A bit of a trick! But once you get it done, SUPER cute!
 |  |  |
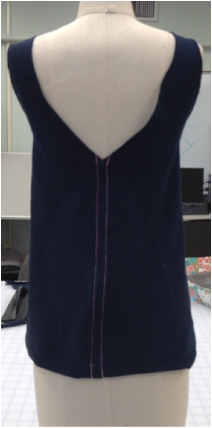
A close-up of the "bow". You can see how nice the gathers fall between the tacks. It just wouldn't be the same if you top-stitched all the way across the fold-up that creates the "loop".

Analysis: Study this pattern to discover what you can learn and apply to future work. Start with these questions and include any additional insights.
- What type of flat patternmaking is this: Dart manipulation? Added fullness? Contouring? Something else? A combination?
- What are the basic principles of this pattern?
- Use a knit
- Decide where you want the "bow". You will need seam lines on either side of this, so a loop extension can be added to the center panel and extensions (perpendicular to the loop) can be added to the adjacent panels.
- What are the basic rules of this pattern?
- You don't want a seamline running through the added fullness of your "side" (and back in this case) panels. It will ruin the drape.
- Equal fullness should be incorporated in the "side" panels close to the edge where the extension will be.
- One-sided fulness should be incorporated on the "loop" edge of the center panel.
- Tack the loop in place with several small stitches.
- Are these rules and principles always true?
- Even though this section of the book is to demonstrate "the expressive power of knits", I think this technique could still be applied in a woven fabric.
- What rules of traditional patternmaking are “broken” in this pattern?
- None that i can think of . . . not that there are many patternmaking rules for knits to begin with . . .
The Challenge: Application: Create your own half scale pattern by applying the rules and principles of this pattern in a different location of the garment. Sew a 1st sample.
I thought it would be fun to apply this to a neckline, instead of a hem and over one shoulder, instead of center front. I thought a raglan sleeve would be the perfect way to do this!
I thought it would be fun to apply this to a neckline, instead of a hem and over one shoulder, instead of center front. I thought a raglan sleeve would be the perfect way to do this!
| The Pattern:
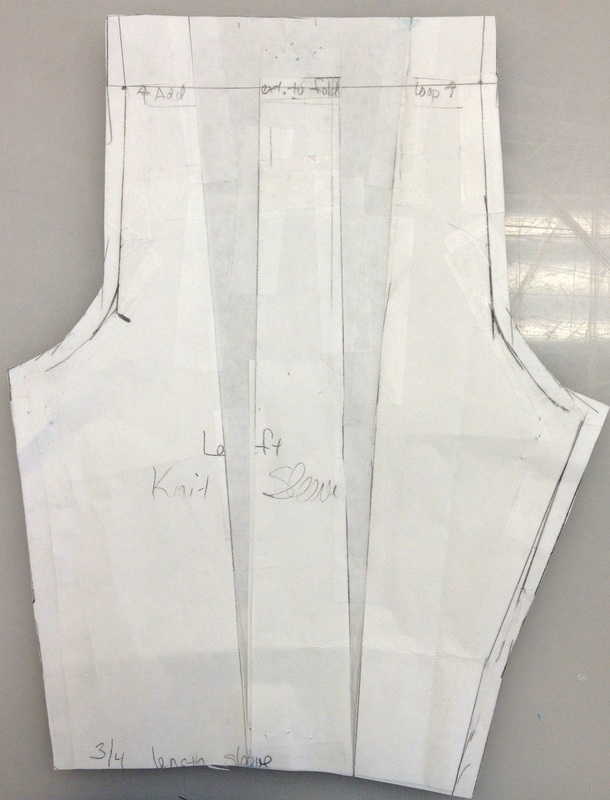 | 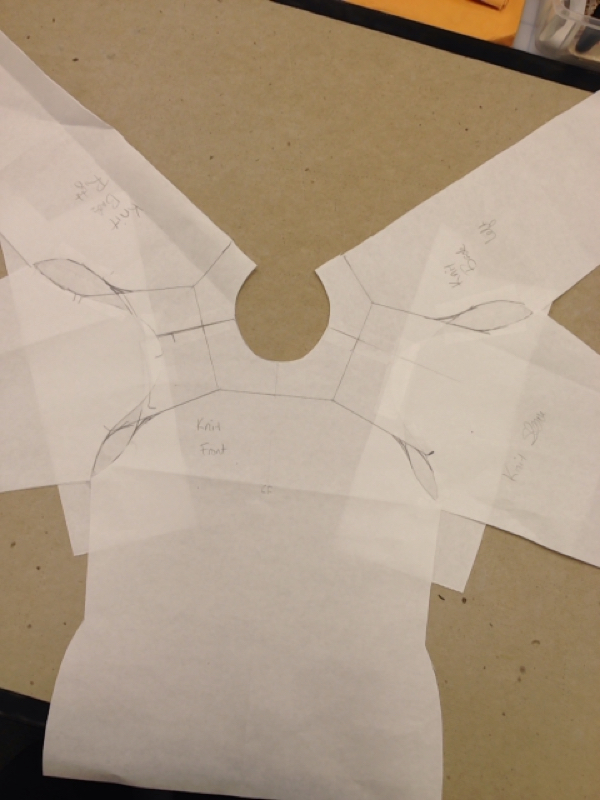   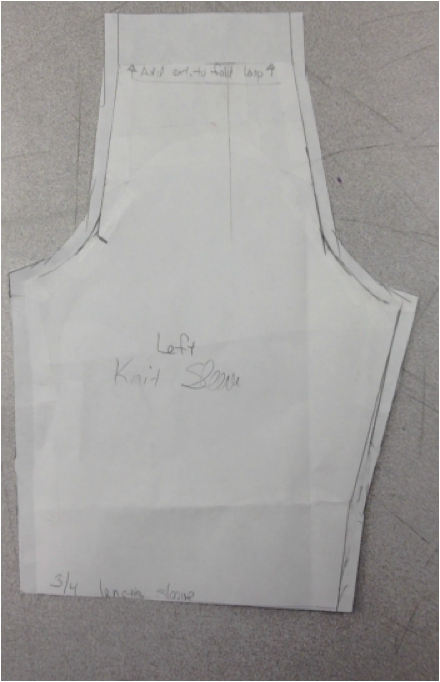 |
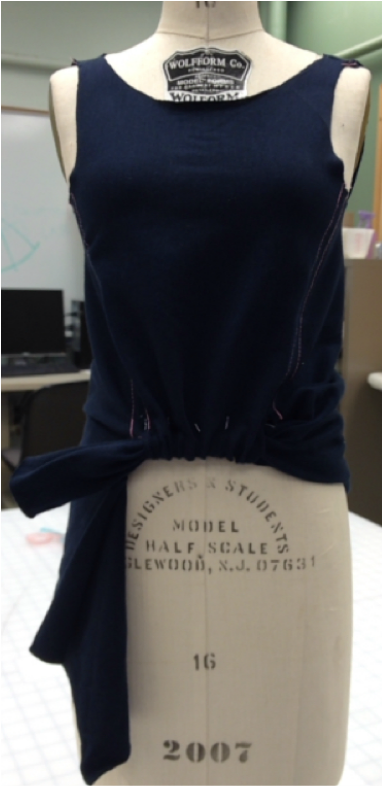
The Muslin:
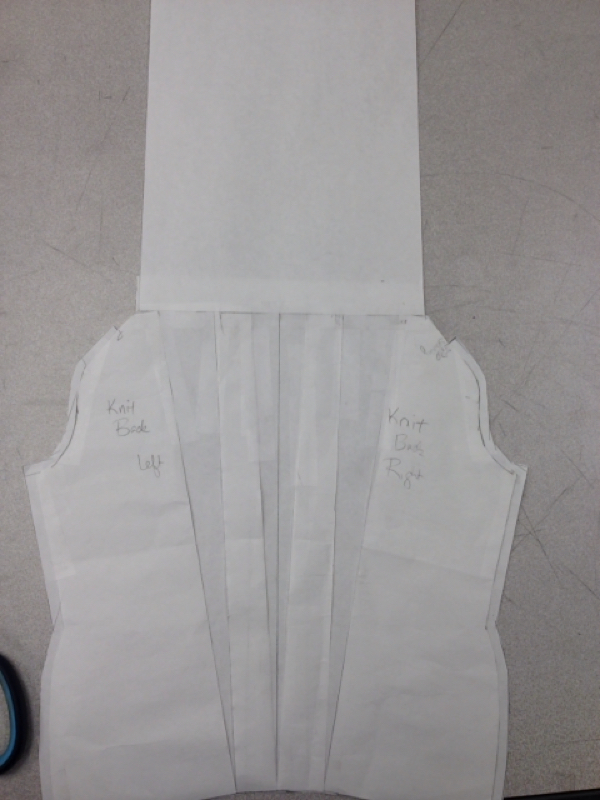
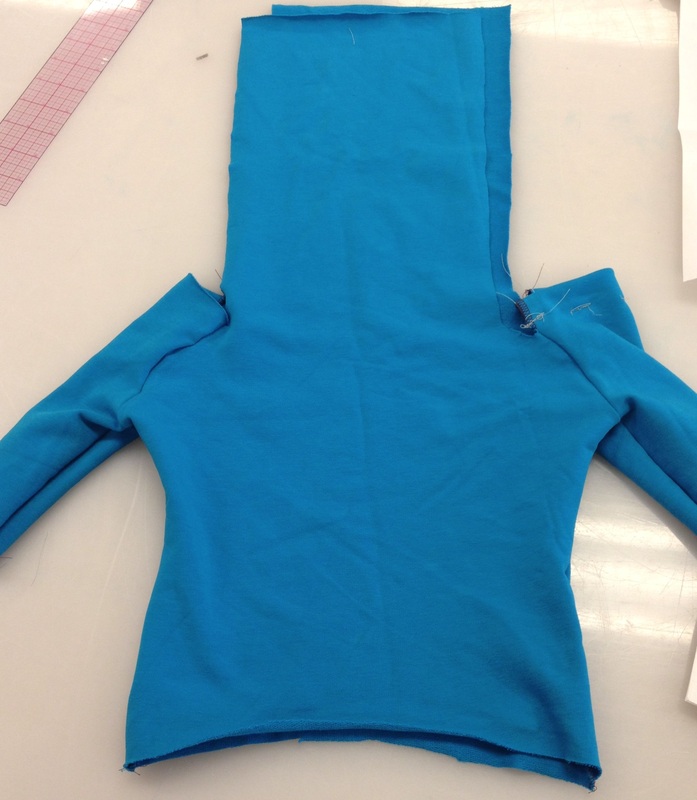
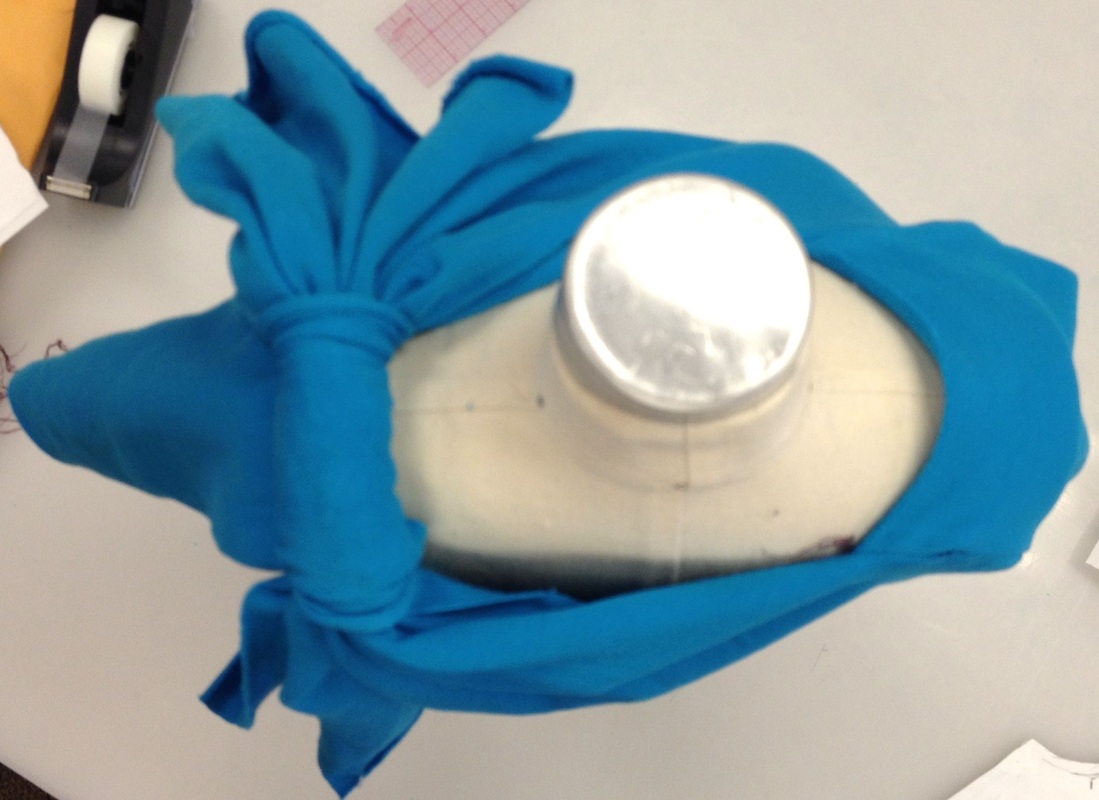
It was fairly straightforward to sew this one up. Similar to the first one, I just tacked the loop in a few places. First photo shows the extensions before they are pulled through the loop. Second photo is the aerial view, showing the "square" neckline.
It was fairly straightforward to sew this one up. Similar to the first one, I just tacked the loop in a few places. First photo shows the extensions before they are pulled through the loop. Second photo is the aerial view, showing the "square" neckline.
 |  |
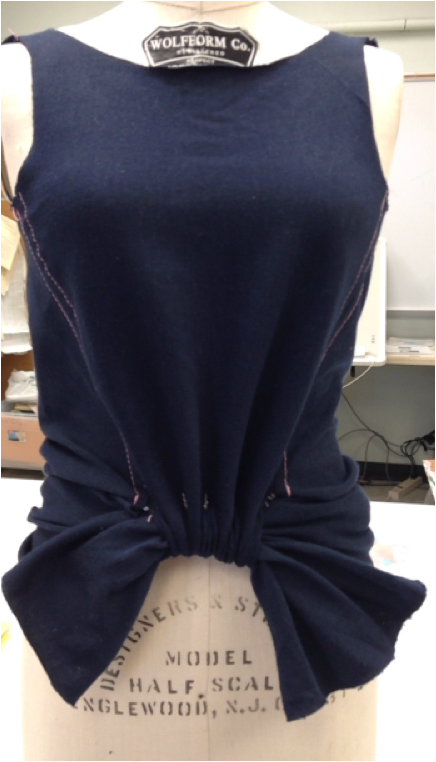
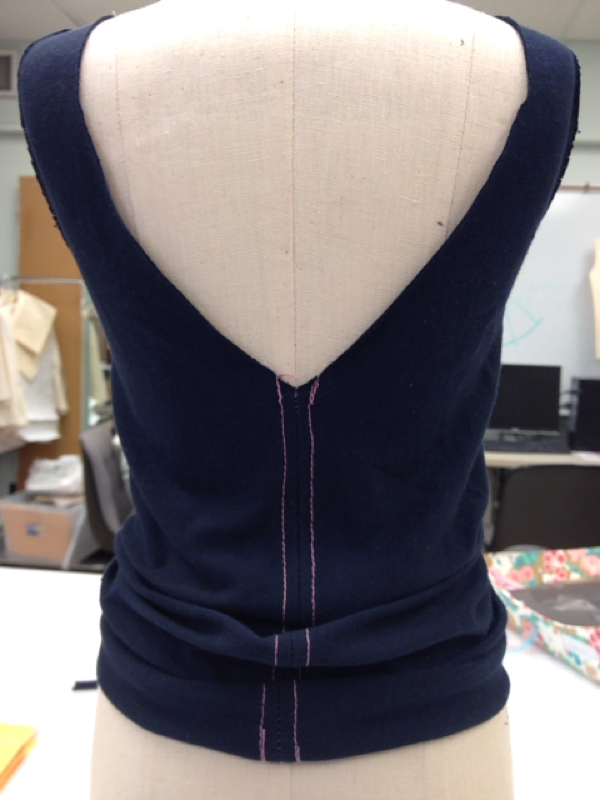
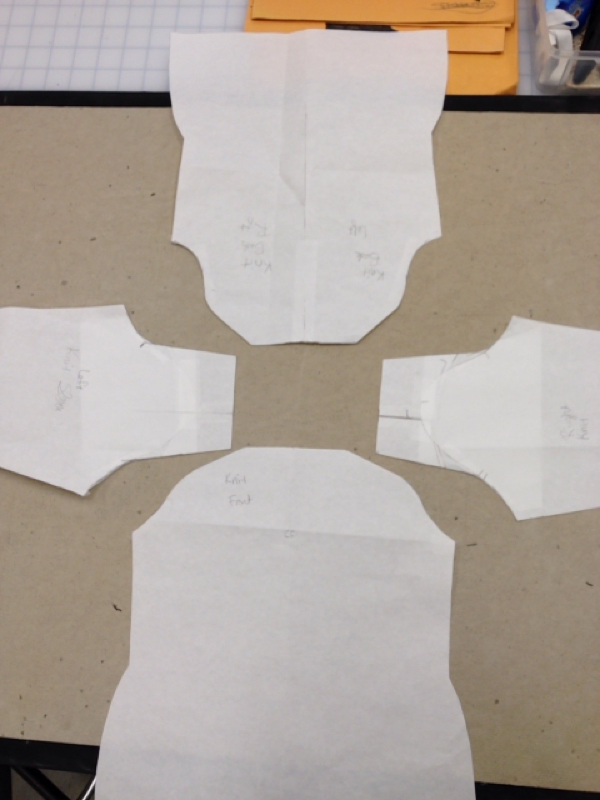
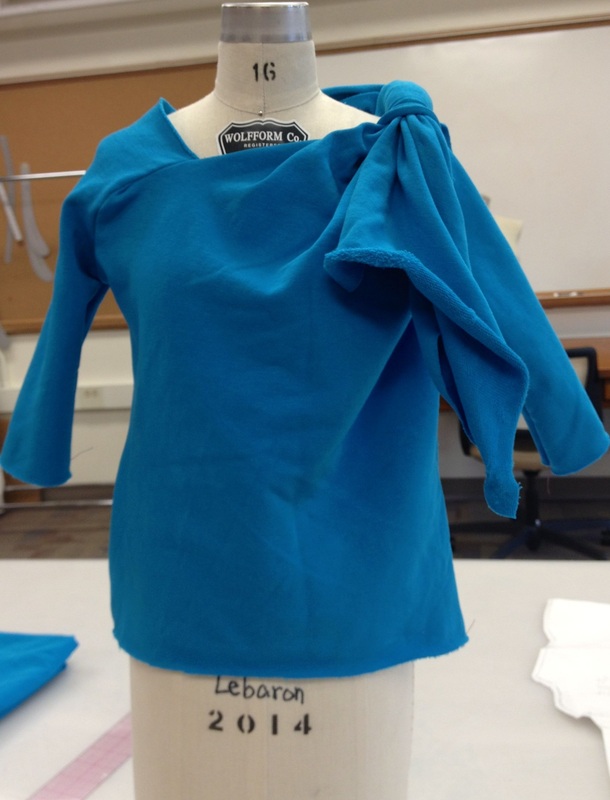
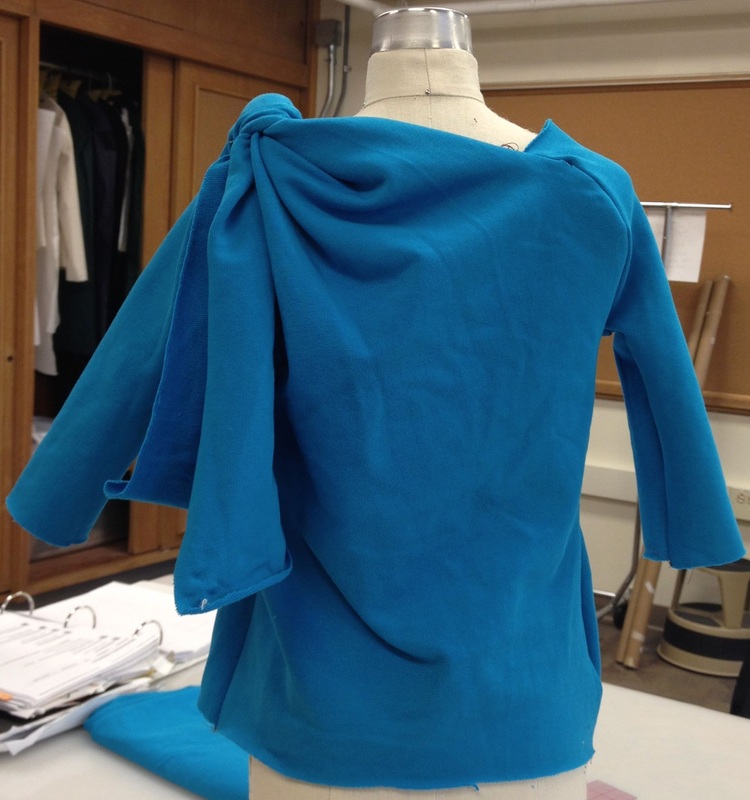
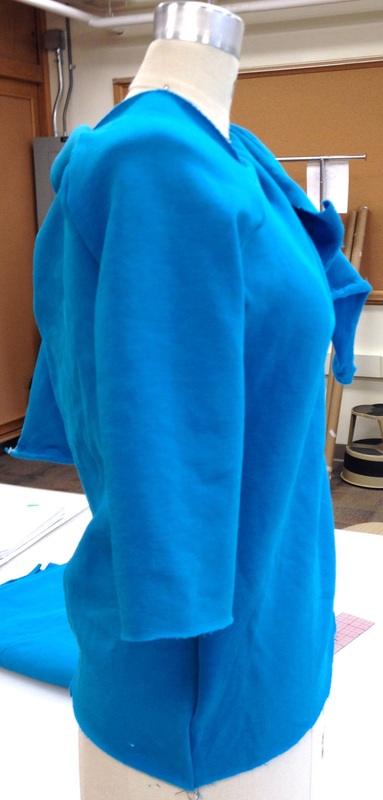
Front, left side, back, right side.
The extensions seem to be too wide. Or, perhaps, the fabric is just too thick. The fabric pulled through the loop creates a VERY bulky area on the left shoulder. The top is overall a bit too large for the form. The draping that is created is interesting; however, would probably have been more attractive in a softer, drapier knit.
The extensions seem to be too wide. Or, perhaps, the fabric is just too thick. The fabric pulled through the loop creates a VERY bulky area on the left shoulder. The top is overall a bit too large for the form. The draping that is created is interesting; however, would probably have been more attractive in a softer, drapier knit.
 |  |  |  |
Evaluation: Study your pattern to discover what you can learn and apply to future work. Start with these questions and include any additional insights.
- Did you stay true to the basic principles of the original pattern? Yes, with the exception of the slash and spread. I did one-sided added fullness, rather than equal added fullness.
- Where did you move the pattern manipulation and how well did that work? I moved it to the shoulder, using raglan seams as the locations for the loop (sleeve) and extensions (front and back). The pattern worked out well, but the garment would have been better with a softer knit, I think.
- Do all the same rules still apply? Did the need for new rules appear when you made this change? Yes, the same rules still applied.
 RSS Feed
