In order to create the design, I first needed to draft a pattern for the sample Straight Lines and Curves A based on the following instructions from the book: (all measurement are adjusted from the book to half-scale)
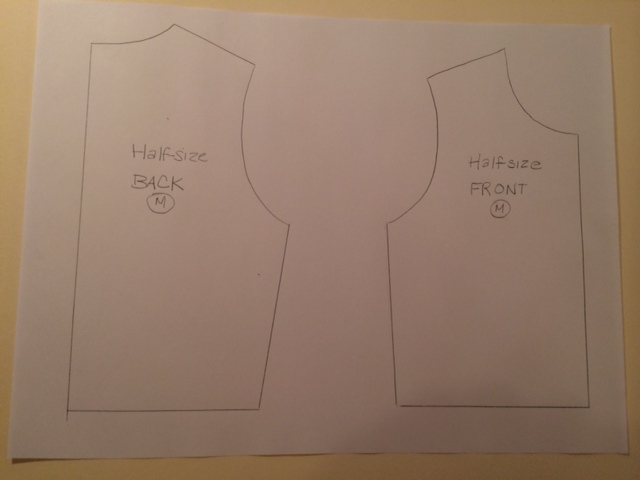
The first step in the book was to trace off the half-scale stretch pattern sloper front and back that comes with the book
The first step in the book was to trace off the half-scale stretch pattern sloper front and back that comes with the book
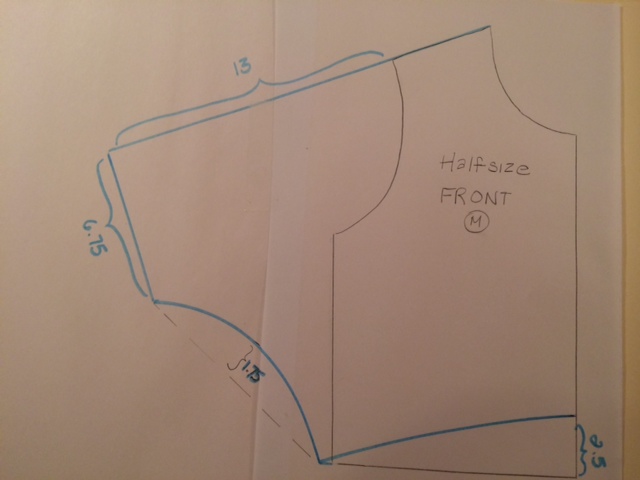
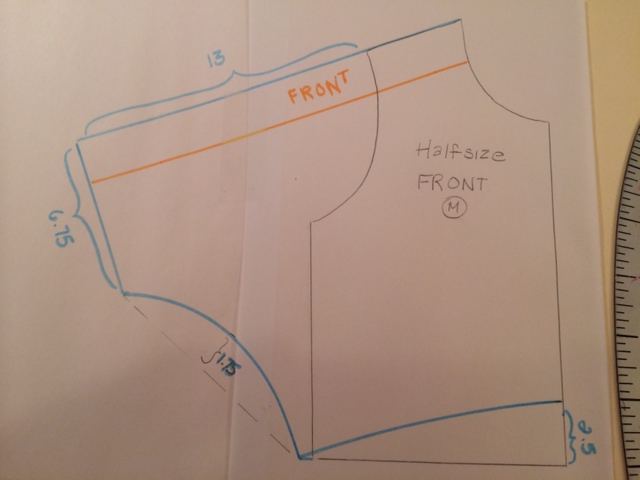
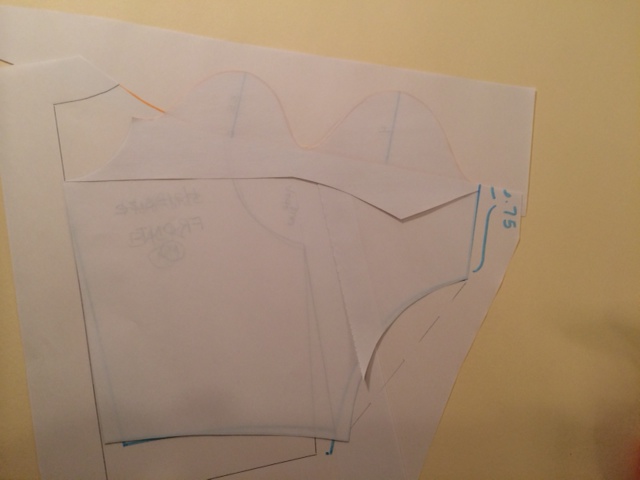
The next step to continue the shoulder line 13 cm (half-scale measurement) on bodice front, square a 6.75 cm line, add guidelines .5cm out from side seam and 2.5 cm above waistline, and dotted guideline connecting new waist at side seam to sleeve opening depth guideline in at 1.75 cm. Use curve to make seam lines, be sure to hit guidelines.
 | 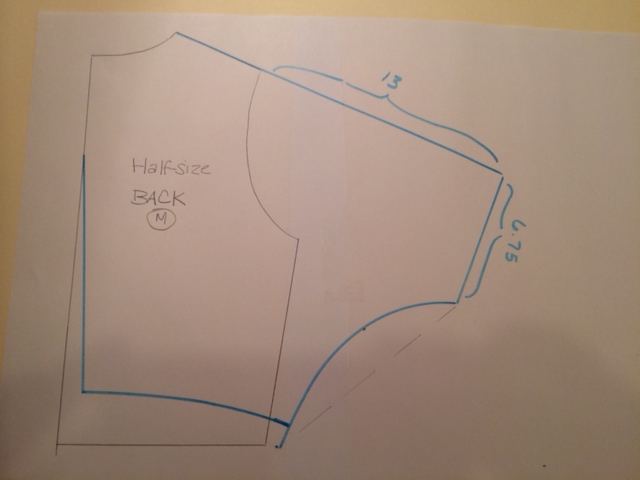 |
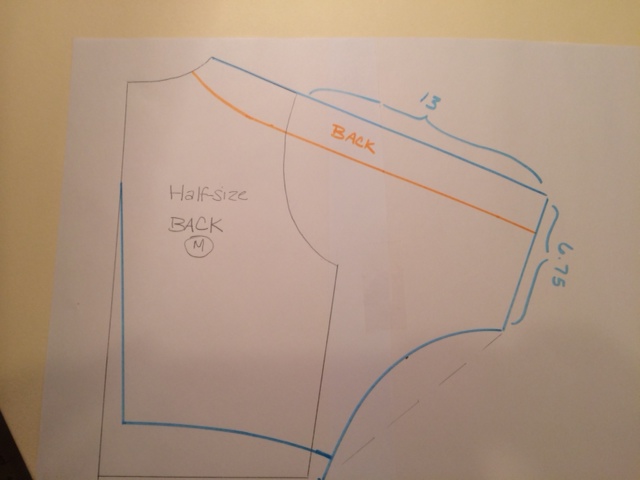
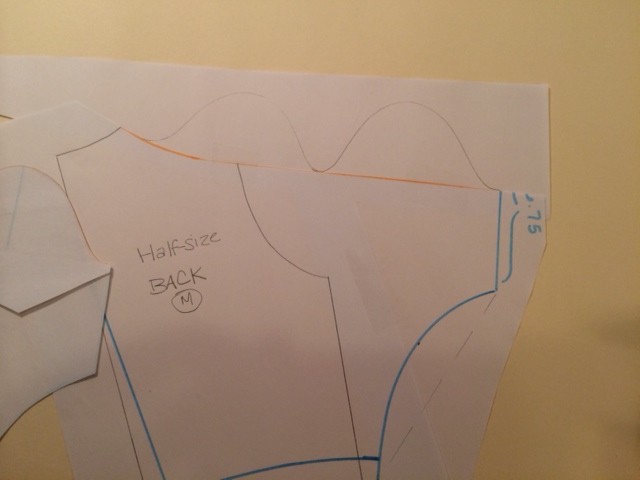
Do the same to the bodice back, There was no mention to make sure the back underarm seam is the same length as the front so I trued up this curve before I made the waistline and center back adjustments
On both bodice pieces draw in (orange) seamline 2cm from edge and adjust with a curve at the back neckline
On both bodice pieces draw in (orange) seamline 2cm from edge and adjust with a curve at the back neckline
 |  |
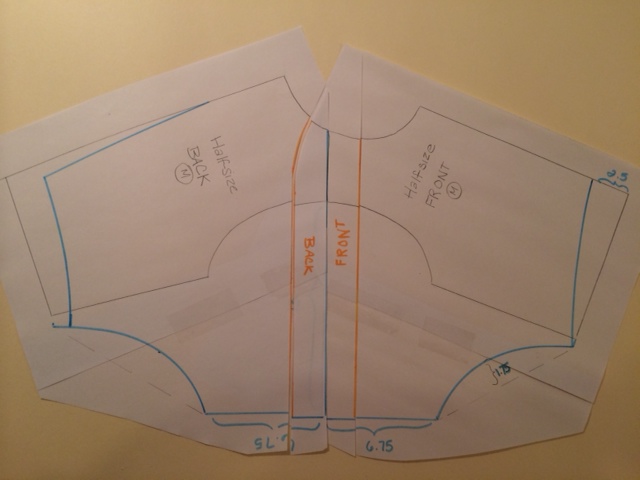
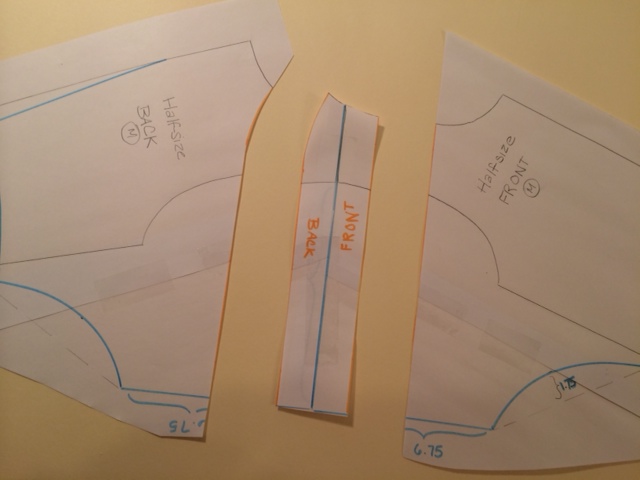
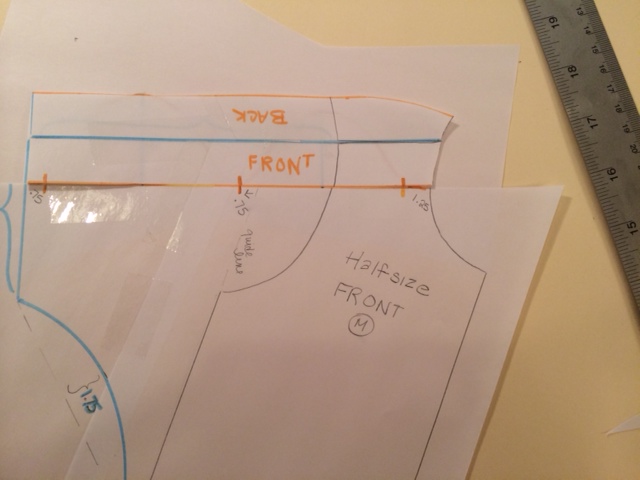
Tape bodice front and back together then cut along orange lines
 |  |
Tape extra paper above orange line on bodice front and back, tick off guidelines at 1.25cm from neckline and .75 from sleeve hem, draw dotted guideline up from side seam and add tick mark .75cm towards sleeve hem, find midway points and draw perpendicular lines, one at 3.5 cm and the other at 4 cm
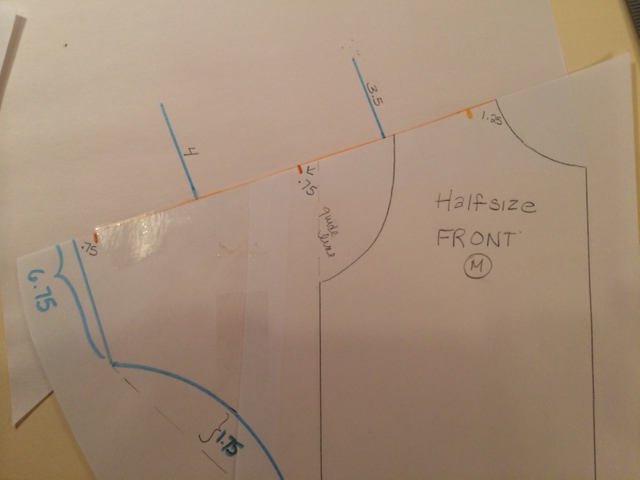
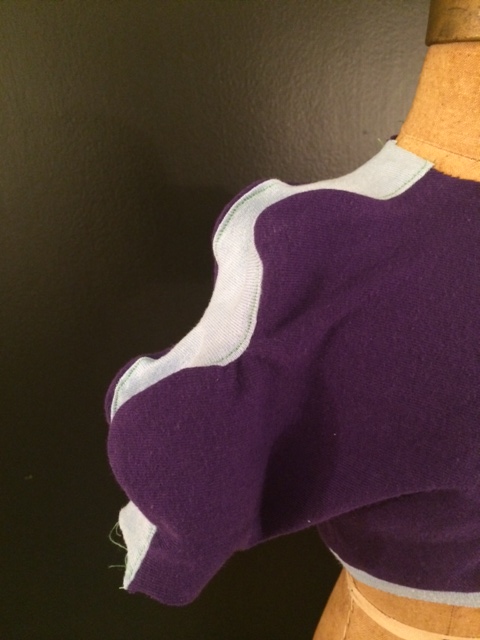
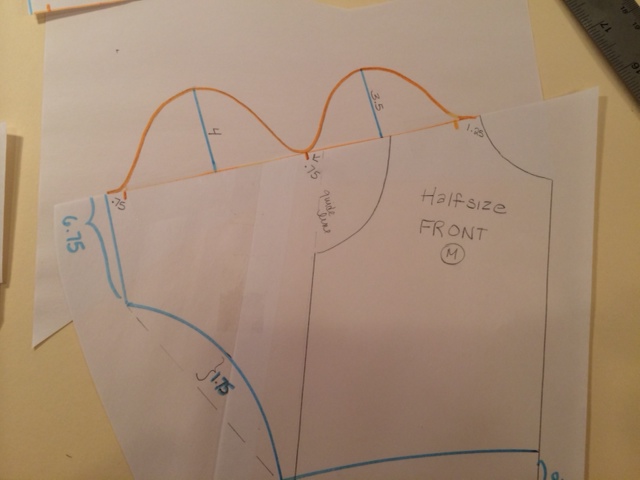
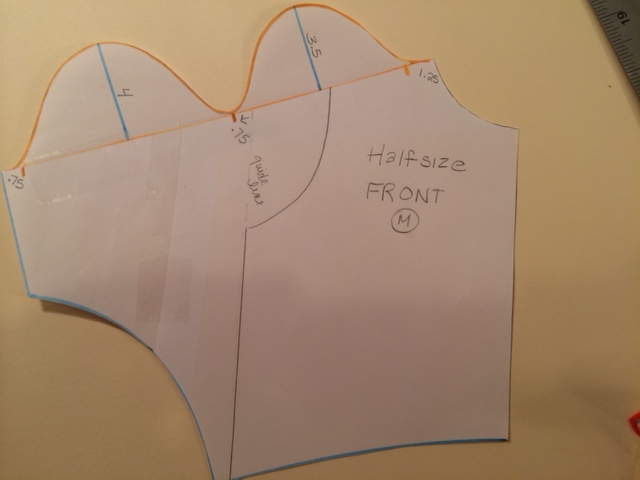
Add curved “humps” hitting all guidelines, cut out pattern pieces
Transfer guideline from bodice front to panel
Place bodice front upside down on top of bodice back lining up at sleeve hem, trace off curved line from front to back, walking the pattern to follow the orange seam line
 |  |  |
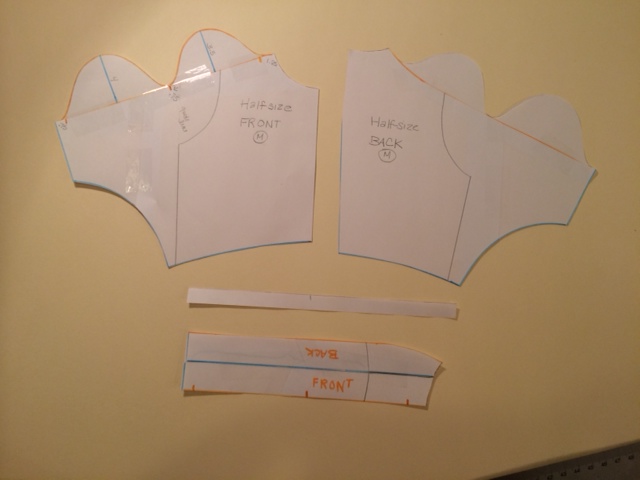
Cut back piece out
Make waistband by using measurement from waistline on bodice front and back finished pattern pieces
Make waistband by using measurement from waistline on bodice front and back finished pattern pieces
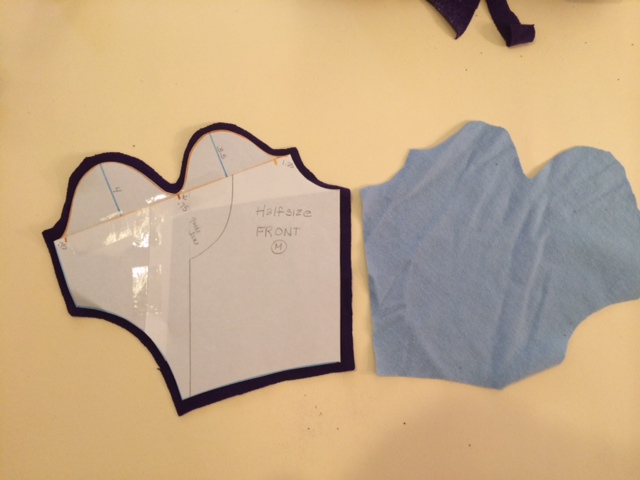
Cut out fabric pieces, start with band to front and pin at all notched guideline, stitch with band side down (I stitched both ways and stitching band side down allow the stretch to work better)
 |  |
 | 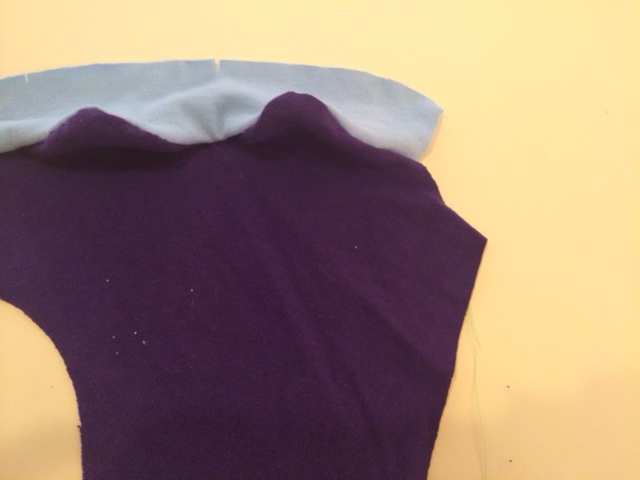 |
After stitching be sure to top stitch on right side band side to help maintain stretch
| Stitch band to back side, top stitch Stitch center front seam and center back seam Then open up and pin underarm seams together and stitch Stitch waistband | 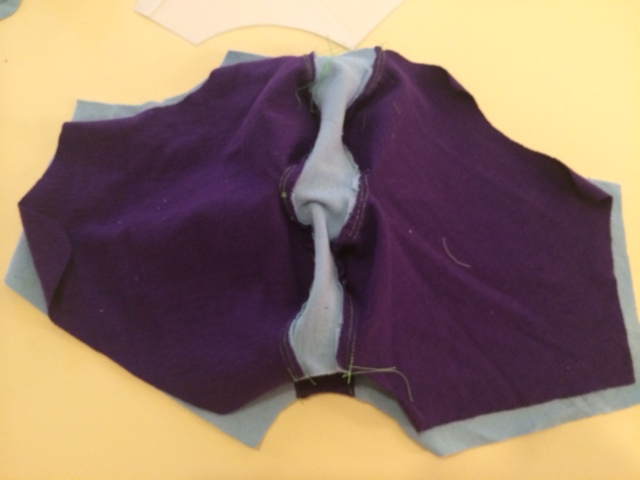 |
  |   |
Analysis:
The Challenge: Study this pattern to discover what you can learn and apply to future work. Start with these questions and include any additional insights.
Q. 1: What type of flat patternmaking is this: Dart manipulation? Added fullness? Contouring? Something else? A combination
Straight lines and curves is a technique achieved in two different ways. Straight lines and curves uses added fullness technique by adding symmetrically placed extra geometric shapes along the seam lines, but ONLY along one side of the seam line therefore the other patterning technique is using stretch fabricas
Q. 2: What are the basic principles of this pattern?
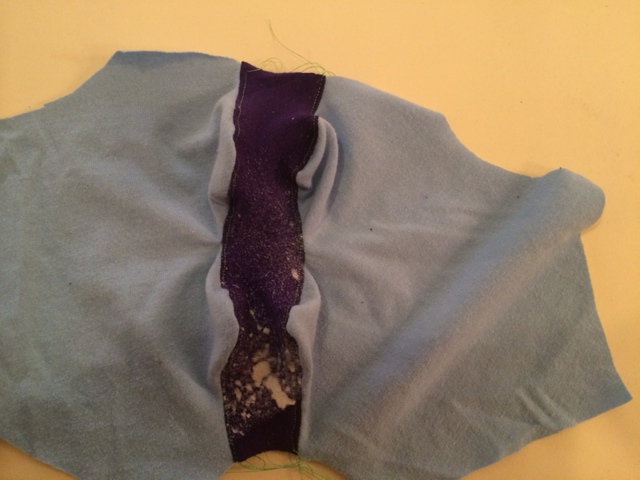
1. cut away section of the pattern to become a band that is stretched when replaced to its position because the seamline it is being attached to has grown in length
2. add extra shape by redrawing seamlines, the book does not mention but the height of the humps is determined by the amount the fabric can stretch
3. garment must be worn to achieve full effect “humps”
Q. 3: What are the basic rules of this pattern?
1. Add desired extra curve to create amount of “hump”
2. When adding extra geometric shape (curve) make sure they are perpendicular to the seam lines
3. I suggest transferring the curved seamline to other parts of the pattern
4. Topstitch on band to enhance effect
Q. 4: Are these rules and principles always true?
Yes, I think the principles always true if using stretch fabrics
Q. 5: What rules of traditional patternmaking are “broken” in this pattern?
No traditional rules are broken but the patternmaking principle of adjustment based on amount of stretch is not mentioned or used to determine size of “humps”
The Challenge: Study this pattern to discover what you can learn and apply to future work. Start with these questions and include any additional insights.
Q. 1: What type of flat patternmaking is this: Dart manipulation? Added fullness? Contouring? Something else? A combination
Straight lines and curves is a technique achieved in two different ways. Straight lines and curves uses added fullness technique by adding symmetrically placed extra geometric shapes along the seam lines, but ONLY along one side of the seam line therefore the other patterning technique is using stretch fabricas
Q. 2: What are the basic principles of this pattern?
1. cut away section of the pattern to become a band that is stretched when replaced to its position because the seamline it is being attached to has grown in length
2. add extra shape by redrawing seamlines, the book does not mention but the height of the humps is determined by the amount the fabric can stretch
3. garment must be worn to achieve full effect “humps”
Q. 3: What are the basic rules of this pattern?
1. Add desired extra curve to create amount of “hump”
2. When adding extra geometric shape (curve) make sure they are perpendicular to the seam lines
3. I suggest transferring the curved seamline to other parts of the pattern
4. Topstitch on band to enhance effect
Q. 4: Are these rules and principles always true?
Yes, I think the principles always true if using stretch fabrics
Q. 5: What rules of traditional patternmaking are “broken” in this pattern?
No traditional rules are broken but the patternmaking principle of adjustment based on amount of stretch is not mentioned or used to determine size of “humps”
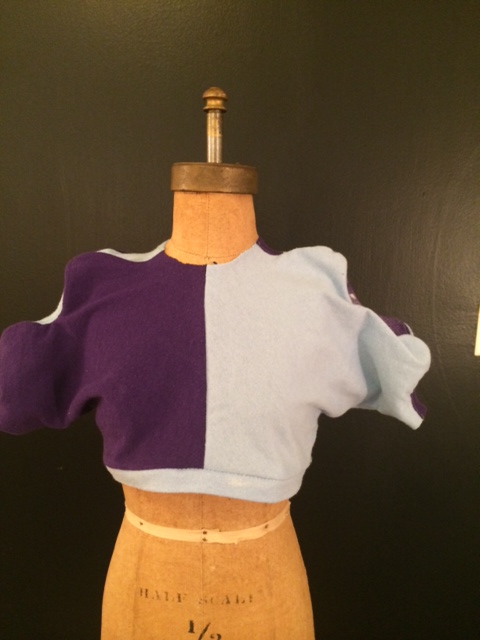
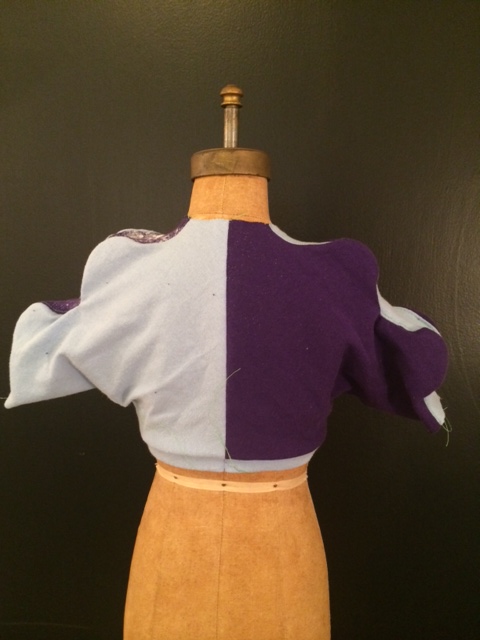
Straight Lines and Curves Application
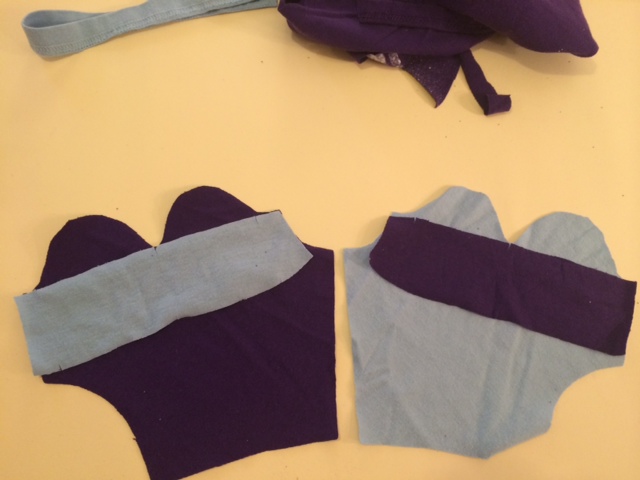
I decided to apply the rules and principles of straight line and curves on a sleeve but with the use of multiple panels and the panels running in a different direction then the sample to see the results
I segmented the sleeve to identify where I wanted the bands, before cutting the pieces apart I made sure to label and notch each piece, then I cut apart pieces and taped extra paper to the parts of the sleeve that would receive the curved extension
I segmented the sleeve to identify where I wanted the bands, before cutting the pieces apart I made sure to label and notch each piece, then I cut apart pieces and taped extra paper to the parts of the sleeve that would receive the curved extension
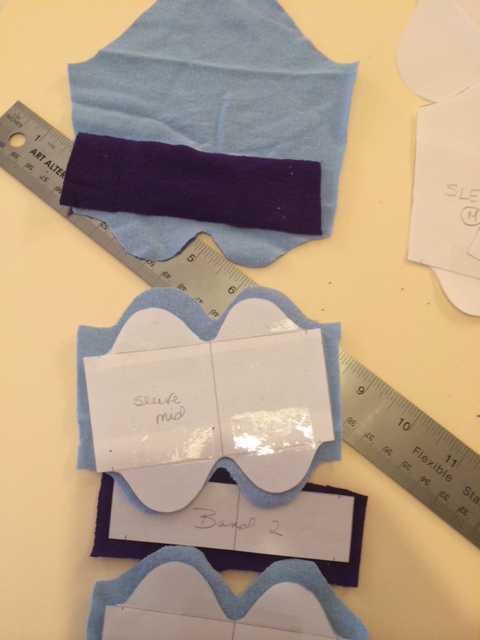
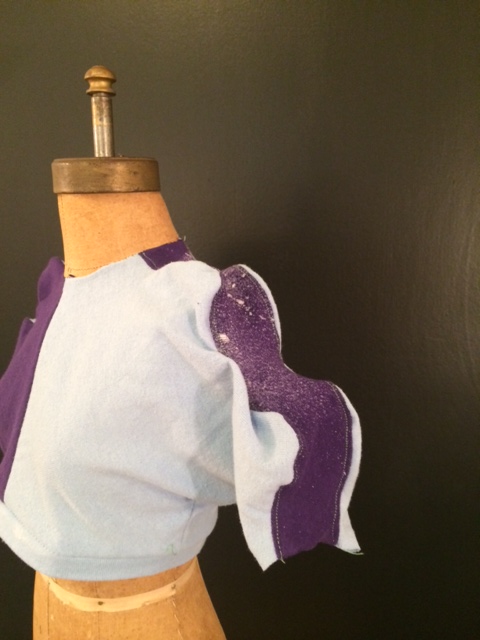
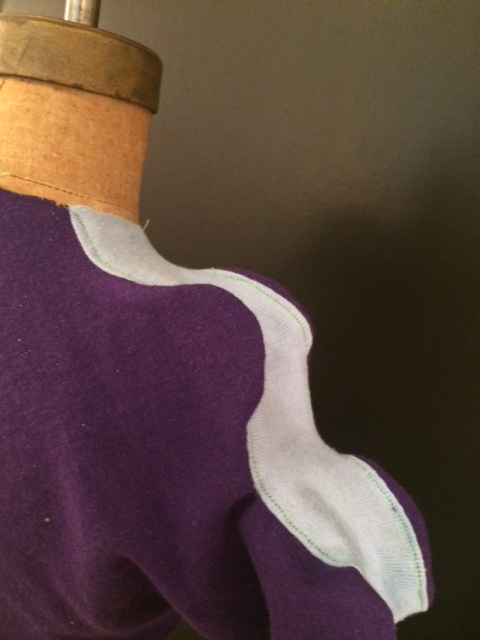
Similar to my method of drawing the curved line in the sample I drew perpendicular lines to indicated height and placement of curve, drew in curve, cut out the piece and then used this curved line as the template to trace off for the other pieces.
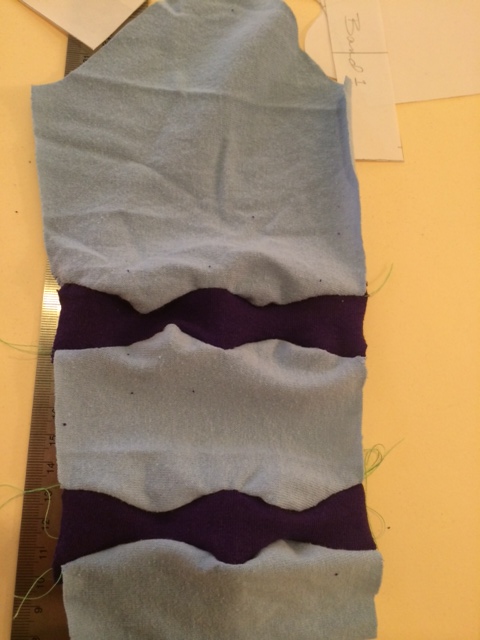
Stitched the same way as the sample with straight edge on the bottom but I chose not to topstitch, again just to see the result
Stitched the same way as the sample with straight edge on the bottom but I chose not to topstitch, again just to see the result
 |  |
Evaluation:
The Challenge: Study your pattern to discover what you can learn and apply to future work. Start with these questions and include any additional insights.
Q.1: Did you stay true to the basic principles of the original pattern?
I did stay true to the basic principles of the original pattern, drafting the pattern , and tracing off the seamlines
Q. 2: Where did you move the pattern manipulation and how well did that work?
I moved it to the sleeve and changed the orientation of the panels. I was concerned with the placement of the “humps” on other pattern pieces
Q. 3: Do all the same rules still apply? Did the need for new rules appear when you made this change?
In general, the same rules apply.
Bonus:
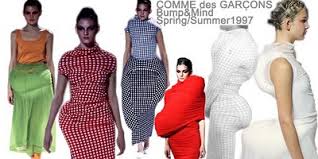
The Challenge: Identify a designer and a picture of their work that uses this pattern technique.
Comme de Garcon
The Challenge: Study your pattern to discover what you can learn and apply to future work. Start with these questions and include any additional insights.
Q.1: Did you stay true to the basic principles of the original pattern?
I did stay true to the basic principles of the original pattern, drafting the pattern , and tracing off the seamlines
Q. 2: Where did you move the pattern manipulation and how well did that work?
I moved it to the sleeve and changed the orientation of the panels. I was concerned with the placement of the “humps” on other pattern pieces
Q. 3: Do all the same rules still apply? Did the need for new rules appear when you made this change?
In general, the same rules apply.
Bonus:
The Challenge: Identify a designer and a picture of their work that uses this pattern technique.
Comme de Garcon
 RSS Feed
