 |  |
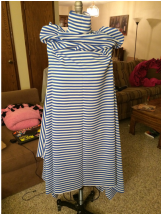
This week in Pattern Magic: Stretch Fabrics, I attempted Whac-A-Mole. The idea of this garment it to have versatility through optional arm and neck holes. The patterning directions were fairly simple and straightforward. Nackamichi provided almost all of the measurements needed to make this garment.
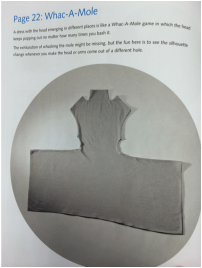
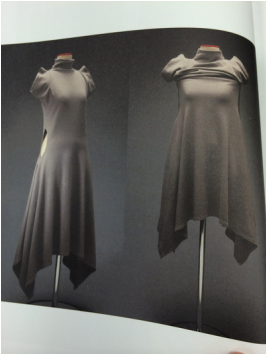
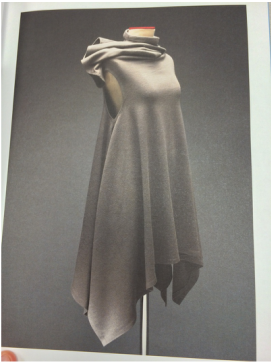
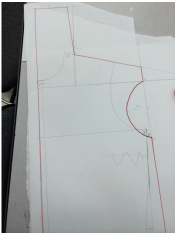
The garment laid flat looks exactly like the picture to the left. It is a fairly large pattern piece and is cut on fold. The width of the fabric needs to be at least 58'' wide in order for this pattern to fit. The rectangular extension on the sides of the skirt are what creates the drape effect of the dress at the side seams. What I discovered when I created this pattern is that the armholes and the neck holes are too small to fit a person's head. In my modification of the design I increased the size of the arm and neck holes so someone could wear the garment.
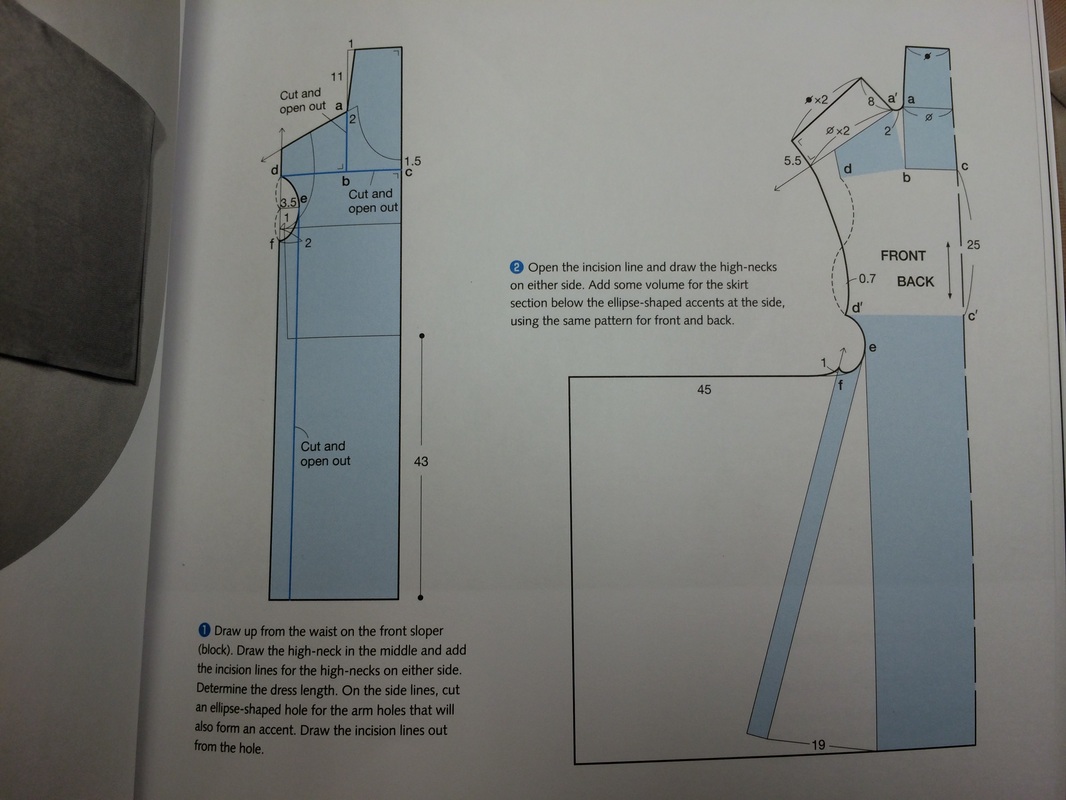
In the patterning directions Nackamichi has you start with a knit sloper block. You make modifications to the sloper block such as taking out all of the darts so it becomes a straight dress. Once you have the torso adjusted to the specifications you make slash lines from the mid-armhole down to the hem parallel to the side seam. One slash line is made from the top of the new armhole(d) to 1.5 cm down from the center front neckline(c). The third slash lines is made starting 2cm down from the neckline on the shoulder seam down perpendicular to the 2nd slash line creating right angle. Once the lines are drawn the are cut as the directions show and either opened up or in the 2nd slash line's cash completely cut off from the bottom of the torso and spread upwards 25cm. This lengthened your pattern quite a bit. There a lot of measurements involved with making this pattern and when you are all finished it really does not look like a torso sloper at all. I had to look at the finished picture and the pattern quite a bit before determining what seams to sew.
 |  |  |
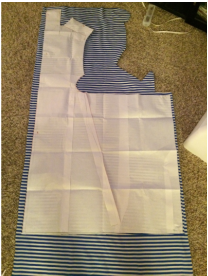
Because the pattern piece is cut-on-fold my fabric had to be at least 58'' wide. It almost took up the whole width when folded. I cut the first pattern on fold and I decided to make it more fabric-yield-friendly to cut the back piece with a center back seam. This let me use the fabric fairly efficiently. I had a lot less waste than I initially thought I would have.
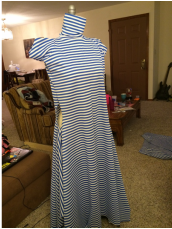
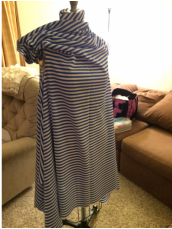
This application had many different element to it from start to finish. All darts were ignored in this application to create a non fitted silhouette in the end. The slash and spread method was used to create fullness in the skirt, but was later ignored by drawing a rectangular extension on the skirt. The slash and spread method at the skirt was primarily needed for the curve created at the armhole when it was spread open. This is easy to see in in Nackamichi's instructions. The 2nd slash line that is completely cut from the original pattern and moved up is an interesting added fullness method. Nackamichi completely ignores traditional patternmaking methods in this application. The idea behind this application is creating versatility though using already established holes of the pattern(armhole and neck hole). She demonstrates the different ways this application can be worn by putting your arms and neck through the different holes created in the pattern. These are three replications of what she included in her text.
 |  |  |
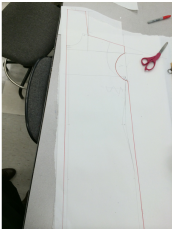
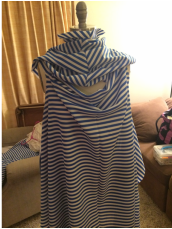
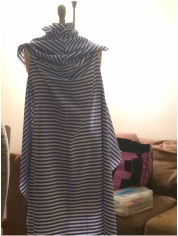
For my application I could not think of another area on the body this would work and still be wearable. I decided to create a similar pattern with two more holes. The holes I included were in the front above the chest and in the back. I wanted to create a cowl effect with my hole. Incorporating a cowl cut-out was challenging for a cut-on-fold pattern piece. I determined the only way it would work would be if the skirt was cut on fold and the top half of the dress pattern had a seam at center front and center back.
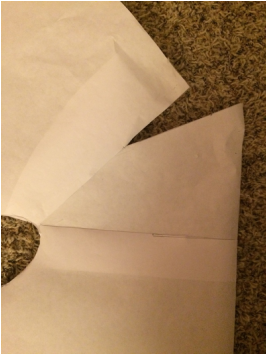 | 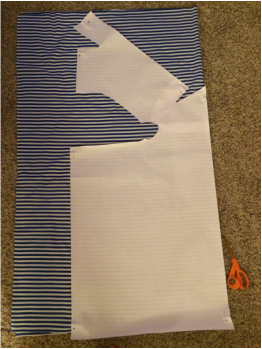 |
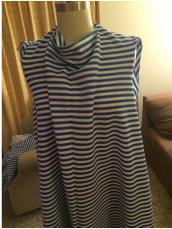
You can see from the picture above, on the right, the bottom half of the dress is on fold and the top half(past the slash) will be cut on fold. The slash looks similar to a dart but it will act as a cut out cowl piece. The hole could be worn as is, with it sitting above the chest or you could put your head thought it. This will make a mini cowl at the neck as well as an interesting drape down the center front. It will put all of the top half of the dress towards the back of the wearer, acting as what looks like a cape. There front and back piece will be cut the same creating this cowl shape in the back as well. In the modified pattern I increased the size of the top arm and neck holes because I found it difficult to get your head though the initial holes.
 |  |  |
Here again, this pattern application was difficult to establish traditional patternmaking principles. Because my modification was fairly minimal the same results Nackamichi's vs traditional patternmaking principles apply. The modification I incorporated was a slash and spread with some added fullness. The slash was made in a non traditional area and it was not dart manipulation because the dart shape is never closed. I chose to keep the rectangular extension that Nackamichi incorporated into the skirt of this application because I think with a lot of her applications she incorporates an extension and creates 3d shape with simple rectangular extension in a non-traditional area. This dress incorporated a lot of versatility, but I am curious on the wearability of the garment. I would like to try this garment leaving out the initial armholes and just have the cowls in the front and back. I think it might create a hood effect that would be more aesthetically pleasing and practical to wear in different ways.
 RSS Feed
